In this painting tutorial we will take a look at a few of the texture painting techniques you can use to make your artworks look special as well as the equipment you will need to create these effects.
The texture painting techniques in this tutorial can be used by oil or acrylic painting artists.
Note: this page contains affiliate links to products on Amazon. If you purchase through the links I will earn a small commission for the sale at no extra cost to you.
Why Use Texture in Your Paintings?
The simple answer is obviously : because we can 
With mediums like watercolour it is not so easy to create texture and height in the artwork, so when working in oil or acrylics we may as well make full use of this advantage.
From a customer point of view, they love to see texture in a painting. They like to especially see brush strokes in the paint as they are fascinated by your ability to create such beautiful artworks, so seeing the brushstrokes adds to this mystique and awe.
For us as artists, it adds an extra dimension to our artworks and of course it is a fun new skill that we are challenged to master.
Let the Paint Create it's Own Texture
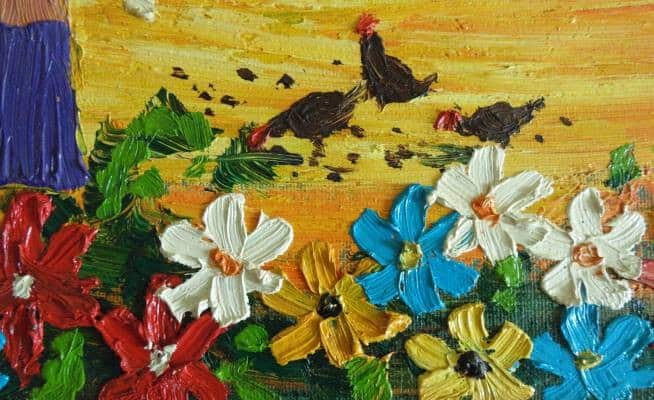
The easiest way to create texture when painting is to simply use more paint on your brush than needed. When doing this the bristles of the brush leave marks in the paint giving you beautiful texture marks in the final artwork. The texture you want, the rougher the brush you use, the more height you want, the more paint you use.
When using this technique it is better to use the harder bristle type brushes as opposed to the soft hair type brushes as you want the bristles to "scrape" the texture into the paint.
This technique will allow you to build up around 5 millimeters in height when using oil paint, less in acrylic.
Here you can see the effect that is created:
There are however four potential problems with using this method:
1) Using lots of paint can become expensive
2) You are limited by the amount of textures you can create and the height you can achieve.
3) When working in oil paint you significantly increase the amount of time your painting takes to dry, which means it has to lie around your studio longer before you can sell it.
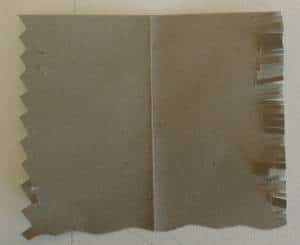
4) When working in acrylic paint the paint has a tendency to slump when it dries. This means that a lot of the lovely texture you create while painting flattens out as the paint dries. To give you an idea of the result you can take a look at the photo below:
The Slumping Effect of Acrylic Paint
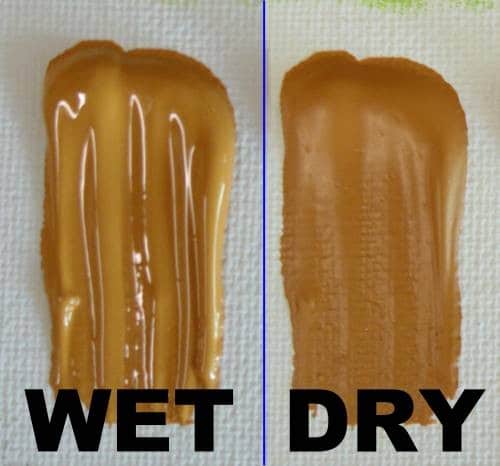
In the photo on the left you can see the acrylic paint when wet and on the right is the same paint when dry. Notice how much of the lovely texture is lost in the dry paint. To overcome this problem you can use an acrylic impasto medium.
How to Use Acrylic Impasto Medium
Warning : Only use Acrylic Impasto Medium with acrylic paints. If you are an oil painter, skip this section and move on to the knife painting heading.
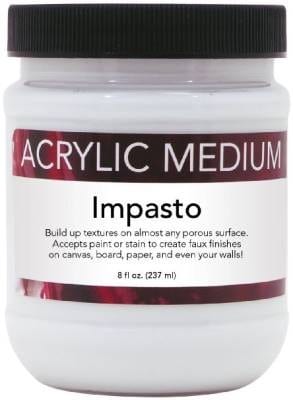
To overcome the slumping problem when using acrylic paint you can use an Impasto Medium. To use it you mix it into your paint, so you will mix and match your paint colours on the palette as normal, then before you start painting, you add some of the impasto medium to the paint.
This makes the paint thicker (less runny) so the paint holds it's shape during the drying process. You can then use any of the techniques for creating texture, like using lots of paint on your brush, and the effect created will remain in the final artwork.
The impasto medium usually comes in a tub, but some manufacturers also sell it in a tube.
Tip : Although you can technically use any impasto medium with any acrylic paint, I recommend you use the same brand of impasto medium as the paint to ensure there are no unwanted / unexpected chemical reactions between the two.
The impasto medium works beautifully and the effects you get are as good as if you were using oil paint. There is however one drawback to adding impasto medium to your paints : the paint tends to dry darker than normal.
As acrylic normally tends to darken when it dries, already making it a challenge to match your colours, the impasto medium compounds the problem so you often end up with an artwork that is darker than you planned.
The way to overcome this problem is to test how dark the colour will dry by painting it onto scrap piece of paper / board first, then dry it with a hairdryer to see the final colour. You czn then adjust the wet paint mixture to compensate before you actually start adding it to the final canvas.
Some manufacturers produce two ranges of acrylic paint - standard and impasto. The difference between the two is that the impasto range already has the impasto medium mixed into the paint for you. If you are going to be painting a lot of texture then you may opt for the Impasto range of paints to save yourself a lot of time.
Creating Texture Using a Knife
When painting you are not confined to just using brushes. This is especially true when it comes to creating texture in your paintings. One of my favourite alternatives is to use a painting knife.

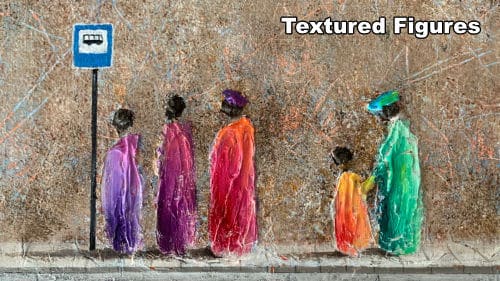
You scoop up the paint with the painting knife and then smear it onto the canvas. This not only creates lovely textures, but is also great fun to do. I will often paint entire paintings using only the knife. To see how I do that you can follow the Textured Figures class.
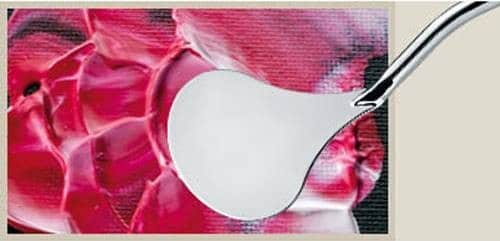
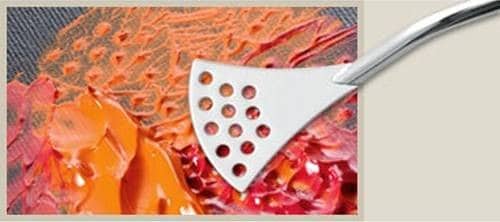
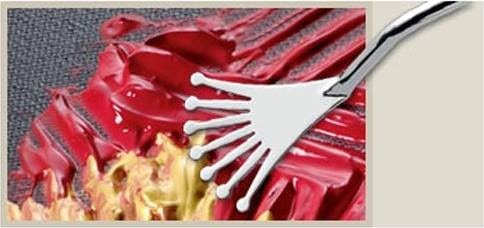
Painting knives come in a large variety of shapes and sizes, including some really weird looking ones. Each is designed to give you a different texture or effect so don't be shy to buy yourself a variety of knives. Here you can see a few of the different shapes available and the textures they create:
Other Texture Painting Tools
Don't let yourself be limited to painting knives either - when it comes to creating texture in your paint your imagination is your only limit. You can use almost any item imaginable to create texture. Start with whatever you have lying around the house. Once you start playing around with texture it won't take you long to discover tons of different tools that will give you interesting textures.
Here are a few "tools" to get your creative juices flowing to think up some more:
Fingers
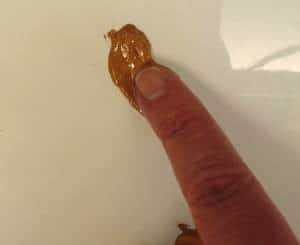
They are always on hand, so why not make full use of them? You can even paint entire paintings using only your fingers.
Credit Card
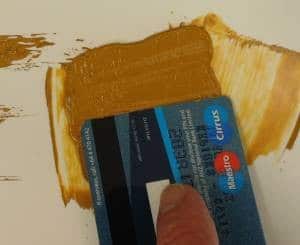
Obviously you want to use an expired one, lol. They are great for scraping lines into the paint or laying down large, smooth areas of texture.
Cardboard
Cardboard is super handy because it quick and easy to cut all sorts on interesting shapes and patterns into it.
To really unlock the doors to limitless texture in your paintings though you will need to go shopping for texture gel and texture paste.
How to Use Texture Gel
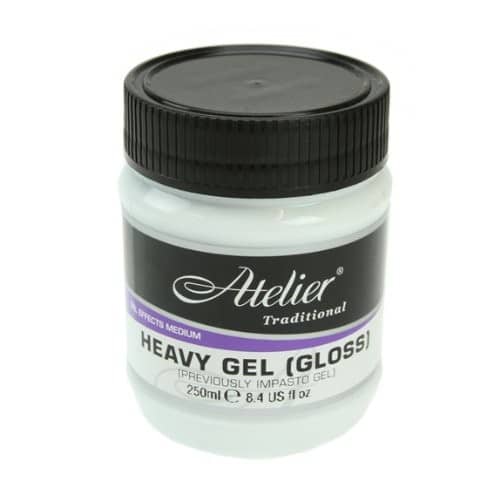
Texture gel (also called impasto gel) is an acrylic based product similar to impasto medium, but is used differently.
You buy it in a tub or bottle. The texture gel appears white when wet. When it dries however, it becomes transparent. It is available in matt or gloss which allows us to use it in a large variety of ways.
How it differs from impasto medium is that it is painted directly onto the canvas instead of being mixed into the paint. This means you can use texture gel with oil or acrylic paints by painting the texture onto the canvas first, letting it dry, then painting over the gel in your chosen medium.
To do this, scoop up the texture gel it exactly the same way as you would if it was paint. In other words use brushes, knifes and any other tools you want to create the required texture on the canvas.
When doing so don't be shy with the gel, apply it liberally. As with acrylic paint, the gel also has a tendency to slump as it dries so will loose some of it's height.
Dry the gel thoroughly before you start to paint. You can speed up the drying process using a hairdryer, but it is best to wait overnight before you paint over the gel to ensure it is completely dry.
So if it slumps, why not just use paint?
The gel allows you to create the texture you need much cheaper than using paint. When the gel dries you can then paint a thin layer of paint over it, saving yourself money.
The texture gel also allows you to add a texture that is different to the one you naturally get from the brush strokes. For example you can use the gel to paint a series of circle or random squiggle textures onto the canvas.
When you then paint over the gel prepared canvas this unexpected texture is visible as though you were painting on an embossed canvas (which you actually are).
As the gel is smoother than the raw canvas you will find that when you are painting over it your brush will tend to glide over the gel causing it to naturally lay down a thinner layer than the raw canvas. The result is that the painted areas covered in gel can appear lighter than the raw canvas areas.
If you are clever you can use this effect to your advantage to create fun effects and patterns as you can see below:
How to Use Texture Gel
Texture gel can be used to apply various light items to your canvas.
To do this lay your canvas down flat, apply a liberal amount of gel to the item you want to stick onto the canvas then carefully place the item where you want it. Leave the gel to dry thoroughly before continuing to paint the canvas.
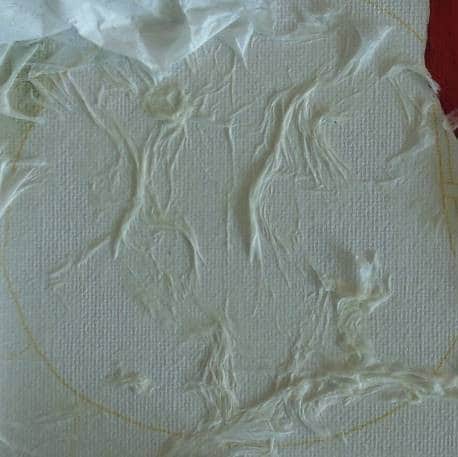
One of my favourite items that I stick to the canvas is actually paper napkins. I use the napkins to create various textures. The first is a random pattern.
For this you will need a cheap thin napkin, not the thicker, more expensive variety. Start by unfolding the napkin.
Apply liberal amounts of texture gel to the canvas where you want the napkin to adhere to then carefully lay the napkin onto the canvas. You can now gently manipulate the napkin by pinching, pushing and prodding it. The napkin will then spread out in areas and bunch up in other areas forming a beautiful vein like wrinkles on the canvas.
If you know what you want to paint, you can even manipulate the napkin into the various textures of the final painting, for example if you are painting a tree you could wrinkle the paper in the tree area along the length of the trunk to form a bark texture.
Once you have created the texture and patterns you want, leave the napkin to dry overnight. Once dry seal the top of the napkin by carefully painting a layer of texture gel over the top of the napkin. Leave this layer to dry overnight as well.
With the top layer dry always do a double check to ensure the top of the napkin is properly sealed. If not seal and dry the exposed areas before painting over them.
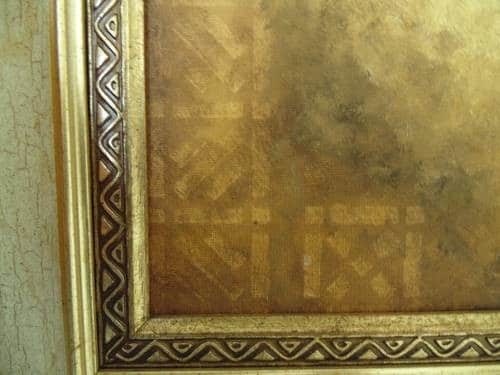
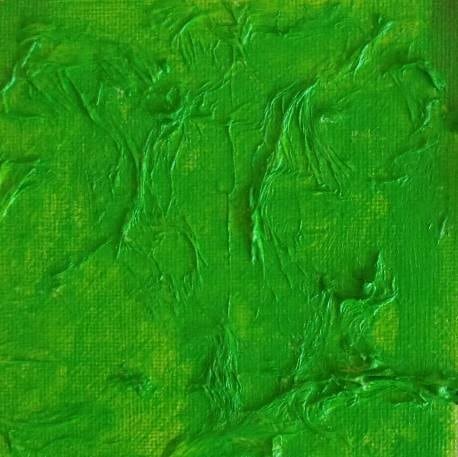
You can paint over the sealed napkin using oil or acrylic paint. Paint a thin layer of paint as normal. What will happen is that more paint will adhere to the wrinkles because they are raised, giving a lovely texture to the final artwork.
This is what the canvas looks like before and after painting onto the sealed napkin:
After Sealing the Napkin
After Painting
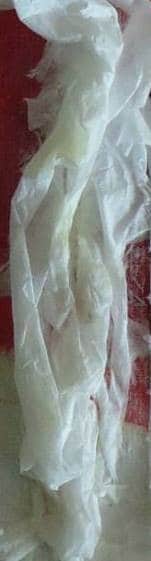
In the next example, we will paint a tree trunk that has even more height and texture.
Draw the shape of the tree onto your canvas. Liberally coat the tree area with texture gel. Crumple up a napkin and carefully stick it to the tree area. Leave this to dry.
Don't worry about the central tree area where the napkin is not fully stuck to the canvas, we will sort that shortly.
When the texture gel is dry take a soft hair brush and carefully, coat the top layer of napkin getting into the crevasses and folds as best you can without flattening the texture of the napkin. Don't worry if you can get in everywhere for now. What we are trying to do is coat the napkin enough so that when the texture gel is dry it will hold it's shape. Leave this top coat to dry.
With the top coat dry, inspect the napkin for exposed areas and using a soft haired brush add more texture gel to those areas to ensure the napkin is fully sealed. Get into the crevasses and folds as best you can, but if you can't get in everywhere don't worry - if you can't get in with your brush now, you won't see or reach it with the paint later.
Once the napkin is sealed and the gel 100% dry, then you can paint the tree as normal. Here you can see how the tree looks after being sealed and after being painted:
After Sealing the Tree Trunk
After Painting the Tree Trunk
Warning: If building the napkin up so high, just realise that it cannot withstand hard bumps so ask people not to touch the final artwork. If you are scared of the texture being damaged, then you may want to consider framing the painting in a box frame.
Now that you know how to stick things to your canvas, don't be shy, stick all sorts of interesting goodies to the canvas in order to create texture. You can use sand, sandpaper, bark, hand made paper and more.
Tip : If you work in acrylic, you can even stick objects on top of painted areas as the gel is also water based and the gel dries transparent. You can also give the gel a pearlescent effect by using Mica Flakes. Read more about the different acrylic mediums.
Warning : Don't use texture gel over areas painted with oil paint though as the gel will not adhere to the oil paint and will subsequently peel off.
If you like the idea of creating lots of texture and height off the canvas then the best way of doing it is by using texture paste instead of texture gel.
How to Use Texture Paste
Texture paste differs from texture gel in it's consistency. Where texture gel has the look and feel of Elmer's glue (white school / wood glue), texture paste has the look and feel of cement.

As you can imagine the texture paste will allow you to not only create texture using brushes and knives as before, but it will even allow you to do a bit of sculpting.
As the texture paste retains it's shape when dry, the texture you can work into the paste is limited only by your imagination.
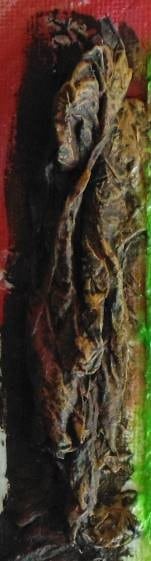
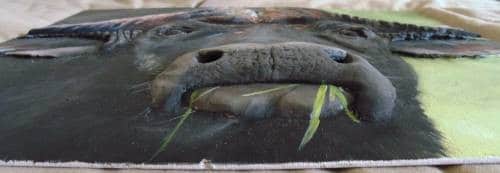
One of my favourite ways of using texture paste is to sculpt it into the shape of the object I am painting. Below you can see an example where I have sculpted the texture paste into the face and horns of a buffalo.
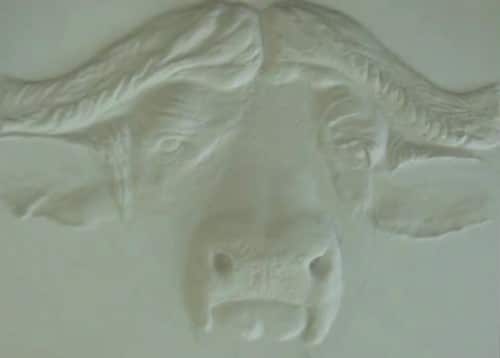
The paste is then left to dry before painting over it.
In this artwork the paste is around 2cm (nearly 1 inch) high at it's thickest point - if you need to go higher, just let the one layer dry before continuing to build up the height.
I usually use my hands as well as painting knives the do the sculpting.
With the texture created and the paste dry, you can paint over it as normal using either oil or acrylic paint. As with texture gel the paste is water based so you can add it on top of acrylic paint, but not over oil paint.
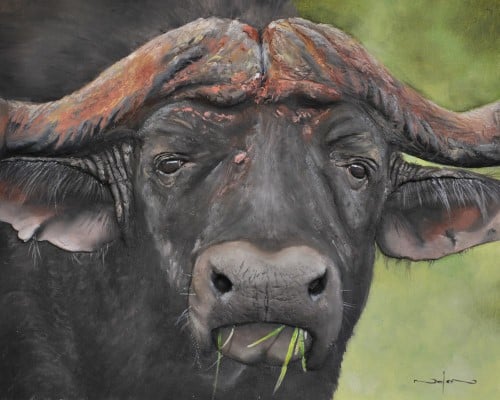
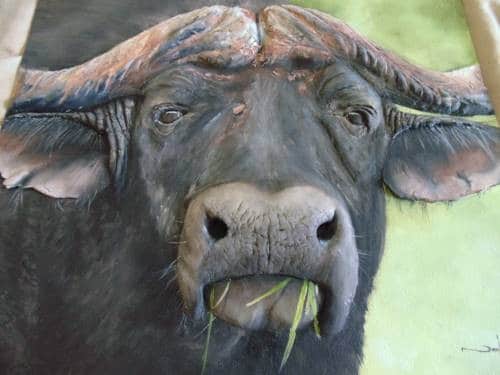
The end result is a uniquely 3D painting that you can only really appreciate by seeing it in real life, but to give you an idea, here is the completed buffalo painting as seen from a few different angles.

Warning : Always lay your canvas flat on the table when building up thick textures as the paste will run slightly if applied in a thick coating (2cm / 1 inch or more) at a time.
Here you can see a 1m x 1m (3 feet x 3 feet) painting of a tulip that I did many years ago. I lay it flat on the table and built up the flower to around 3cm (almost 1.5 inches) height on the edges.
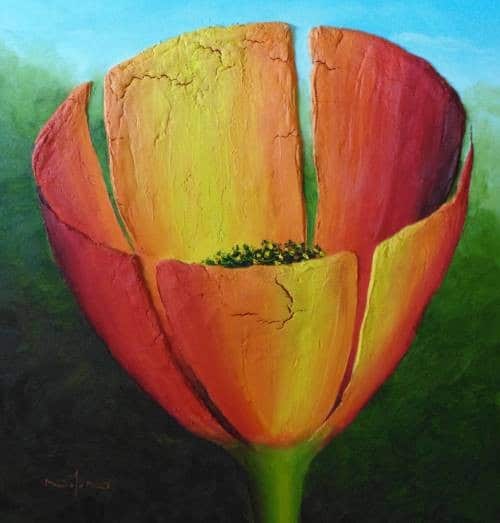
As the painting was so large it was difficult to ensure the perspective was correct while lying flat on the table, so in a lapse of concentration, I instinctively lifted up the textured canvas to check the perspective.
The paste promptly started running so I instantly lay it flat again and resculpted the edges.
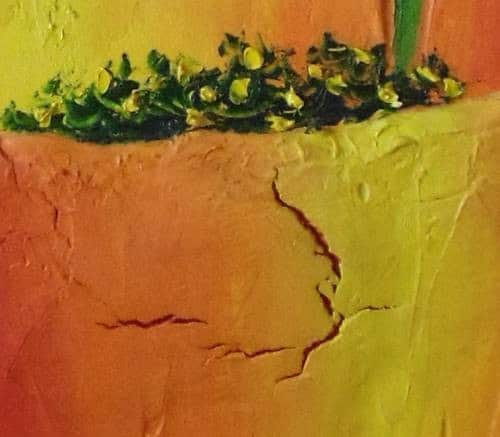
The damage has however already been done because as it dried the cracks started to appear. As I had used about 2kg (4 pounds) of paste on the canvas I left it to dry thinking that I would fill up the cracks then.
Once dry however a little creative thinking turned the mistake into a happy accident - I painted the insides of the cracks red and then painted the flower as normal which gave as interesting end result as you can see below:
If you would like to learn how to create sculpted 3D artworks like this you can follow my class on Creating a Textured Kingfisher.
Tip : Although the best texture paste to use it always the recommended products that have been created specifically for the purpose, there is a cheaper alternative which you can use as well. This is the filler you use around the house to fill holes in the wall. You get two varieties - powder or premixed. The premixed is suitable as a an alternative to the commercial texture paste. The most common commercial name for the filler is called Polyfilla. I have been using it successfully for years and my artworks have taken many knocked and bumps without the texture paste even chipping or lifting off the canvas.
Attaching Items To Your Canvas with Texture Paste
Texture gel is great for sticking small and light items to the canvas. Sometimes however you have larger or heavier items that you need to stick to the canvas. In this case you would rather use texture paste.
I have successfully used it attach feathers, porcupine quills, glass beads and more to my canvasses.
I hope you have enjoyed this tutorial on texture painting techniques and equipment. Now it's your turn to let your imagination run wild...
Pin Me