Introduction
What is a sketchbook and why is it necessary for an artist to have one?
A sketchbook is simply put, a book with empty drawing pages in it.
This book is however your personal growth factory because you are going to sketch, draw, write, paint, experiment, mess and make mistakes in it.
Generally you never even show anybody your sketchbook. It is your private art journal in which you, and you alone, can document and watch how you progress.
As only you will see the inside of your journal, there is no pressure on your part to perform or get anything perfect. Nobody will see your mistakes so you can lose your abandon and play to your hearts content.
In the process you will improve your art beyond anything you ever imagined.
Then in a few years time you will be able to page back through your sketchbooks and relive your artistic journey and see how far you have come.
In my opinion every artist should first be given a sketchbook and a pencil (no eraser) and be sent out to sketch at least 10 pages full before they ever follow a single tutorial or buy any more art supplies. That way they will always have some before sketches to look back on – something very few artists have.
Sketching Equipment
Let’s start off by looking at the equipment you will need to start your sketchbook.
1) Sketchbooks
They are available in a variety of sizes, paper types and makes. I will mention a few, but in the end, you will have to make your own choice depending on what is available in your area and to suit your own pocket. I always recommend that you try to buy the best you can afford.
Things to look out for when purchasing a sketchbook are:
a) Sturdy: You will be taking your sketchbook with you everywhere you go. In the car, on holiday, hiking, you name it so ensure the cover is sturdy enough to handle the rough and tumble it is going to endure.
b) Paper Thickness : You don’t want the pages to be too thin for two reasons. The first is that you don’t want any of your harder pen / pencil strokes to score the sheet of paper below it. The second is the problem of bleeding. If you are using inks or paints and the paper is too thin it can bleed through the sheet onto the one below. I recommend ensuring the paper is at least 160gsm thick.
c) Size : The size sketchbook you buy will depend on where you are going to use it. If you going to only use it in the studio then one with larger pages will allow you the freedom to either make multiple sketches / studies of the same subject on the same page or one larger study per page.
Smaller sketchbooks (A4 / 9″ x 12″ or smaller) are better for working outdoors as you generally need to hold the sketchbook in your hand as you work so anything larger tends to be unstable in your hand.
d) Paper Colour : Most sketchbooks come with white paper inside, but you can also get ones where the paper is off white, as well as coloured. (Strathmore have a good variety of paper colours from tan to grey to cream)
If you are wondering why you would want to use off white or coloured paper then here is your answer : To save you adding a heap of colour / tone to the paper you choose a paper that is already the base colour you need. You then only need to add the shadow and highlight colours to complete the sketch.
Standard Sketchbooks
(This tutorial contains affiliate links to products we recommend you use when sketchbooking. If you purchase through our affiliate link we will get a small percentage of the purchase price for the referral. This helps us to create more tutorials. It will however not affect the price you pay. All products are the ones we personally use. To purchase the product you can click the photo of the product.)
Standard sketchbooks normally come in three different styles.
- Hardbound
Similar to a hard cover book these sketchpads are very sturdy. You will however find that they often want to close on themselves while sketching because of the stiff cover. Open it in the store at a variety of places (front, centre, back) to make sure the cover will remain open while drawing. - Paperbound
This type does not have a hard cover. Generally the cover is little more than a thin cardboard which does not give much protection to the papers inside the book. Only use these sketchbooks in light duty situations, like in studio. - Wirebound
These sketchbooks don’t have a bound / glued spine, but rather punched on one end then held together with a wire spiral. The spiral is either on the side or on the top edge.The advantage of wirebound sketchbooks is that you can flip the whole book open and back on itself. This takes up less space and is easier to hold than a glue bound book.
Using these are also recommended if you want to remove the pages for framing, etc. later as individual pages can be removed without affecting the integrity of the rest of the book.
The disadvantage is that you do loose some stability and sturdiness so you have to be more careful handling them when on the move. Especially to not damage the spirals.
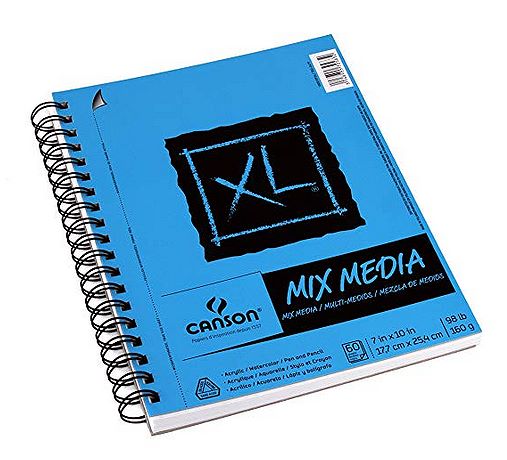
I like the mixed media sketchbook shown above because you can use it to add watercolour, acrylic, gouache and a variety of other media over your sketches to give them colour and make them look interesting. The pages will however not bleed through like many of the other sketchbooks do.
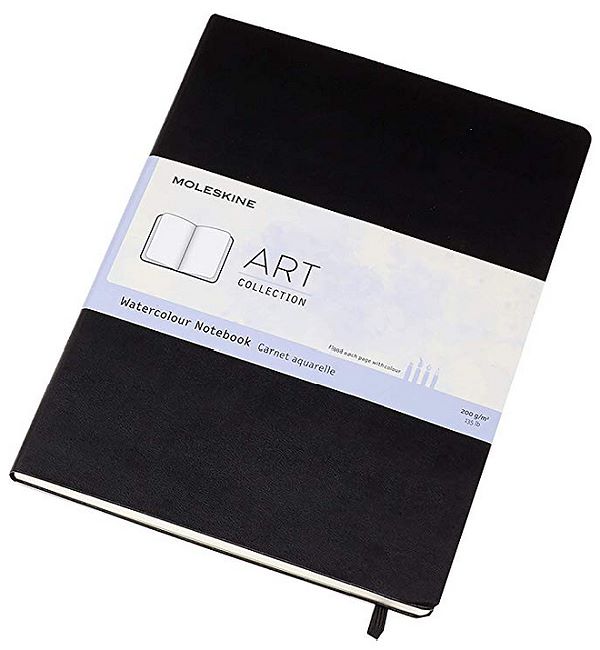
Moleskine Sketchbooks
These sketchbooks are normally made from quality heavy paper that is perfect for outdoor handling.
The paper is suitable for pencil, pen and ink washes and gouache. Many are reasonably priced and have special hard covers for durability. They are available from large to convenient pocket size.
Moleskine sketchbooks are very popular with Urban Sketchers who like to use pen and ink for the sketch and then add colour over it using watercolor washes.
2) Pencils
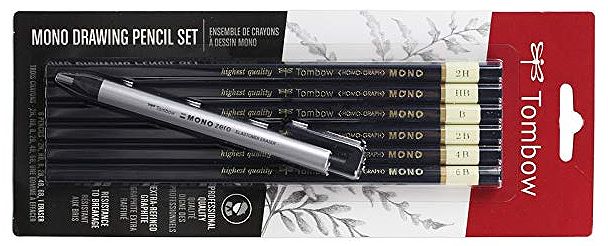
When sketching we don’t need a lot of pencils. You basically need only 3 pencils – one hard, one medium and one soft. I recommend a 2H, B and 6B.
If you are working outdoors and have more space in your bag, then by all means take more with but I seldom use more than these three, In fact I will often use only one pencil.
The pencils I recommend and use are the Tombow pencils shown above. I have also successfully used and can recommend the Faber-Castell, Staedtler and Derwent brands. I just find the Tombow pencils have smoother lead so they glide better over the paper.
The set shown above also comes with a Mono eraser which I constantly use for erasing fine detail into a sketch.
2) Sharpener

You will also need something to sharpen your pencils with. For this a simple little sharpener will do.
If however you want different shaped tips to your pencils, then a carpet knife works well to trim them.
There are many other bits of equipment you can use, but they are not required in order to start sketching so let’s move on to learning how to sketch. We will then revisit the equipment later to see how we can expand our options beyond the basics.
The Rules of Sketching
Rule #1 – Only you see your sketchbook
As you are allowing yourself to make mistakes and experiment inside your sketchbook, your sketchbook is a place for your eyes only.
There must never be a penalty for what is inside your sketchbook. You don’t want people to see your sketchbook and you feel bad or them judging you for some horrible artworks inside.
Your sketchbook is a place where you are allowed to create horrible artworks, and believe me in the beginning there will be many of those. These horrible artworks will allow you to later create the amazing artworks that will stun the world.
Rule #2 – There are no art rules in your sketchbook
Your sketchbook is your play area where you mess around with ideas, practice and learn without abandon or restriction.
If you want to doodle, then doodle.
If you want to do a super accurate drawing of a local landmark, then do it.
If you want to test out a new paint colour by making a few swatches, then do it.
If you want to practice freehand sketching, then go ahead.
Heck, if you want to see what happens when you mix acrylic and oil paint together, test it in your sketchbook.
In your sketchbook you follow the rules when you want, break them when you don’t and sometimes even make your own rules.
Rule #3 – No Fear
Take all the preconceptions, misconceptions, misguided road blocks that people have drilled into your head about how you are supposed to do art and throw them out the window.
Free your mind and allow yourself the space to make mistakes, flops and outright disasters inside your sketchbook.
Out of these flops and disasters you will learn something every single time. Each flop and disaster is a stepping stone along the way to becoming the artist you envisioned when you first started.
Rule #4 – Sketch Often
Drawing and experimenting inside your sketchbook is going to allow you to grow incredibly fast as an artist, but only if you are consistent.
Let’s look at an analogy – driving a motor vehicle.
For the beginner there are many things to remember, do and to look out for when learning to drive.
The big L plate displayed on the vehicle warns other drivers to be cautious as anything can unexpectedly happen. It is so easy to become mixed up trying to do many things at the same time, such as engaging the proper gear, pulling off correctly, watching the traffic in the front, sides and rear, traffic lights, pedestrians, etc.
Fortunately, the time arrives when all these actions become so natural that you do them automatically without even thinking about them.
What has happened? Without you realizing it, the subconscious mind has conveniently stored all the relevant information in order to do the thinking for you.
How has this happened? By repeating the actions over and over again. Repetition is the key to success. I cannot stress his enough.
The more you practice the easier drawing becomes. Repetition is a large factor, so sketch regularly.
The Basics of Sketching
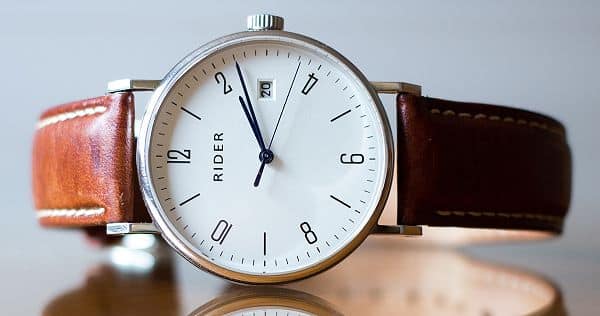
In the beginning start off by drawing simple things. Whatever is around you.
Draw your watch for example. Don’t even bother with shadings, just draw the outline and add the numbers and the hands.
As an example let’s draw the watch above:
Use your B pencil only. Gently sketch a circle. Correct the circle as you go along until you are happy with the shape. Don’t bother erasing the wrong bits, just leave them there.
Now indicate the 12, 3, 6 and 9 marks on the watch face.
This makes it easy to judge the marks indicating rest of the hours so add them in.
Next draw the watch straps. Roughly indicate the stitching.
Finish off by adding the numbers and arms.
Well done, you have just completed your first sketch.
You will probably end up with something like this:
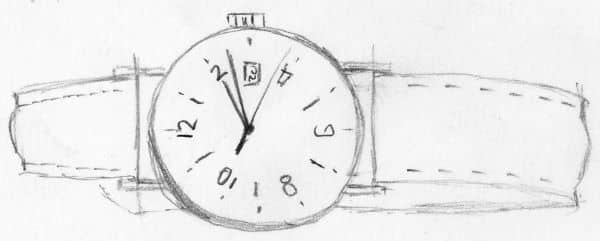
Does it look like the photo?
Probably not because your judgement is well off, but it doesn’t matter. You have started to train your eye and hand co-ordination.
Do the same for many more seemingly simple items around you.
Concentrate on getting the shapes and proportions correct.
Don’t be shy to use whatever means you need to help you – like using your pencil to estimate lengths or using a proportional divider or redrawing using common shapes. There are many methods like this to help you.
I recommend you follow the Sketchbook Basics Course to learn all the methods.
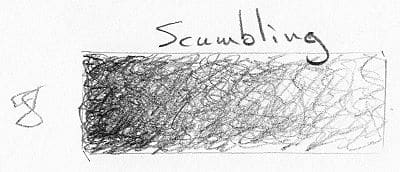
When you are starting to feel confident that you are estimating the shape and basic features correctly start to add some cross hatching or scumbling to the sketch in order to show some shading and depth.
Hatching is when you use a series of parallel lines to indicate shading. The closer the lines are to each other, the darker the area appears. The further apart the lines the lighter the area appears.
Cross hatching is when you add multiple series’ of parallel lines in different directions. You can see examples of hatching and cross hatching below:

Scumbling is when you use random scribbles to create a shading like in the example below.
To the left you can see a single scumble. Your scumble technique will differ, but it gives you a good idea of how I do it.
Continue practicing this for a few weeks.
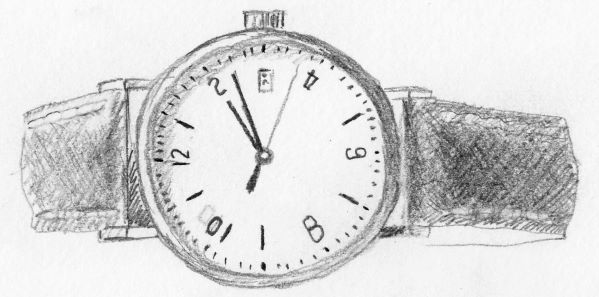
After a few weeks come back here and redraw the watch above.
It will now probably look something like this then because your eye hand co-ordination will have improved dramatically:
As you gain more confidence start to draw more complex subjects, like your portrait in the mirror or venture outside to sketch objects in the garden.
What to Sketch?
Anything. Anything you see, or imagine, can be sketched.
There is no need to stare at a blank piece of paper. There is more than enough inspiration around you to last for years of sketching. Even the most mundane of objects make for excellent sketching practice.
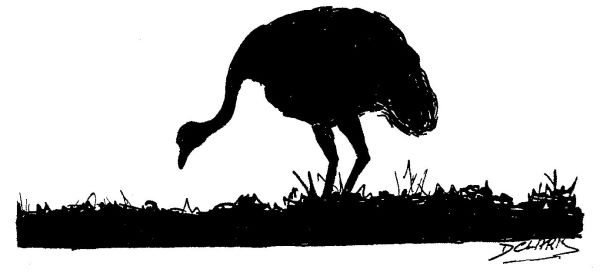
Just look around you. What do you see? Kitchen utensils, flowers, ornaments, trees, animals, birds, hills, mountains, furniture, clothing, clouds, buildings, rocks, workshop tools, and thousands of others. Even a simple feather has much to teach you about drawing.
Try different angles of the same object, from the side, from slightly above and so on. You will be amazed how drawing the same object from different angles can pose completely different challenges.
The Secret to Good Sketching
What is the biggest key in drawing?
Observation.
Most see an object, but they don’t look at it. What do I mean by that?
You see a mug on a table. So what! But have you really studied it? Have you observed it properly?
What type of lettering is printed on it? How large are the letters? What other features are there? What type of flowers are printed on it. How about their colours?
What shape is the mug and is the ear large or small? What are the different textures on it and how will I represent it on the paper?
So often we just glance over an object. Oh! It is only a mug. As an artist you need to look and observe all the details that make up the object more carefully than the average person would.
Train your mind to look at the object, and not just see. Get this right and you will be well on your way to excellent sketching.
Make Sketching a Habit
We have already discussed why you need to sketch often, now let’s take a look at ways that you can turn sketching into a habit.
The most important thing is to :
Make time for sketching.
No matter how busy your lifestyle, if you look at your schedule you will find intervals where you can slot in a quick sketch or two. For example on your lunch break, while waiting for the bus, while on the bus, while watching TV and so on.
Once you have found the time in your schedule, stick to. Set an alarm on your phone to remind you so that you don’t get carried away with other things. This is your sketch time. Your time to relax.
In an ideal world you would give yourself at least half an hour to sketch in the beginning as you are not as proficient at judging accurately yet, but if you only have shorter spells available, don’t let that stop you.
Choose a subject to concentrate on.
I find that if you concentrate on one subject at a time you learn quicker than when you jump around.
You could for example start by drawing small common items and only worry about sketching the proportions correctly. Once you feel you are happy with your proportions, you may decide to concentrate on your shading work and do a series of shading exercises.
After that you may decide to do a series of hand studies, then figures and so on.
You will find that as you start to gain confidence in a subject you not only work quicker and more accurately, you start to enjoy it more so look forward to your next sketch session, which is a great motivator to keep it a habit.
Carry a sketchbook with you.
No matter where you go make sure you have some form of a sketchbook with you or within easy reach.
It could even be something a small as a notebook and pen carried in your shirt pocket or handbag which you can whip out when the opportunity presents itself and do a quick sketch or doodle.
You could keep a small bag with some sketching equipment permanently in your car so that you have them available wherever you are.
Challenge yourself.
Keep challenging yourself when you start to become too comfortable with a subject. You don’t want sketching to become boring or you will lose the habit.
There are endless ways in which you can keep things interesting. Start by changing the subject you are concentrating on. You could add a new medium to the mix like sketching with a pen instead of a pencil. You could start to add colour to your sketches. You may decide to set yourself a time limit on the sketch and so on…
Take Your Sketches to the Next Level

That brings us nicely to taking your sketches to the next level and the optional equipment I mentioned earlier.
Starting off with simple little pencil sketches opens up the door to an incredible array of new opportunities for you to grow as an artist.
You will find that you will be able to transition to more intricate forms of drawing like photorealistic or pen and ink drawing.
You can start to add colour to your sketches by adding watercolour washes, gouache or acrylic paints.
Your sketches can become the study used to design a more complex painting or drawing done in the studio.
It can open up the door to en plein air (outdoor) drawing and painting.
The easiest and most common add on to sketching is usually pen and ink with watercolour washes, also called line and wash, so let’s have a quick chat about that.
Line and Wash
With line and wash you will initially sketch your drawing outlines lightly using pencils. Once you are happy with your sketch, you will go over the lines using ink pens to establish the drawing. You can also add shading and detail using the pen.
With the drawing finalised you then whip out your watercolour paints and a basic brush and add lose layers of colour over the drawing to suggest the colours.
This style is fabulous as it lends itself perfectly to indoor as well as outdoor work on any scale.
You can take a look at our Pen and Ink Lessons for more info about this fabulous method.
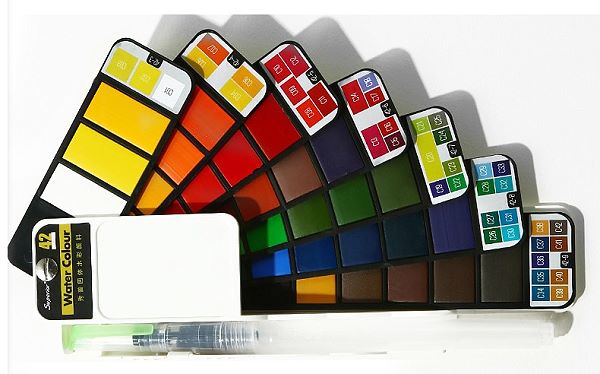
To get started with line and wash all you need to add to your equipment are a few different size Felt Tipped Pens and a portable watercolour set like the one shown below.
Conclusion
I hope this tutorial has given you a good feel for what is involved in sketching and wet your appetite to give it a go.
You will not regret making sketching a habit. Good luck.
Pin Me
