Ever stood in front of an array of paint brushes at the art store, feeling a bit overwhelmed? You’re not alone. Whether you’re a seasoned painter or just starting out with oils and acrylics, knowing which brushes to choose can be a game changer for your artwork.
In this guide, you will learn what makes each type of brush unique and what each is used for, ensuring you know exactly what to pick next time you are connfronted with a wall of brush choices at the art store. We will also look at the care of brushes and some handy tips and tricks for selecting the right brush while painting.
Ready to unravel the mysteries of paint brushes together? Let’s get going!
Brush Anatomy

Let's break down what goes into making a paint brush. Understanding this can really help you pick the right one for your art projects.
Every paint brush consists of three key components:
The Handle: This is what you hold. Handles come in different lengths—long ones are great for broad strokes on an easel, allowing you to paint from a distance. Short handles give you more control for detailed work up close.
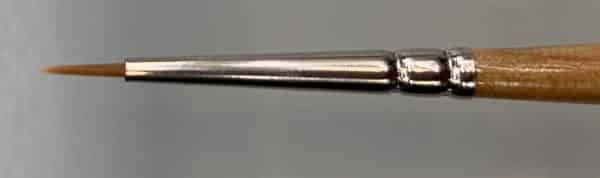
The Ferrule: The metal part that connects the bristles to the handle. It’s not just there for good looks; it secures the bristles in place and keeps them shaped just right.
The Bristles: This is where the action happens. Bristles can be natural hair or synthetic fibers, and the type you choose affects how paint is applied to the canvas.
Types of Brushes
Brush bristles are made from a variety of materials. Each gives you a different effect when applying paint on the canvas so can make a big difference in how your painting turns out.
Natural vs. Synthetic Brushes
Natural Hair Brushes: These brushes are made from animal hair, like hog or sable, and are favored for their ability to hold a lot of paint. They're especially good for oil painting because they can handle the heavy texture of the paint and apply it smoothly. Natural brushes are known for their durability and the fine, soft finish they leave on your artwork.
Synthetic Brushes: Made from man-made fibers, synthetic brushes are a versatile choice for both oil and acrylic painters. They're particularly great for acrylics because they can withstand the quick-drying nature of the paint without losing their shape. Plus, they're often more affordable and easier to clean than natural hair brushes.
Pros and Cons
Natural Hair Brushes:
Pros: Excellent paint absorption and smooth application; durable when cared for properly.
Cons: More expensive and require more maintenance; not the best choice for acrylics as the fast-drying paint can damage the natural fibers.
Synthetic Brushes:
Pros: Less expensive and easy to maintain; resistant to damage from acrylic paints.
Cons: Might not hold as much paint as natural brushes; some artists find them less smooth for oil painting.
Brush Bristle Flexibility
Another key aspect to consider is the flexibility or stiffness of the brush bristles, which greatly impacts your painting technique and the effect you get when applying the paint.
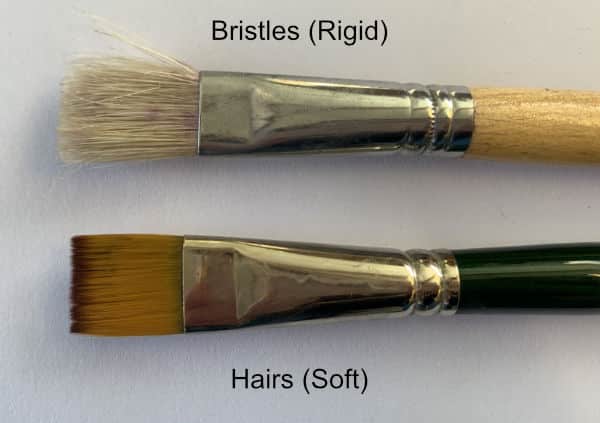
Bristle Brushes: These are the stiffer brushes, perfect for when you need to scrub in a background color quickly. Rubbing them over the back of your hand, you might feel a gentle scratching sensation. Traditionally made from hog bristles (hence the name), these days they can be crafted from various stiff fibers, both natural and synthetic.
Hair Brushes: Soft and gentle, these brushes are ideal for smooth, delicate blending. If you run them over the back of your hand, they feel more like a soft tickle. Sable hair was traditionally used for these brushes, but modern versions might also use other soft, natural, or synthetic materials.
Choosing between natural and synthetic brushes (and between bristle and hair brushes) really comes down to the medium you prefer and the feel you want from your brush as you paint.
Brush Shapes and Their Uses
Not only are brushes made from different materials, but their tips can be assembled into different shapes. Each paint brush shape is uniquely designed to serve a specific purpose in your painting, helping you achieve different effects and textures with ease. Here are the most commonly used brush shapes:
Flat Brush
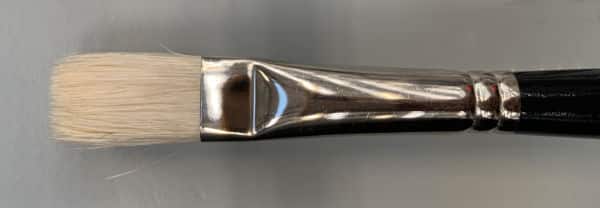
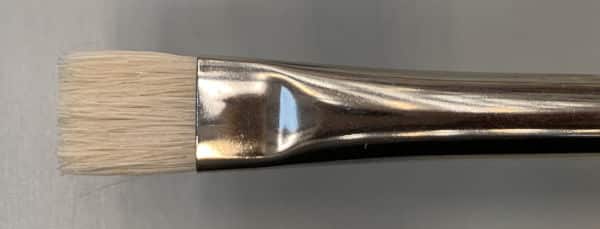
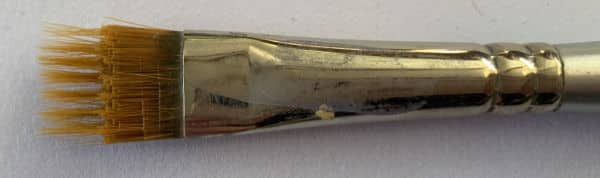
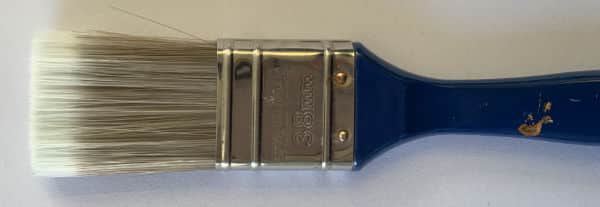
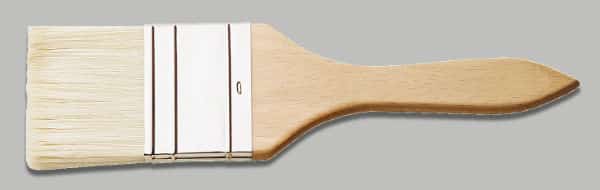
Flat brushes are real workhorses in the world of painting. They feature a rectangular shape with medium to long bristles that hold a fair amount of paint. Ideal for filling in large areas with color, these brushes are also great for making bold, sweeping strokes or sharp-edged lines. Whether you’re laying down a vibrant sky or crafting architectural details, the flat brush provides both coverage and control.
Bright Brush
Bright brushes are similar to flat brushes. The bristles are however cut shorter and look square shaped as opposed to rectangular. This makes the bristle stiffer and more rigid. This allows for more controlled and heavier paint application, making them perfect for techniques where you need to push the paint around on the canvas without it spreading too far. Bright brushes excel in creating impasto effects or bold strokes that stand out on the surface, adding a lively dynamic effect to your artwork.
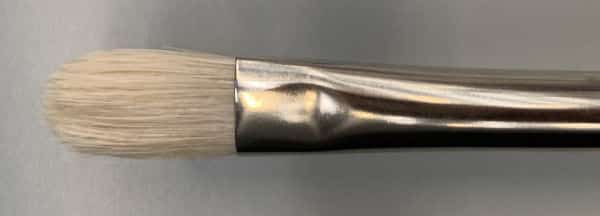
Filbert Brush
The Filbert brush is basically a flat brush with a rounded top edge instead of a straight one. That makes it incredibly versatile - and one of my favorite choices when painting. They come in bristle and hair varieties. I prefer the hair variety for its softness and flexibility, allowing for blending and creating smooth, rounded strokes that can mimic the natural shapes in landscapes, portraiture, and more. What I like about them is that it forms a chisel type point allowing you to paint fine lines by holding the brush one way, then in an instant you can rotate the brush 90 degrees in your hand to paint broad strokes. Whether you're softening edges or sculpting forms, the Filbert brush is a go-to for artists who seek a gentle touch with the ability to cover areas both large and small.
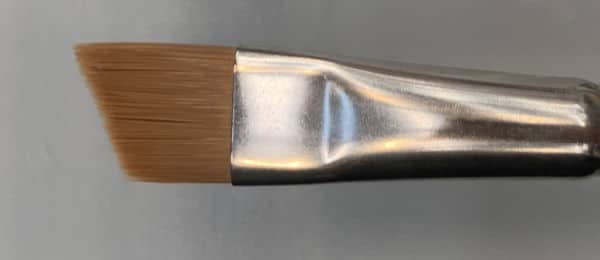
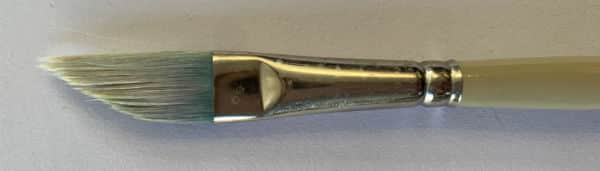
Angled Brush
The Angled Brush is designed with its bristles cut at a slant, offering precision and versatility that other brushes can't match. Ideal for sharp lines and crisp edges, it excels in painting corners, curves, and intricate details. This brush is particularly useful for achieving clean, controlled strokes in floral motifs, fabric folds, and even in creating gradient effects. It's a favorite among artists who require a tool that can navigate tight spaces and complex shapes with ease. They are especially great for painting man made object like windows on a building.
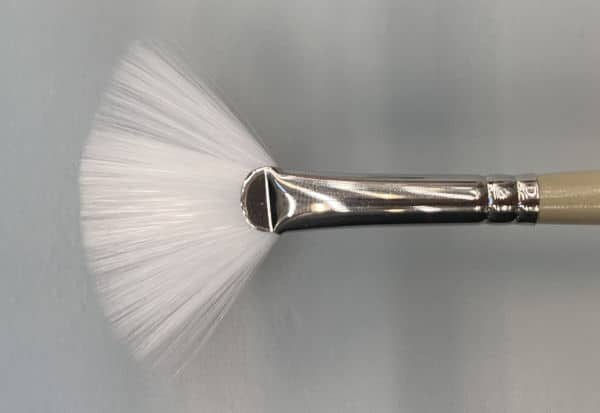
Fan Brush
The Fan Brush, with its unique spread of bristles resembling a fan, is a specialist tool in the painter’s arsenal. It’s fantastic for blending backgrounds, creating texture, and softening edges without noticeable brush strokes. This brush is also a favorite for painting elements like foliage, clouds, or water effects where you need a light, airy touch. When using this brush for landscapes painting though you do have to be very careful not to create repetitive patterns as these will quick appear unnatural.
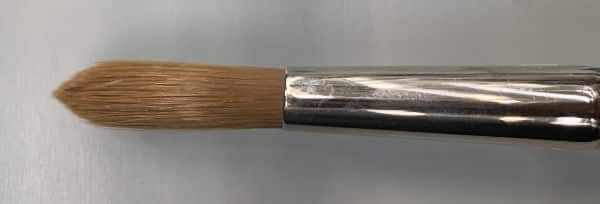
Round Brush
The Round Brush has long, closely arranged bristles tapering to a round, pointed tip. It's perfect for adding fine details, delicate lines, and small touches to a painting. Ideal for both sketching and detailing, round brushes offer exceptional control, making them a staple for artists focusing on portraits, botanical illustrations, or any work requiring precision. You would typically hold this brush near the tip so that you have maximum control over each brush stroke.
Detail Brush
Smaller than the typical round brush the Detail Brush is a must have for any artist who thrives on precision and intricacy. This brush is typically very small with a fine, sharp tip designed specifically for the minute details added to a near complete painting. Whether you are adding the sparkle in the eyes of a portrait, the intricate patterns of textile designs, or the delicate veins in a leaf, the Detail Brush allows you to paint those tiny, precise strokes with ease and accuracy. It's the ultimate tool for adding those final touches that require a steady hand and keen attention to detail.

Rigger Brush
The Rigger Brush, originally designed for painting the rigging in nautical scenes, is long, thin, and pointed, making it perfect for detailed line work. Its fine bristles are excellent for creating very delicate lines such as tree branches, ship rigging, or hair details. The length of the bristles offers a good paint load, allowing for extended continuous strokes without frequent reloading. This brush is ideal for any work requiring fine, controlled lines, making it a valuable tool for both oil and acrylic painters who need precision in their artwork.
Dagger Brush
The Dagger Brush features a distinctive angled shape, somewhat akin to a sword, which offers a blend of versatility and unique stroke capabilities. Its sharply slanted bristles are excellent for creating sweeping curves with sharp points. The Dagger Brush eats fluid, expressive strokes that vary in width for breakfast, making it a favorite for adding a dramatic flair to your work, from bold, graphic lines to gentle, flowing details. Painting the edges of petals, leaves, and other swirly type lines are a breeze with this brush.
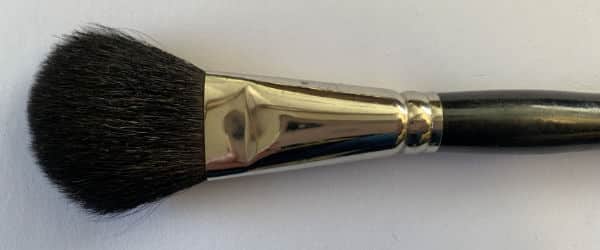
Mop Brush
The Mop Brush is a round brush with large, soft, fluffy hairs. Often used for laying down large swathes of color or water effortlessly. It however really comes to life when used for softening edges, blending colors seamlessly, and creating smooth transitions in both background and larger areas of a painting. When blending like this ensure the hairs are clean and dry for best results.
This brush can however hold a significant amount of paint or water allowing you to apply washes or glazes with a gentle touch. This allows you to achieve a diffuse, airy effects or mist in your paintings.
Comb Brush
The Comb Brush is distinctive for its split bristles, which resemble the teeth of a comb. This design allows for creating multiple fine lines in a single stroke, making it exceptional for texturing effects like fur, hair, and grass. It’s also ideal for feathering and adding fine details that require a delicate touch. The unique structure of the Comb Brush enables artists to achieve a level of detail and texture that other brushes might not provide as easily, offering both precision and the ability to mimic natural patterns in their artwork.
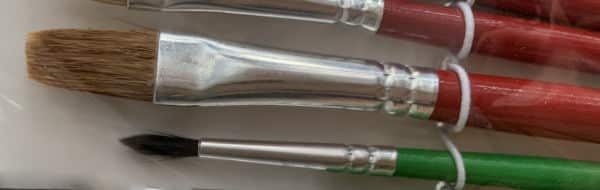
DIY / Hardware Brush
The DIY or Hardware Brushes are the larger, more robust brushes that you find in a hardware store and usually purchase for painting jobs around the house. These brushes are excellent for applying broad strokes of paint on larger canvases or for underpainting techniques where detail is less critical. Due to their size and durability, they're also ideal for applying gesso or varnish, ensuring even coverage across extensive areas. While not traditionally used for detailed work, these brushes are invaluable when working on a grand scale or need to block in large areas of canvas quickly.
Tip: Look for the cheapest, ugliest hardware brushes when purchasing them as the more expensive brushes have their bristles cut too perfectly. The rougher tip paints smooth large areas, while also allowing you to paint effects like grass.
Varnish Brush
The Varnish Brush is specifically designed for the final, protective coating of a painting. These brushes are typically wide and flat with soft, evenly distributed bristles that ensure a smooth, streak-free application of varnish. The softness is key to avoiding any texture or brush marks that might detract from the finished artwork. Varnish brushes are essential for artists looking to achieve a flawless finish, protecting their work from dust, UV rays, and the elements while enhancing the vibrancy and longevity of their colors.
They can however also be used during painting for glazes, washes as well smooth blending over large areas.
Brush Size and Length

I know it sounds odd but when it comes to paint brushes, size and length really do matter, as they directly influence the control and effects you can achieve on your canvas. Let’s break down how these elements can help you pick the perfect brush for your painting needs.
Size Matters
Brush size is typically indicated by a number on the handle; the larger the number, the bigger the brush. Smaller brushes (sizes 0-2) are perfect for fine details and small touch-ups. As the numbers go up, the brush size increases, which is great for broader strokes and filling in larger areas. For instance, a size 6 to 10 brush is versatile enough for general shapes and outlines, while sizes 12 and above are excellent for filling large spaces, underpainting, or even applying varnish.
It is important to note however that the size numbers are not standard and vary from one manufacturer to the other. For that reason you will not find me mentioning brush size numbers during the class, but rather the width in cm and inches as that is something we know is standard.
The general rule when it comes to choosing a brush size is to pick the largest brush you can get away with. This will allow you to paint quickly while still getting the detail you need. You will also find that you tend to start a painting off using your large brushes as you are blocking in large areas. As the painting progresses, you end up using smaller and smaller brushes to indicate finer and finer detail.
Of course, the larger the canvas, the larger the brushes you will use.
Why Length Counts
The length of the brush handle also plays a crucial role in how you interact with your canvas. Short handles offer more control and are ideal for detailed, close-up work. You typically hold short handle brushes near the tip of the brush and control the brush movements using your fingers.
Long handles, on the other hand, allow artists to paint from a distance, giving a broader range of motion. You then hold the brush further back along the handle using your wrist or arm to control the brush movements. This is particularly beneficial for painters who work on large canvases or when standing at an easel, as it enables more expressive strokes and a better overall view of the painting.
Understanding the interplay of size and length can help you select the right brush at the right stage of the painting, to match your technique and the scale of your artwork.
Maintenance and Care of Brushes
Cleaning
Keeping your brushes clean is crucial not only for their longevity but also to ensure that they perform well in each painting session. Here’s how you can keep your brushes in tip-top shape:
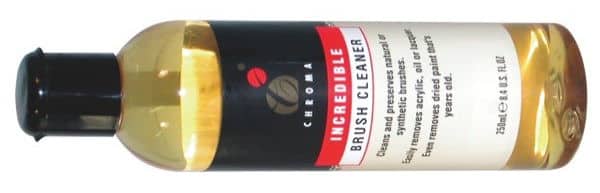
For Acrylics: Acrylic paint dries quickly and can ruin brushes if not cleaned immediately after use. Rinse them thoroughly in water, and don't let the paint dry on the brush. For a deeper clean, a mild soap or a specialized brush cleaner can be used to remove any residual paint.
For Oils: Oil paints require a different approach since they're not water-soluble. Wipe off excess paint with a rag or paper towel, then rinse the brush in a solvent like turpentine or mineral spirits. (If you don't want to use a solvent you can either paint using water mixable oil paints, or wash your brushes in a water / Handy Andy solution). After most of the paint is out, use soap and water to clean the brush thoroughly. Ensure all solvent is removed to avoid damaging the bristles.
General Brush Care Tips:
a) No matter what medium you use, never let your brushes soak in water or solvent as this can damage the handle and loosen the glue holding the bristles. Even during a painting session, wash the excess paint off the brush and dry off the excess liquid using a soft, lint free cloth.
b) After cleaning your brushes at the end of the painting session, reshape the brush head gently with your fingers and lay it flat to dry to prevent water from loosening the ferrule.
Regular cleaning not only extends the life of your brushes but also saves you money in the long run and keeps your colors true as you paint.
Storage
Proper storage of your paint brushes is key to maintaining their shape and extending their lifespan. Here’s how to store your brushes correctly:
Dry Properly: Before storing, ensure your brushes are completely dry to prevent mildew and other damage. Hanging them bristle down is ideal, but if that’s not possible, laying them flat on a towel will also work.
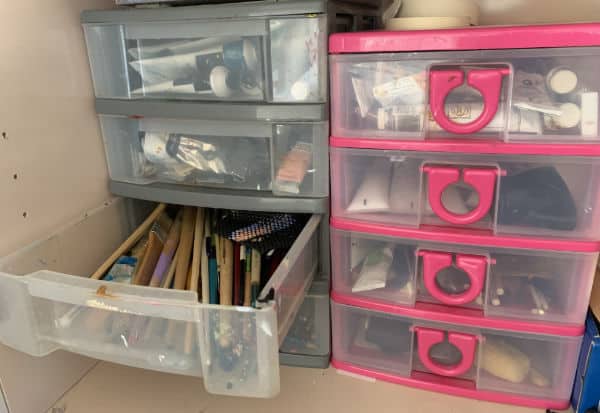
Keep Them Separate: Store your brushes in a dedicated container where they won’t be crushed or bent by other items. A brush holder or a segmented drawer that keeps each brush separate is perfect. This prevents the bristles from getting bent out of shape and keeps your brushes organized and easily accessible. I store my paints and brushes in a drawer system as you can see above. Oil paints in one drawer, acrylics in another, brushes in another. That way I simply putt out the correct drawers for each painting session.
Orientation Matters: Ideally, brushes should be stored flat, or bristle up if they’re in a container, ensuring that gravity doesn’t pull the bristles out of shape. Avoid standing brushes on their bristles as this can deform them over time. If you’re using a roll-up brush holder, make sure it's rolled loosely enough to not squish the brush heads.
Avoid Heat and Humidity: Keep your brushes in a cool, dry place away from direct sunlight, heaters, and high humidity, which can damage the brush components and lead to bristle loss.
Proper storage not only keeps your brushes in good working condition but also makes your painting process more efficient since your tools are always ready and well-maintained.
Restoration
Over time and with frequent use, paint brushes can lose their shape or become caked with dried paint, but often they can be restored to a good-as-new condition. Here’s how you can restore your worn-out brushes:
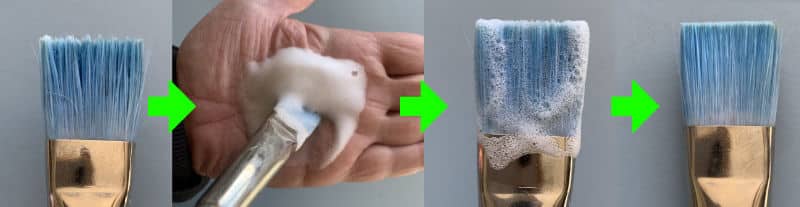
Reshape Bristles: If the bristles of your brush have become splayed or misshapen, you can often restore their original shape. For this you will need a bar of soap and a little water. After thoroughly cleaning the brush, work up a thick lather in the palm of your hand using the soap and as little water as possible. The thicker you can get the lather, then better. Work this lather into the bristles of the brush. Ensuring the whole length is coated, from tip to ferule. Also ensure the inside bristles are well coated in the lather. Now using your fingers gently reshape the bristles. For synthetic brushes, you can dip the bristles in warm water for a few minutes to help them become more pliable before reshaping them. Allow the brush to dry flat for a few days. (Wash and dry the brush thoroughly before you using it again.
Remove Dried Paint: If paint has dried deep in the bristles, soaking the brush in a specialized brush cleaner, warm vinegar or fabric softener for a few hours can help loosen and dissolve the paint. Oil paint brushes can also be soaked in turps to help loosen the dried paint. After soaking, use a brush comb, painting knife or your fingers to gently remove the softened paint. Rinse thoroughly and repeat until the brush is clean.
Restore Softness: If the bristles have become stiff, conditioning them can help. After cleaning, apply a small amount of hair conditioner or brush conditioner to the bristles, gently working it through and then rinsing it out in luke warm water. This can help restore softness and flexibility.
Handle Care: Sometimes the handle of the brush can become loose or cracked. Tighten any loose ferrules by gently pressing them back towards the handle. If the ferule is still loose you can also use a pair of pliers to crimp the furule back onto the handle.
A wooden brush handle that has become rough or cracked can be restored by lightly sanding it and then applying a small amount of linseed oil or a new layer of varnish / paint.
Following these care and restoration techniques can significantly extend the life of your brushes, saving you a lot of money in the long run.
Professional Tips and Tricks
Here are some handy tips and tricks regarding brushes that I've picked up over the years:
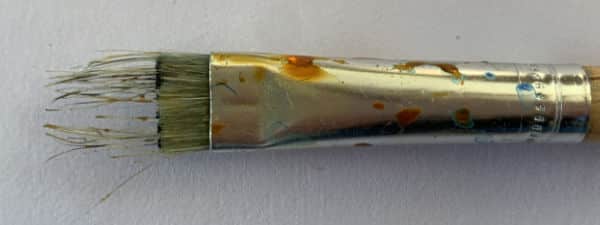
Choosing Synthetic Brushes: When purchasing synthetic soft (hair) round brushes, be careful of the very cheap ones, often recognizable by their reddish hair. These can be too soft and become unusable once wet. You can sometimes spot them in the packaging when the brush tips are already splayed instead of well formed. Other times you need to open the packaging and rub the starch out of the hairs first. If the tip does not reform itself naturally into a sharp fine point, don't buy it.
In the photo above you can see an example of very low quality brushes. Look carefully at the reddish hairs and you will see that don't lie evenly despite being new. These hairs are so soft they will just flop all over the show when you try to paint with them. The hairs on the green brush are already splayed and haven't even been used yet. You will never be able to form a sharp point with this brush no matter how much you load it with paint to try and keep the hairs together.
Using Brushes Across Mediums: You can use the same brushes for painting in both oil and acrylic; just make sure they're dry before switching mediums. However, avoid using the same brushes for oil and watercolor as they require separate sets due to their differing natures.
Modifying Brushes: Don't be shy to modify a brush for a specific use case. For example I will often use scissors to randomly snip some of the tips off a new flat brush in order to get a ragged edge. This allows me to paint a random grass or hair effect.
Repurposing Old Brushes: Never throw away your old brushes. An aged brush can be transformed by smashing the tip onto the table to fray the bristles, making it excellent for painting random marks and strokes that add character to your artwork.
Alternative Brush Uses: The bristle end isn’t the only part of a brush that you can paint with. Sometimes, turning the brush around to scratch into wet paint with the handle end can add fine details like branches and highlights.
DIY Brushes: You can even make your own brushes by cutting the bristles off an old brush. You can then tape the bristle onto a flat piece of card or hot glue onto a stick in the shape that you need. An example of this could be a crude witches broom shaped brush that you can use to stipple flowers into a meadow painting.
One-Haired Brush: For ultra-fine lines I've even used a single long bristle cut from a kitchen broom.
As you can see with a little creativity you can come up with a multitude of ways to paint incredible effects by modifying standard brushes. Don't be shy to play around and experiment.
Conclusion
I hope this tutorial has given you the knowledge you need to confidently browse the brush aisle at the art store as well as help you choose the correct brush when painting.
If you enjoyed this article, then you will learn a lot from my Ultimate Guide to Oil Paint.
Pin Me