Class Video
Class Tutorial
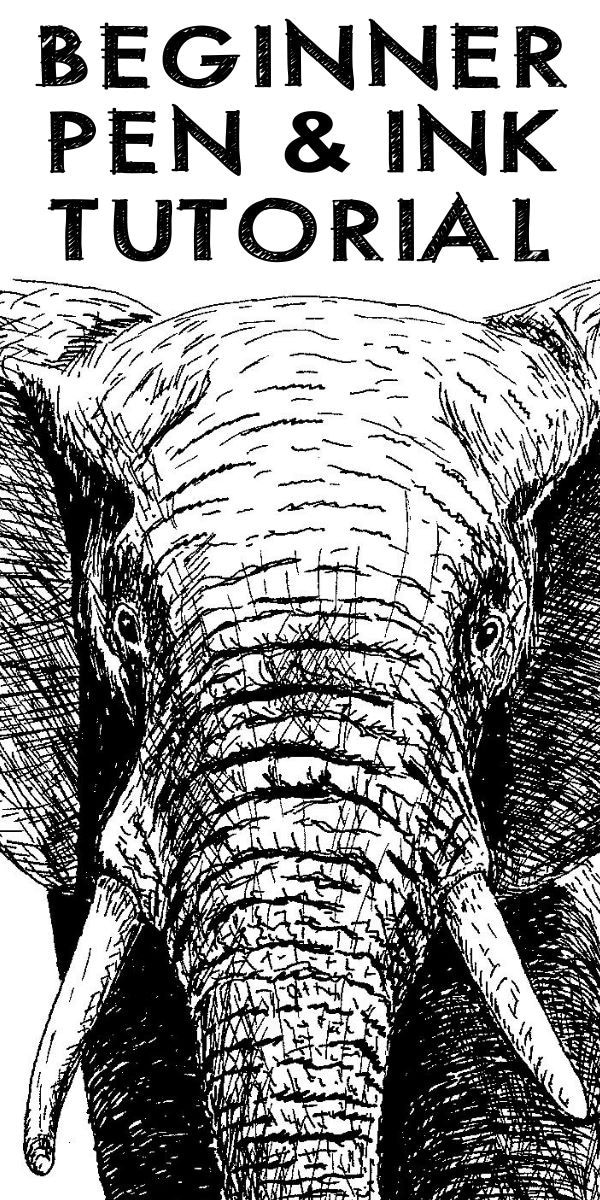
What is Pen and Ink Drawing?
Pen and ink is an art form where you draw using a variety of pens instead of pencil.
It is a very exciting medium to work in, but also a challenging one as you cannot use pressure to create tonal values like you can with a pencil. You need to use a variety of marks on the paper in order to get your tonal values and details.
Mastering pen and ink drawing is however very rewarding as it opens up the door to incredibly fun and quick drawing styles like line and wash (where you sketch in pen and ink then add colour to the drawing in loose washes).
If you enjoy working from life or travel often then pen and ink is a must learn skill as it will take your art enjoyment to a whole new level.
Pen and ink can however also be used for more technical work like book illustrations and artists impressions of commercial items like proposed shopping centres and so on. If you get good at pen and ink as well as line and wash you can earn a good income.
The biggest challenge with pen and ink though is that erasing is not really an option. Though we will look at ways to “erase” errors in this tutorial, unlike pencil, ink marks can never be truly erased, only covered up. This means that thorough planning is essential when working in pen and ink. Don't let this put you off however as little imperfections and errors actually add to the character of pen and ink drawings. As you gain more experience you will find that the errors automatically become less and less.
Lets start our pen and ink journey by looking at the equipment we will use.
Pen & Ink Drawing Supplies
Ink
You may expect that drawing in pen and ink is simply grabbing your nearest pen and starting to draw. Even though you can by all means do this, there is a lot more options available to you as a pen and ink artist.
We will be using a variety of pens, some of which are the old fashioned nib pens traditionally used for calligraphy.
These pens require us to use bottled ink so we need to know which ink to buy. Believe it or not you get different types of inks. Even the manufactured pens we will use have different types of ink in them and we need to know what to look out for when purchasing them.
There are two types of inks. Dye based and pigment based.
Dye Based Inks
Dye based inks are generally a dye added to water. As the dye dissolves in the water it colours the water. As the ink is applied to the paper, the liquid penetrates the paper, essentially dying the paper at that spot as the water evaporates.
Nowadays dye based inks are also made from other alcohol based liquids instead of water. These liquids are designed to evaporate quicker allowing you to draw over the area sooner.
Classic examples of dye based inks are a Sharpie, highlighters and the ink inside your inkjet printer.
Disadvantages of dye based inks are:
- they tend to bleed as they penetrate the paper softening the edges of your lines.
- They will also bleed when going over them with a liquid, for example when adding watercolours washes over the ink. As a result if you are going to be using washes with dye based inks, you want to add the washes first, dry them, then add the ink details on top.
- Dye based inks tend to fade quicker than pigment based inks.
- Dye based inks tend to appear less vibrant than pigment based inks.
The advantage of dye based inks are:
- they dry quicker than pigment based inks so you can add subsequent layers sooner. The quick drying effect also helps a lot when you are sketching on tour and can't wait around for the ink to dry.
- As the ink bleeds you can get some degree of blending and colour mixing when working with coloured dye based markers.
Note: this page contains affiliate links to products on Amazon. If you purchase through the links I will earn a small commission for the sale at no extra cost to you.
Pigment Based Inks
With pigment based inks, pigment is added into the liquid (typically water). As the pigment doesn't dissolve like a dye, the pigment remains suspended in the liquid.
As you apply the ink to the paper the pigment lies on top of the paper. When the liquid dissolves, you are left with a layer of pigment on the paper.
In order to make the layer more durable on the paper once the water has evaporated, a binder is added to the ink. Typically this is either gelatin or shellac.
A classic example of a pigment based pen is a ball point pen.
The disadvantage of working with pigment based ink is that it takes longer to dry than dye based inks.
Advantages are :
- as the ink lies on top of the paper, it is sometimes possible to remove wrong marks completely before the ink dries. This all defends on the paper used. As pigment based in does also sink into the paper ever so slightly, the less absorbent the paper, the easier it is to remove wrong marks. Good examples are papyrus and parchment. Pigment based ink can be carefully scrapped off the surface before it dries with a knife without leaving any mark on the papyrus.
- As the ink lies on top of the paper the colours tend to look more vibrant than dye based inks.
- For the same reason, the colour fades much slower than dye based inks.
For this reason I try to use pigment based inks where possible.
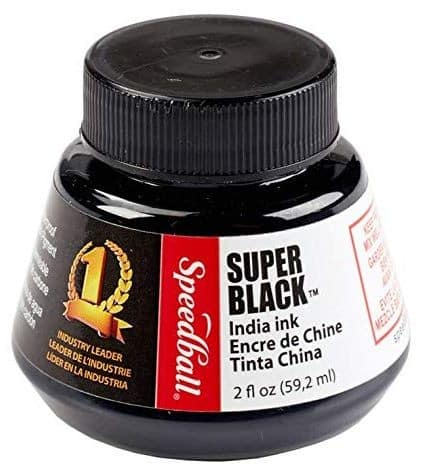
My recommendation is a good quality, waterproof black India ink.
India ink (also often called Indian ink) has been around for centuries and has stood the test of time and will not fade at all. Made from fine soot it was originally invented by the Chinese, but also widely used in India, where it got it's name from.
The soot is added to water to form a suspension. Gelatin or shellac is also often added to make the ink more durable. India ink is available in waterproof or non waterproof, so be careful when purchasing that you get the correct one.
India ink is also available in a variety of colours nowadays.
In this series we will only concentrate on using black inks, but it is good to know that coloured inks are available.
Important: Before using your India ink, the bottle needs to be given a good shake to evenly distribute all the suspended pigment as it tends to settle when in storage.
Pens
Any type of pen may be used. The only "requirement" is that the pen uses ink, lol. From ball point pens to classical quill pens can be used. It is up to you to try different pens to see which you prefer. Let's take a look at some of the common ones and my personal favourites.
Felt Tip Pens / Fineliners
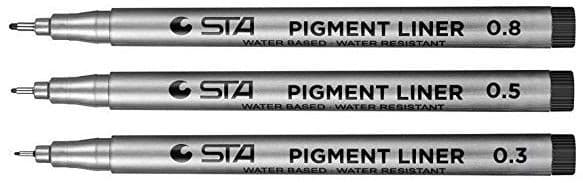
Above you can see an image of 3 fineliner felt tipped pens that I use. Felt tipped pens have a felt wick inside which is soaked in ink. The tip is then compressed into a tip which protrudes from the pen which you use to draw with. The tips are compressed into different thicknesses as well as into brush shapes.
You want to purchase the ones with waterproof and fade proof pigment ink inside. I use a size 0.3, 0.05 and 0.8 mm. For very fine lines you may also want to buy the 0.1 mm and 0.2 mm sizes. (If you click the image above you can purchase the pens from Best Art Shop which have all the sizes and are reasonably priced.)
Dip Type Pens

A dip pen is an improvement on one of the original ways of writing. Originally you would dip a stick which had a sharpened point into a pot of ink and then write with that. As the ink ran out you would re-dip your pen. The problem was that the ink on the stick would run out very quickly making writing a long and tedious task.

In order to write more continuously the stick was replaced with bamboo which was cut into a tip as shown above. The tip was then split down the center in order to hold more ink. As you write the ink flows downward towards the tip allowing you to write longer.
Over the years the solid bamboo pens were replaced with a handle and metal nibs to not only last longer, but also allow for difference size nibs to be used on the same handle.
There are many makes and styles of holders as well as the various shapes of nibs. Some give hard solid lines while others with longer calligraphy type nibs can produce a variety of flexible lines, namely, from thin to wide and back to thin. These are excellent for various effects. There is also a great variety of nib sizes, from thin lines to very thick lines.
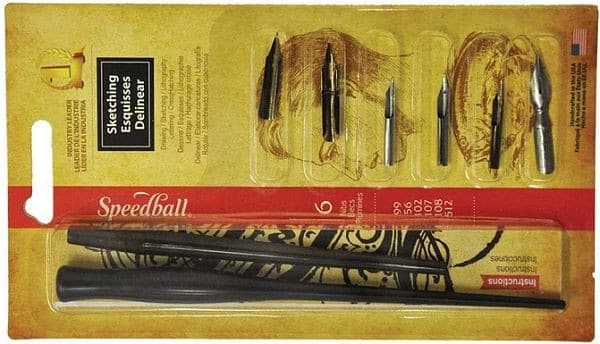
This set is a good example of dip pens with replaceable nibs:
The very versatile mapping pen is my favourite simply because it was the very first type of nib I used when I began sketching in pen and ink in the 1940s. It works very well for me. Some manufacturers call lit a Flexible Quill Tip while others call it a Crow Quill Pen. They are small steel tubular nibs with a very fine point. They have been used since the 1820s. I made my own holder from a porcupine quill from way back when. This is what it looks like:

Hint:
The dip pen need not be messy if you take precautions and plan to work neatly and carefully. The worst that can happen is when (horrors) the ink bottle gets accidentally knocked over. The best method of over coming this is to place the ink bottle in another wider container.
Dipping straight into the bottle has the danger of overfilling the nib. This could cause a devastating blob on your drawing. Never dip the nib section more than three-quarters into the ink. I use a special plastic measuring cup which uses the minimum of ink and is easy to control the ink depth for the nib.

This measuring cup ensures the minimum of ink poured from the bottle. It is best to first place the pen in the cup and then, with a plastic dropper, or straw, slowly add the ink until it reaches the ¾ mark. Because it is a pigmented ink you need to thoroughly shake the bottle before use. This applies especially if the bottle has been standing a for a considerable period.
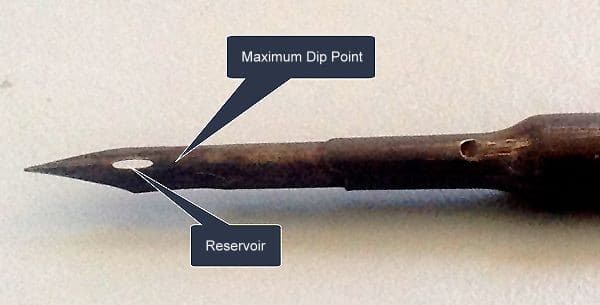
Irrespective of whatever nib you will be using, never dip the pen any further than just above the reservoir. Remember to wipe and clean the pen every 10 minutes to avoid any buildup of dried pigment which will impede the ink flow. When drawing it is better to hold the pen near to the nib and at 45 degrees. With a few different size nibs, you will be able to produce work from the delicate to the very bold, as well as different textures.
Tip:
Draw with the tip either sideways or towards you. NEVER push the pen away from you. If you do, the nib will dig into the paper and splatter ink all over your work.
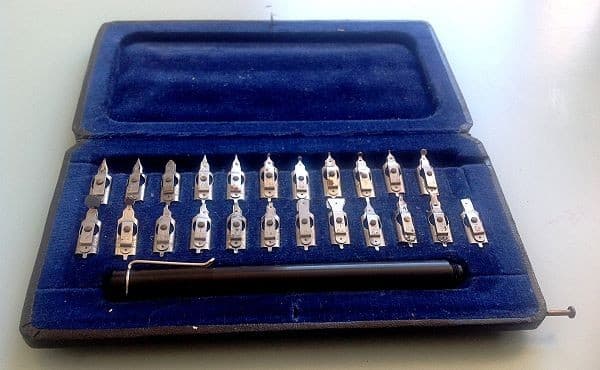
The set shown above is very handy as it can be safely carried in a pocket. I bought this almost 50 years ago and is now a Vintage item and still in excellent condition despite lots of usage. The pen holder contains an ink reservoir so you don't have to continually dip your pen.
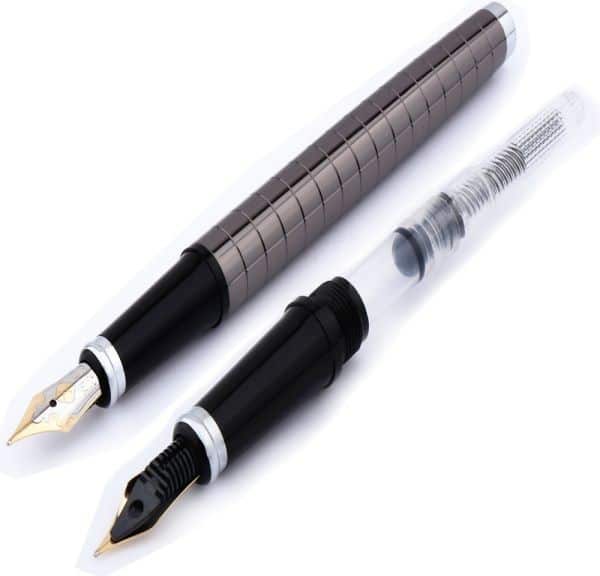
The pens below are the modern equivalent of these calligraphy pens. They are called fountain pens and have a refillable reservoir called a converter which works on a pistol vacuum system. To fill the converter you place the tip of the pen into the bottle of ink. At the back end of the converter is a turning knob that you turn first to lower the pistol, pushing the air out of the reservoir. When the piston is at the bottom, you turn the knob in the opposite direction to suck the ink into the reservoir.
You can then draw continuously until the reservoir is empty, saving you a heap of time by not having to constantly dip your pen.
Pencils
Pencils are used to draw the initial planning / construction lines for your sketch as these marks can be easily erased.
Any make of graphite pencil may be used. I recommend an H or HB pencil for the initial sketching work. I often even use a 0.5 mm mechanical pencil for the initial work.
When doing the initial sketching always be careful to not press hard as you don't want to dent the paper as these dents will give you hassles later, especially when adding watercolour washes to your sketch. The paint settles in these grooves leaving you with ugly darker lines glaringly visible in the final artwork.
Erasers
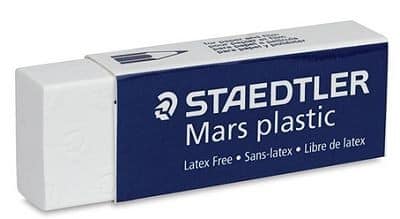
Any soft eraser is good for erasing errant initial pencil marks. You can use a Gum Eraser, White plastic eraser, Faber-Castell Black eraser or a Kneadable eraser. Each of these are perfectly suitable for pen and ink work.
Two types of erasers that cannot be used are the pen eraser and the old school style pink eraser. Both of these types of erasers are too hard and will damage the grain of the paper you are drawing on, leaving you with rough areas on the paper which collect dust and dirt over time.
Drawing Paper
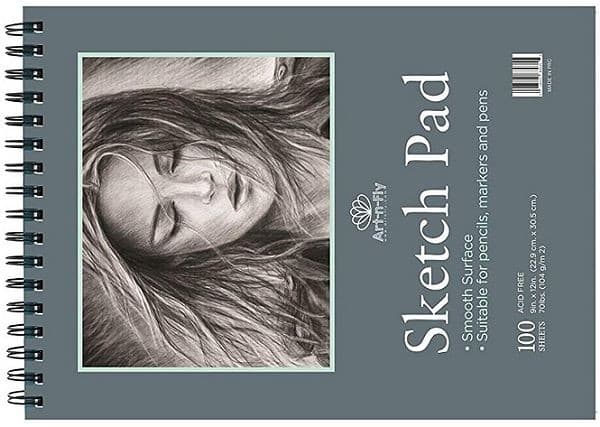
There are many types of paper produced by the paper industry. These papers are made from different materials such as wood, cotton, reeds, grasses, among others. Without going too deeply into the manufacturing processes, these substances are boiled, pulped and rolled into thin sheets of various thicknesses classified by weight.
Examples are Light weight paper 60lb (89gsm), Medium weight paper 90lb (250gsm) and Heavy weight paper 140lb (300gsm). I prefer to use either the Medium or Heavy weight paper depending on the subject and the medium used.
Different surfaces are obtained by cold rolling, hot rolling and other textures by pressing between various textured mats.
Most paper today is made from wood pulp from which the lignin has been extracted. If you want long lasting works of art, then look for paper that is acid free. Papers containing acid are not stable and tend to yellow and disintegrate with time.
For the artist looking to drawing fine detailed work, the best paper, in my opinion, is the hot rolled paper which has a very hard smooth surface which is favourable to rubbing out and corrections.
Drawing paper is specially fabricated for artists who draw in pencil and in ink. The most common is cartridge paper.
Cartridge Paper: So-called because of it’s original use of holding the gunpowder (paper cartridge) used for ball loading muskets. It also had to be produced to strict specifications. This paper morphed into various uses during the following years.
Most of the drawing sheets and pads found in the shops today are made from cartridge paper of different qualities and paper thicknesses. Cartridge paper is very popular and all the well-know Paper Manufacturers make it.
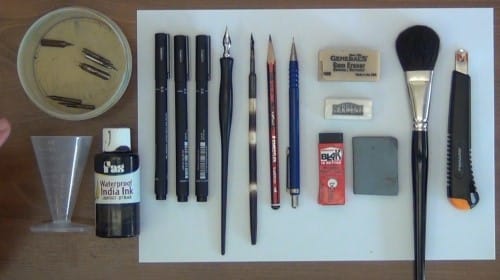
Miscellaneous Items

- A very soft brush for sweeping eraser particles off the drawing. Never wipe them off with the hand as they smudge and dirty your drawing paper leaving marks which are difficult to erase.
- A craft knife for making minor corrections and sharpening the pencils.
- Holder for loose nibs.
- Small measuring container for holding dipping ink during drawing time (if using dip pens).
Playing Around with the Pen and Ink
Get the “feel” of the pens before actual practice begins. When learning, don’t be tempted to rush. Take it slowly and get to know the feel of your pen. You will find that each kind of pen has a different feel to it. It takes time to become a skillful pen and ink artist. Don’t be discouraged when you make mistakes. Mistakes are only stepping stones to better work in the future. Experiment. Come up with some textures of your own.
Pen & Ink Practice Sheets
Download the Practice Sheets above. The Practice Sheets are there for you to practice your line strokes on. Make as many copies as you need.
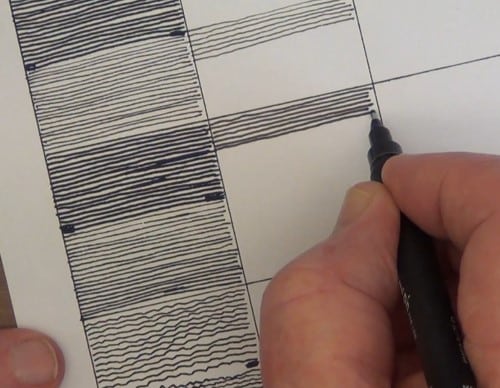
Sheet 1 is for practising straight, horizontal lines, and also how to draw them evenly spaced. When practising do NOT try to draw at speed. Do everything slowly and deliberately. Accuracy is the name of the game.
Notice that you should use a different thickness tip for each row as marked to the right of each row. If you don't have these thickness pens yet, use your closest thickness.
The idea of using different thicknesses is so that you can get a feel for the different effects each pen tip gives you.
Draw each block on the sheet using your wrist as the pivot point, then do the exercise again using your elbow as the pivot point. Repeat the sheet once more using your shoulder as the pivot point.
Now take a look over the three sheet to see which one allowed you to draw the straightest and most accurate lines. Chances are that the lines drawn using your wrist as the pivot point are the worst as the lines tend to arc when using the wrist. The elbow also creates an arc, but a very slow one so pivoting at the wrist is usually fine for most situations. When drawing long straight lines, using your shoulder as the pivot point is best. Now you know for future
Pen and ink drawing is a skill. “Quality work never happens when impatience tries its hand”.
Take your time now to get the quality of your strokes correct. As you master the strokes you will automatically be able to draw them quicker without losing the quality.
Complete as many of this sheet as you need to confidently draw these lines before moving on to Sheet 2.
On Sheet 2 you will be drawing the same lines, but this time they are vertical. The trick here is to not turn the page 90 degrees like you normally would in order to draw the lines horizontally, but to keep the paper straight on the desk so that you are forced to draw the lines vertically.
If you don't keep the page straight, the exercise is pointless. You are using this sheet to learn the skill of drawing vertical lines.
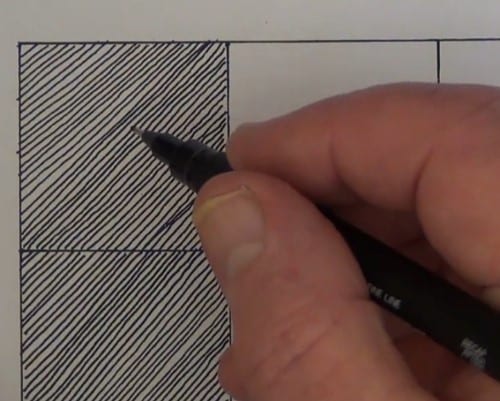
Sheet 3 is for practising all types of diagonal lines. The basis of all this here is to be able to draw various types of cross hatchings. As before keep the page straight on the table when drawing so you can get used to drawing diagonal lines.
Here you will probably find that using your elbow as a pivot point works the best. As I draw from the left hand blocks towards the right across the page, I move my whole body over to the right instead of trying to move my arm further and further to the right.
By moving your arm to the right you are changing the angle of each stroke making it difficult to get accurate parallel lines. By moving your whole body to the right the angle of each parallel stroke remains the same. Try it and you will see the difference.
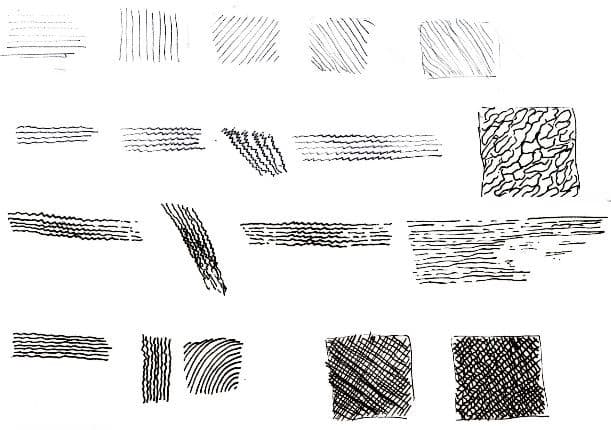
Cross hatching forms a major part of pen and ink work as this is what we use to create the illusion of shading. As a result Practice Sheet 4 is a series of diagonal cross hatching patterns for you to practice on.
To further practice your hatching, you can repeat Sheets 3 and 4, but vary the distance between the parallel lines. Close parallel lines will give you a dark tonal value. The further apart the lines are the lighter the tonal value will be.
Next do the sheet again, but gradually increase the distance between each parallel line. This will give you a lighter and lighter shading.
Finally repeat sheets 3 and 4 by starting with parallel lines that are far apart. Gradually decrease the distance between each line so that you go from a light tonal value to a dark tonal value.
I realise that by this time you will probably feel line a line yourself, but trust me, these exercises are the basis of every single pen drawing you will ever draw. The sooner you master the skills I am teaching you in this tutorial, the sooner you will be drawing those amazing artworks that made you want to start pen & ink drawing in the first place. It honestly IS worth the effort, I promise!
Creating Texture
Now that you know the basic strokes, we can look at ways to create texture in your drawings.
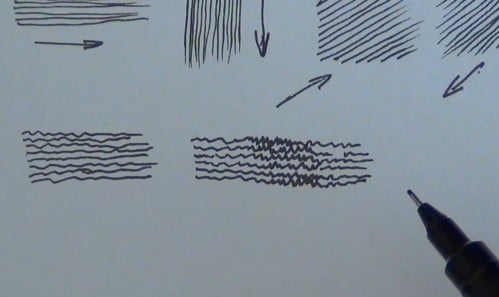
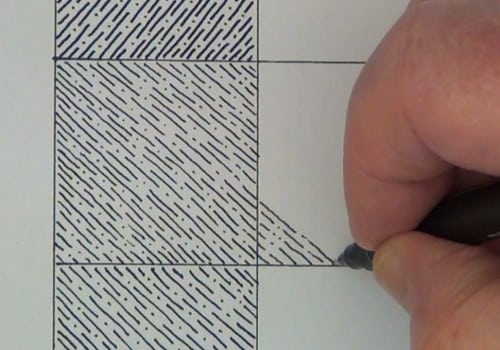
On Sheet 5 we will draw a different type of diagonal drawing. These ones are dash dotted lines so draw a short line (dash), then a dot, then another dash and so on. Sometimes I draw one of each, other times I will draw one dash and two dots or the other way around.
You can of course play around with different combinations. Each combination will give you a different effect. To see the difference, use marking tape to stick the sheets on the wall, then stand back. When you stand back the different lines and marks you have places next to each other "fuse" into one effect.
You can see this in the image below:
In the download you will see that I have added a blank Practice Sheet for you to practice creating different textures using creative marks.
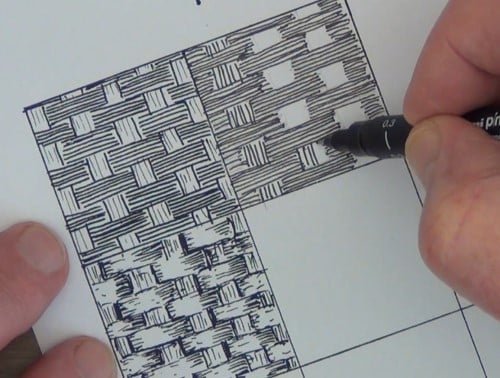
On Sheet 6 you can practice creating a complex weave texture.
Some of these exercises require concentration. Especially with textures like this weave it is very easy to find yourself in a wrong area. A tip when recreating complex textures is to keep your finger on your reference / photograph at the place you are recreating. Your attention will always come back to the right place as you flip between where your finger and your pen are pointing.
If you make an error while recreating a repeating texture you will find that they not easy to fix. Often times the drawing has been ruined when this happens. If you are scared you are going to make a hash of it, draw it very lightly in pencil first. That way you can erase any errors before going over the pencil with ink.
Fixing Pen & Ink Mistakes
As mentioned before once you have placed an ink mark on paper, it is very difficult to remove the mark.
You don't want to use anything that will damage the paper as that will eventually result in a dirty patch on the paper.
If you are drawing using a pigment ink that lies on top of the paper, I have had limited success gently scraping over dried in using a scalpel to lift the ink off. You can however only do this for very small spots so that any damage to the paper will not be visible.
There are however three ways to correct mistakes that do work well.
1) Leave It
If you have made a small mistake you can often just leave it. By the time the drawing is complete nobody will even notice the mistake unless you specifically point it out to them. I always say "Zip the lip". Which means to not point out any shortcomings in your drawings because more often than not nobody ever notices them.
2) Disguise It
Another thing I often do is to work the mistake into the final drawing. For example an accidental slash in the foreground could become a bush or a bird pecking in the sand. Just use your imagination to come up with a creative way that errant mark can become an asset in the drawing.
You will be amazed how many times these disguised mistakes enhance the drawing and make them much better. These are called happy accidents 
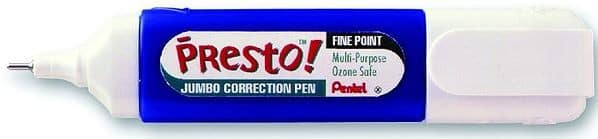
3) Cover It
If the first two options will not work then a correction fluid pen is your best friend. The lines it makes cover most pen lines perfectly and once dry become practically invisible.
Just a word of advice when using one those - correction fluid dries very quickly and that includes on the tip of the correction pen itself. As a result always get the fluid flowing properly on a scrap piece of paper before starting to fix the error on your drawing. That way you will not end up with unsightly blobs of correction fluid on your drawing.
Also wait for the fluid to dry completely before drawing over it.
Let's Start Drawing in Pen & Ink
We need now to walk the talk by drawing something meaningful.
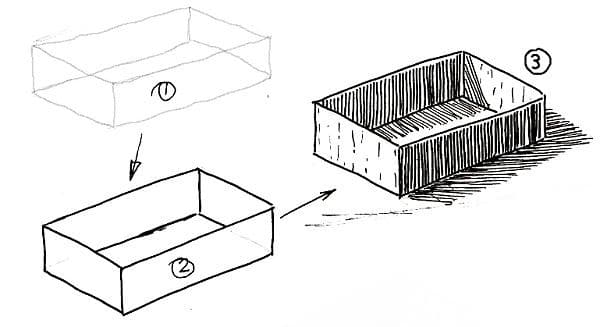
Make a sketch of a box using your pencil as shown by 1) above.
Switching over to a pen, outline the box, being careful not to fill in the “invisible” lines. You can see this marked as 2) above.
Now carefully draw in the shading lines to indicate the direction of the light. Note that the top of the box is open. If you are unsure of the shadings, place the inside sleeve of a box of matches on the table as reference. The final sketch is shown in 3) above.
Practice sketching a cylinder and barrel
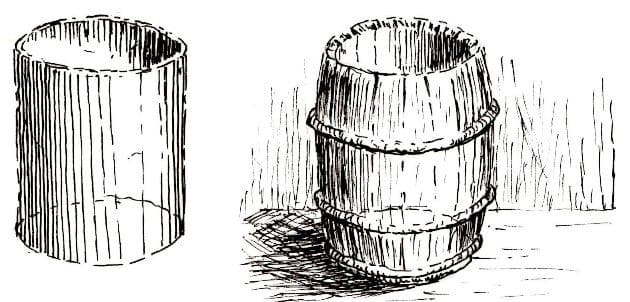
Start by sketching out the shape of the drum and the barrel softly using your pencil. If the pencil marks appear too dark, gently tap on the using your eraser. This will lighten them up.
Once you are happy with their shapes switch to the pen. As with the box, first establish the outline of the objects, then add shading to show how the light effects them.
Carefully observe how the shading of the cylinder and barrel have been executed. The parallel vertical lines start off wider apart to indicate the bright areas. They then get progressively closer together to increase the shading towards the rounded edge indicating that less light is falling on that area.
Pay extra careful attention to the ellipses at the top and the bottom of any cylindrical form. Although the above sketches are placed on a flat surface the bottoms are NOT drawn as a straight line. They will only be flat if your eyes are at the same level as the floor.
You can test this yourself by placing a can on the table. Look at the can from normal sitting height and notice that the bottom of the can appears round. Now duck down and look at the can with your eyes at the same level as the table top. Now the base of the can appears as a straight line.
Many artists fall into this optical trap because you think the can is "flat" on the table so much look flat. Don't let it happen to you. Draw what you see and not what you think you see.
Planning your drawings
It is advisable, when first learning to draw, to lay down light preliminary pencil lines on the paper as you explore the shape(s) of the object(s) you want to draw. These can be erased at a later stage if necessary.
Remember it is very difficult to erase mistakes once you have laid ink onto the paper so it is best to plan with the pencil to ensure a clean and crisp final drawing.
The newer you are to drawing the more important this is as you have not developed your eye hand co-ordination skill yet. Even as a more advanced sketch artist, you will find that complex subjects will still require corrections on the initial drawing so working with pencil at this planning stage is vital.
Take this scene for example:

You would do all your construction work using a pencil. Use as many lines and marks as you need to get the drawing correct - especially as far as perspective and size relationships are concerned.
Here you can see what my pencil construction lines look like. Note that I have darkened them considerably on the computer so that you can better see them. In reality they are very light:
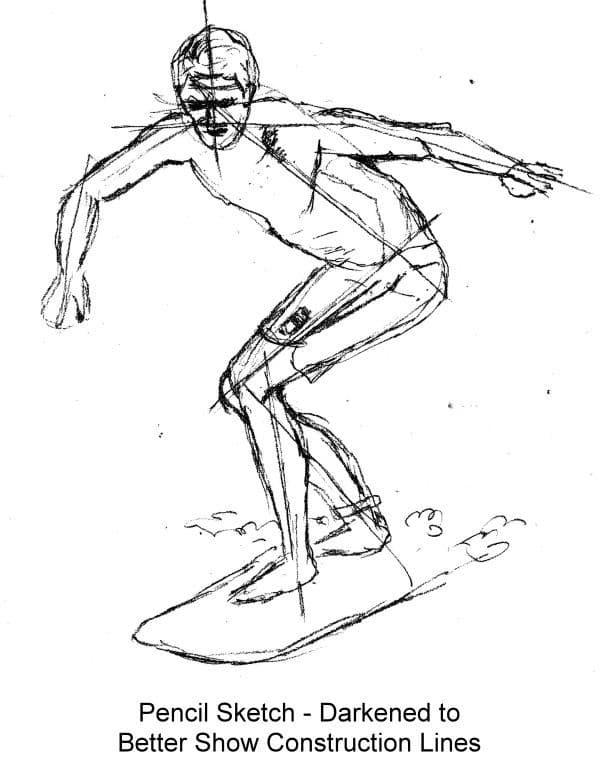
Begin by plotting in all the various angles. Check that the intersection points are in proportion to the subject matter.
Then rough sketch in the outlines as you first see them. On the first go they will not be exactly in proportion. They are just preliminary lines.
Continue refining the outlines without erasing any of the previous lines. In many areas you will have many lines next to each other. Eventually one of these lines will be the right one.
When doing the ink sketch. the trick is picking out the final one of the group of lines that is closest to the correct.
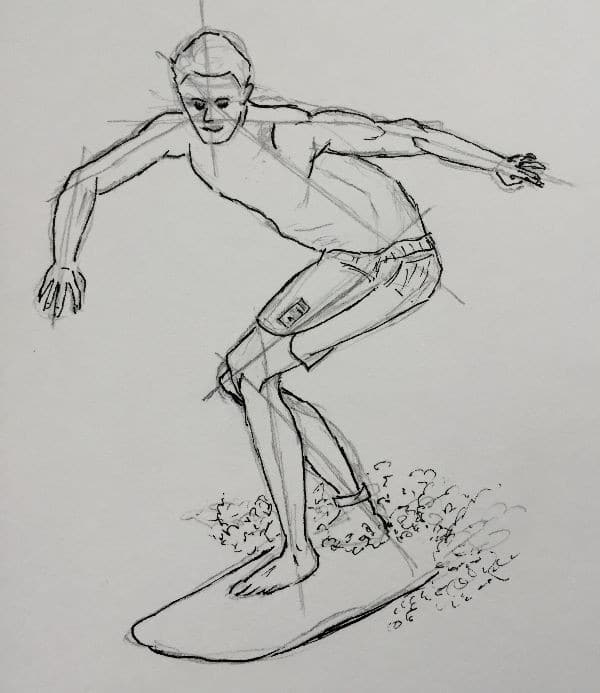
The sketch above shows the final outlines sketched in with ink. Once this is done, the rest of the ink work can begin.

Here is a close up of the head so you can see how I have picked out the correct lines using ink in order to construct the correct outline of the surfer.
On completion, all that needs to be done is to erase all the pencil lines if you are making a final drawing. Don’t erase them in your sketch book, they are there for reference.
Completed Pen & Ink Drawings
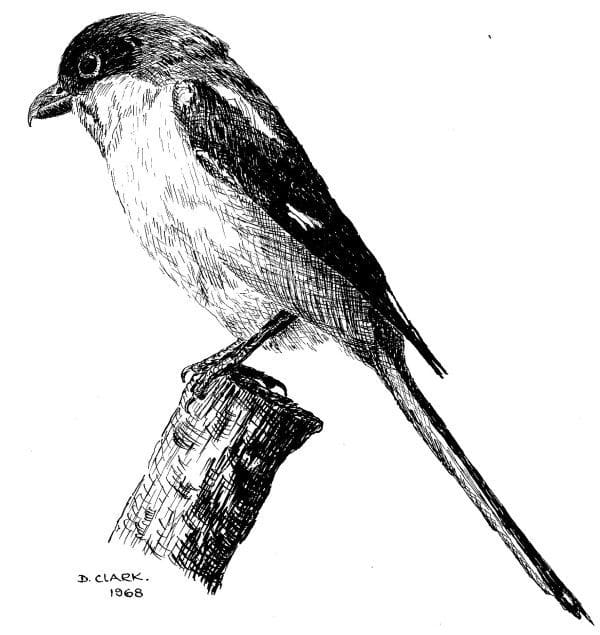
Now that you have a grasp on the basics of pen and ink drawing, I want to show you a few of my own drawings for encouragement.
Never doubt your artistic abilities. Every accomplished artist has spent hours and hours at the drawing board honing their skills. Perseverance is the name of the game. I am essentially a self-taught artist. Only in later life did I attend a few courses to pick up some extra tips and tricks. If I can learn to draw, so can you.
You are however lucky that there are places like this available where you can quickly advance your skills. Feel free to follow the rest of my pen and ink classes if you wish.
When drawing with pen and ink, the secret is to take you time at the beginning of every picture. Make every stroke count. Only add that which is necessary. Once the line has been drawn, that’s it! Build up the lighter areas slowly because it is very easy to go too dark.
Tip:
Work from light to dark. Then add the darker areas, not forgetting to leave out the highlights.
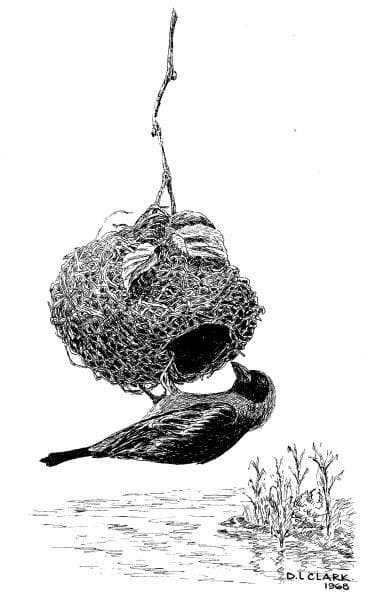
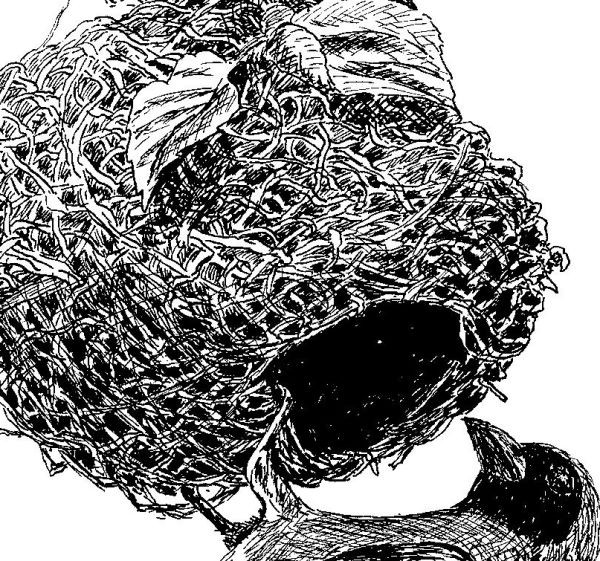
All the main strokes must follow the contour(s) of the subject. Any line to the contrary will distract from the drawing as well as the viewer’s eyes. Keep your lines to the absolute minimum.
In the close up image of the nest below you can see how the mains strands have been detailed and the rest have merely been suggested:
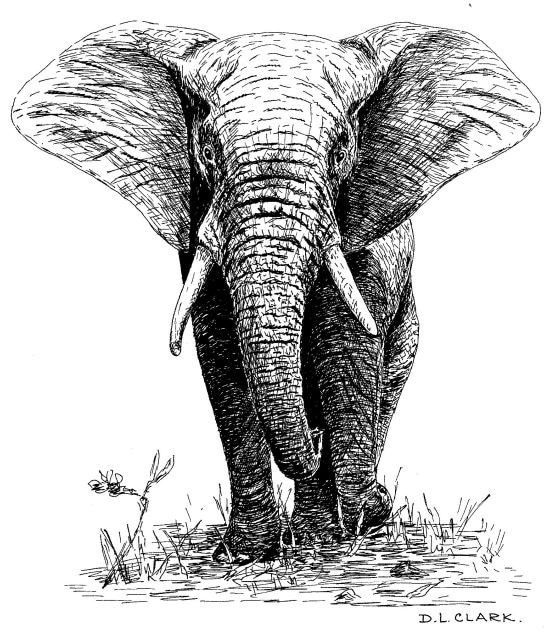
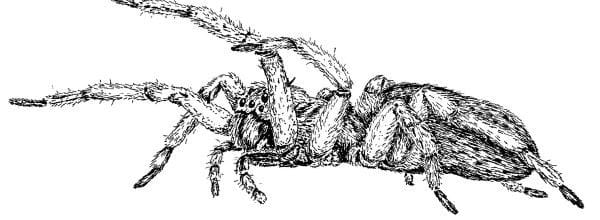
I hope the image below doesn't frighten you too much, but I wanted to show you the beautiful fine detail you can get when using the mapping pen.
Years ago I belonged to a spider club so we would go out hunting spiders in the bushveld, then photographing them. I would then use the photographs to draw the various spiders we caught.
I hope these drawings have inspired you to continue your pen and ink drawing journey. It is a fun one and I would love for you to join me as I show you then ropes.
You can follow the next class in the series by clicking the button below. In this class I will show you how to create depth and dimension in your drawings by creating tonal ranges.
Click the button below to view the real time follow along version of this class:
Pin Me