Short Class Video
Class Tutorial
Drawing the background
Use a cloth dipped in graphite powder to smudge in some random contrasts in the background.
To keep the background out of focus, ensure you don't have any hard edges.
Soften any hard edges by brushing them with a soft brush.
Areas that need to go lighter can be lightened using a kneaded eraser.
At the end of the day you want a soft mottled effect.
You can now use your cloth to lay in the basic tonal values on the owl.
This will give you a good feel for where each feature on the owl is positioned.
If you are scared you are going to lose any of tour edges, then lift out the edge using your pen shaped eraser.
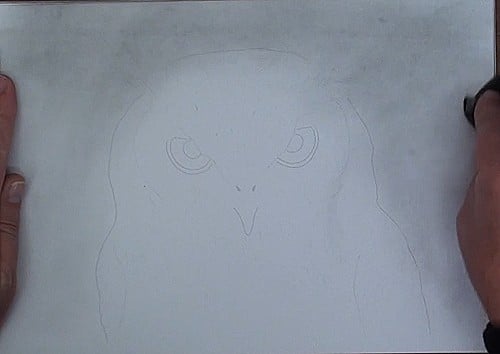
Drawing the head of the owl
I like to start at the center of the face, you can start anywhere with this drawing it doesn't really matter.
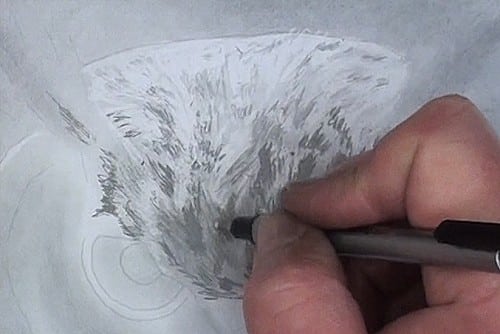
To draw the feather effect you will need a very sharp point on your pencil.
I am using a chisel shaped point as that keeps the point sharper for longer.
Start off by drawing in the dark feathers using a stabbing or chopping motion.
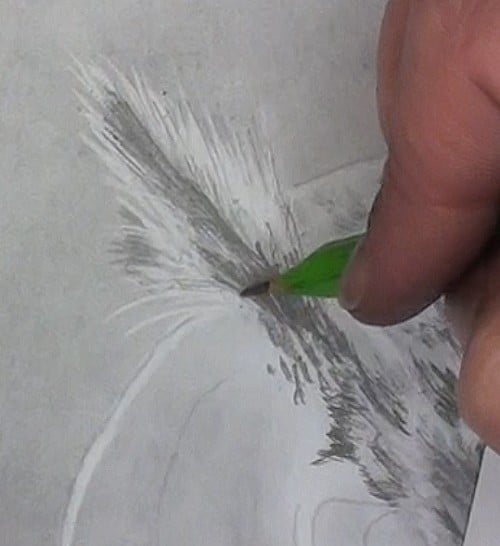
Then lift out the lighter feathers using your pen shaped eraser. Using a flicking or chopping motion.
Gradually make your way backwards, you will notice that the dark feathers appear lighter and lighter. To recreate these tonal values, press lighter and lighter on the pencil as well as change to harder pencils.
I also want you to notice how I point to the place on the reference photo that I am busy with.
This allows me to draw more accurately and quicker as I don't have to keep figuring out where I am drawing.
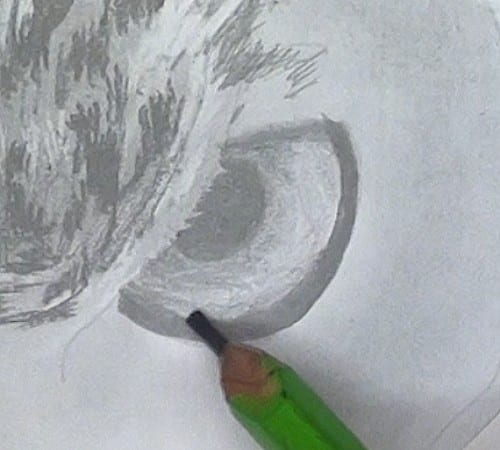
Drawing the ear
For the ear you can use a long flicking motion to draw and erase the hairs.
If your erased hairs don't have enough contrast to stand out against the background then you can carefully darken the areas between the hairs.
Just be careful though to fade this color out so you don't end up with a halo effect.
For the ears, block in the pupil and the ring with a
6 or 8B pencil. Then just add a basic shading to the iris, to indicate the eyebrow casts a shadow.
Notice how I erase a few overlapping feathers to indicate distance between the eye and eyebrow.
Drawing the eye
To show the ring around the eye concentrate on getting the contrasts correct.
You will see that the feathers are much longer in this area, so use a longer flicking motion to draw them.
What is really important here is that you get the directions of these hairs correct.
They must radiate outwards at right angles to the eye.
Drawing the beak
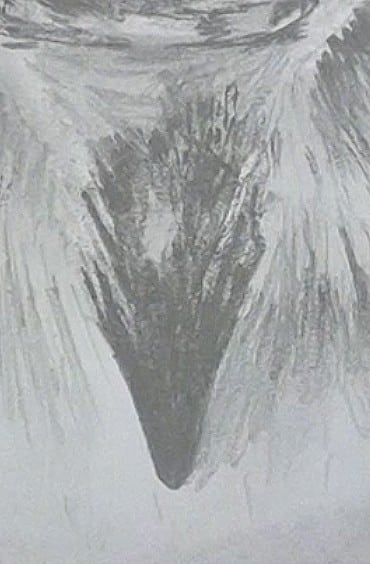
For the beak, start at the tip as that is most defined. Then negatively draw the overlapping feathers being careful to leave that lovely reflection on the beak.
Well done the hardest part of the owl is complete.
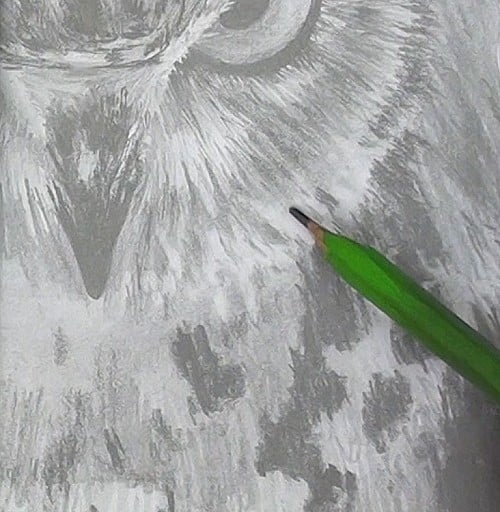
Drawing the feathers

As the face is the focal point, we won't add as much detail into the wings and body. We will simply suggest some detail.
To do this start by scribbling in the dark markings on the feathers. Don't try to get it perfect remember each owl is unique.
Can you see that I am trying to draw a feather effect, these are really rough quick scribbles.
To simulate a feather effect, erase some lines then flick in more lines between dark markings.
Now stand back and compare your tonal values and adjust if need be in order to show the shape of the wings and body.
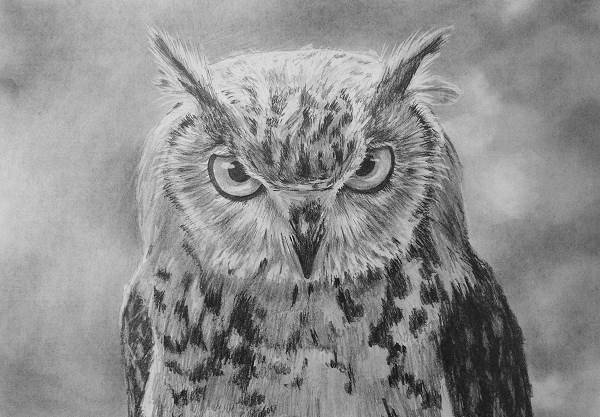
Drawing in the finishing touches
We now need to show the tie in between the face and the body.
These feathers are quite fluffy so use your kneaded eraser to lift out the highlights in the feathers as this will give you a soft edge.
Then flick in the shadow cast by the feathers.
We can now complete the drawing by adding a few fly away feathers at the edges of the owl as well as by lifting out the reflection of the sun in the owl's eyes.
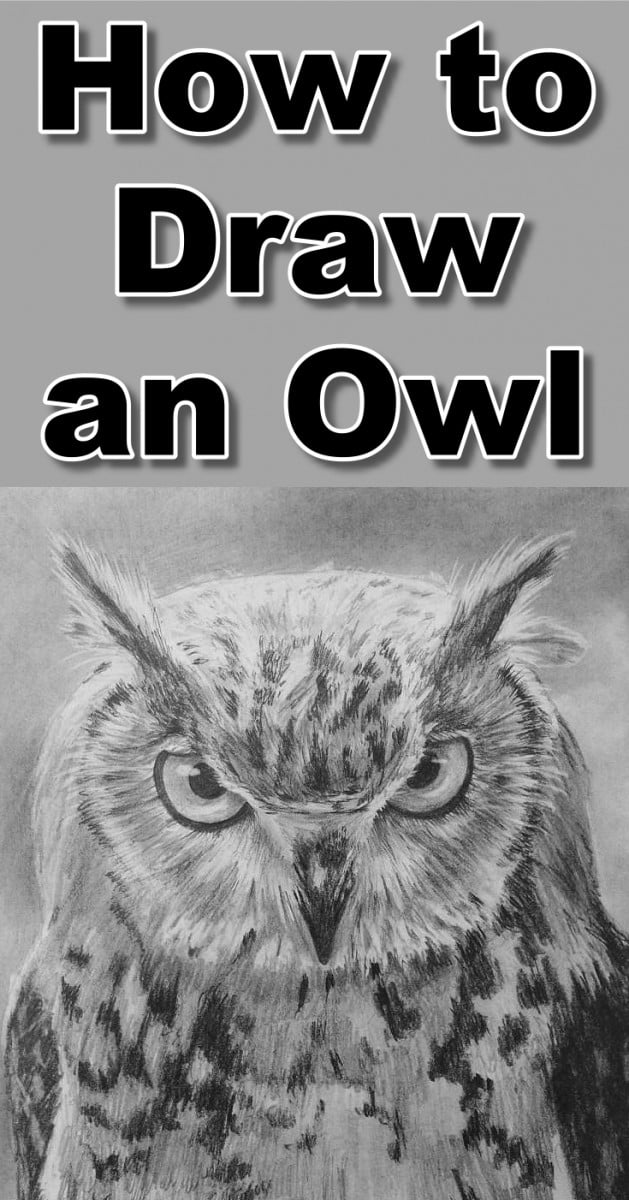
Final drawing
Click the button below to view the real time follow along version of this class:
Pin Me