Short Class Video
Class Tutorial
Drawing the outlines of the Gorilla
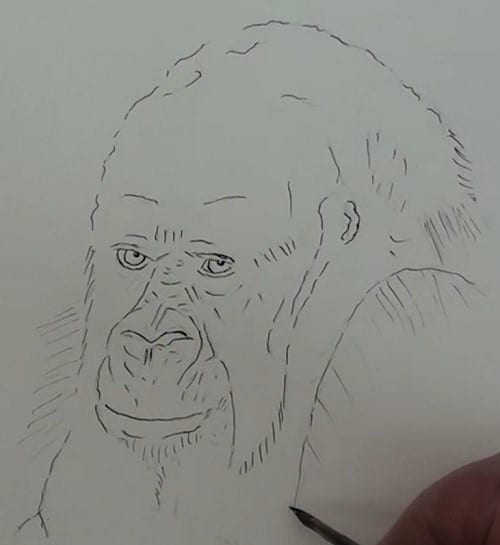
Add short wavy strokes along the top of the head and smaller lines to represent the fly hairs at the edges. Outline the eyes and the main marks around the face. Sketch the main lines of the nose and mouth and chin.
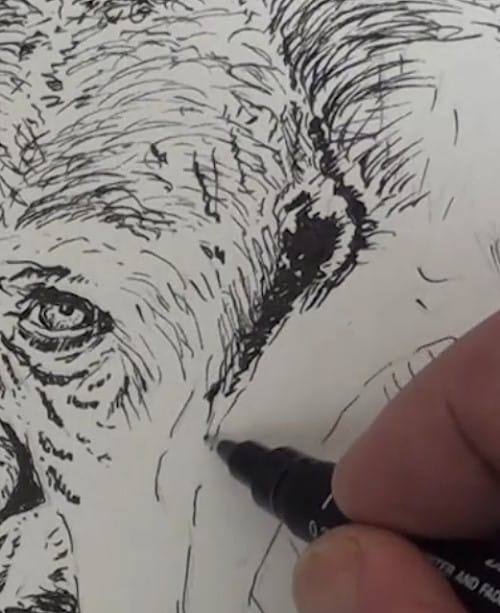
Drawing the eyes
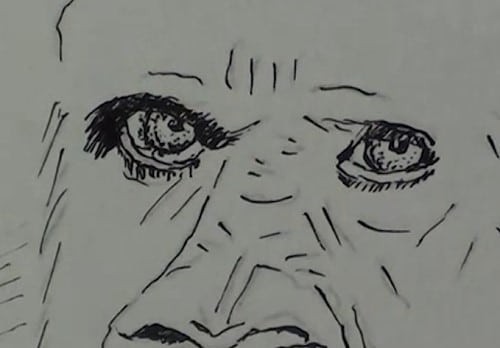
Add the eyebrows and surround. Be careful in not adding to many dots in the eyes.
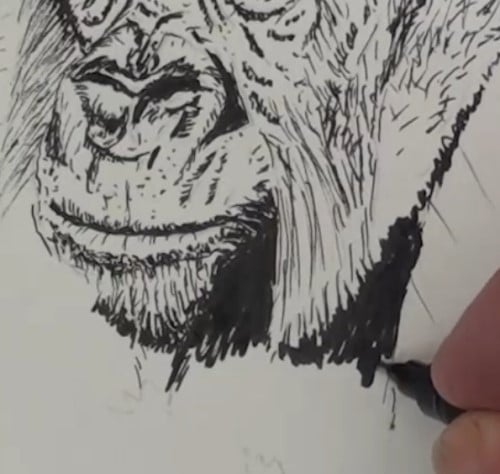
Drawing the nose and mouth
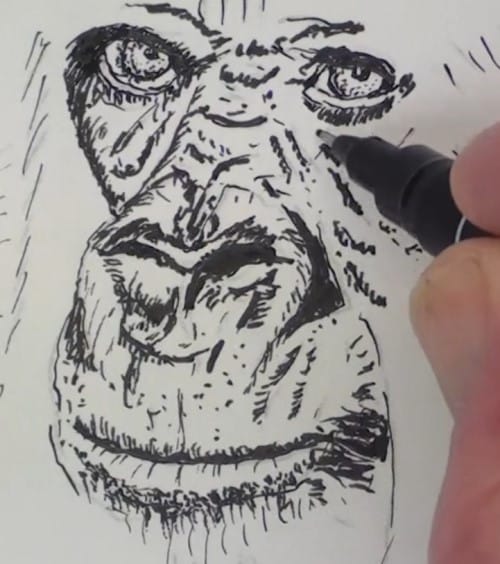
Fill in the darks in the nose and the deep shadows of all the skin folds, which the Gorilla has lots of. Darken up the mouth shadow and add all the small creases of the lips. Spot in the shadow below the lower lip and the corner of the lips.
Add all the small creases around the nose and the lines which show up the rounding or shape of the nose area.
Use the same technique we used for the mouth and nose to draw in all the creases and marks around the eyes.
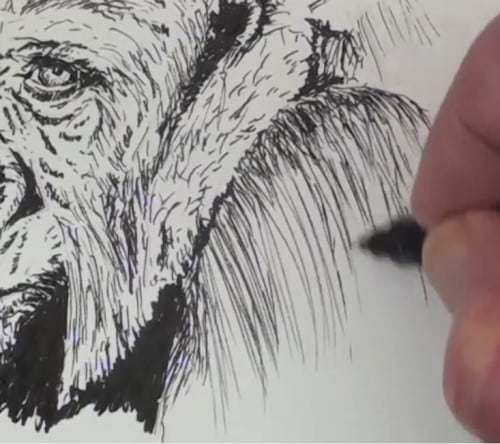
Drawing the top of the head

Pull the strokes outwards and downwards for the cheek hairs. Rough in all the short hairs on top of the head. Curve the strokes to indicate the shapes. Build up the various fold areas and the direction of the hairs. Be careful not to add too many strokes in the lighter areas. As you work along, add guide lines here and there to help you keep the head shape.
This area of the forehead is much lighter than the rest. Notice how these curved lines separate the forehead from the rest of the large head.
Drawing the ear
The ear is very small and we can see only the top fold. There is quite a deep shadow around it. Draw a series of small lines for the cheek area. Mark off the shoulder fold and draw in the lines at the neck fold as well as the long hairs at the side of his mouth.
Drawing the chin
The Gorilla has a hairy chin and we need to show this. Darken up the shadow under the chin and carefully show the light colored hairs of the goatee. Darken up the other deep shadow. You will notice that I do minor touch-ups every so often.
Drawing the shoulder
We need to compare these pen strokes against the reference photograph, they must follow the hair directions The top section is a series of short curved strokes to indicate the rounding of the shoulder. Add also to the left side.
Unfortunately I tend to jump around quite a bit. I have just seen an unfinished area on the side of the head. While I'm there I touch up other areas that needs darkening up. Complete the chin shadow and the left edge of the chest.
Adding detail to the head

Use the fine pen to lightly cross hatch over the top of the head. Carefully note where the light and dark areas are. Don't overdo it though. Continue to build up the tonal ranges over the whole head and the face area, finishing off around the mouth area. Being a bit of a perfectionist I have decided to add a few more lines in the face area.
Please bear with me as we come near to the end of this drawing and my habit of jumping around while drawing. My eyes are constantly comparing what I am busy drawing against the rest of the drawing as a whole. The chest has very short hairs so we can just crosshatch this area. Some more crosshatching below the eyes. Finish off the right shoulder.
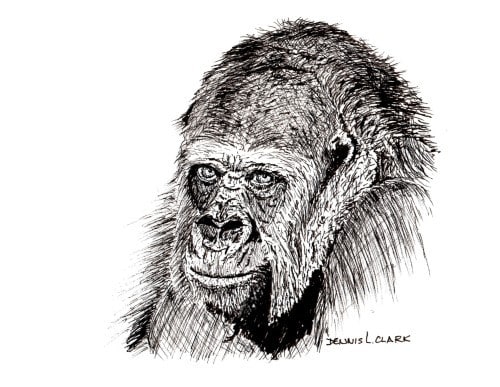
Final drawing
Click the button below to view the real time follow along version of this class:
Pin Me