Short Class Video
Class Tutorial
Drawing the hair
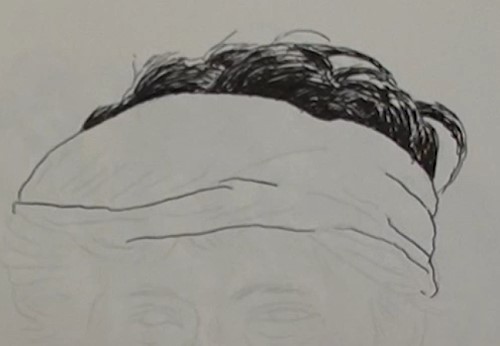
First draw a few lines with a 0.1mm Indian Ink pen to outline the head cloth and then plot in all the various directions of the hair as well as a few stray or fly hairs. Once that has been done, use a 0.3mm pen to add in all the darker areas. Leave some highlights and gaps.
Head cloth - Draw in the basic lines and folds of the head cloth and indicate the protruding hairs.
Drawing the face
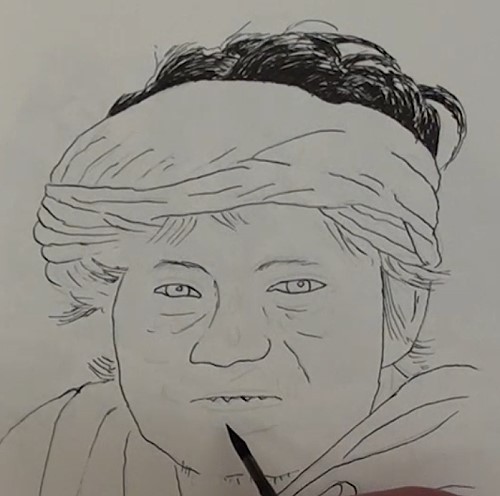
Plot in the eyebrows and the eyes and their highlights. Outline the nose, ears and the face.
Draw the basic outlines and folds of his covering and then the lips and teeth.
Drawing the head cloth

With the 0.3mm pen we can now begin to define the shadows of the folds. Adding these darks first brings out the basic shape of the head band. It also helps when we begin shaping it with the thinner lines. But before we do that, add in all the dark protruding hairs and the shadow caused by the head cloth's lower fold. We need to add in a few more of the smaller folds.
Because the head band is of a light color we only need a few well-placed cross-hatching lines. Notice the curved lines that add to the shape. Continue shaping in the right-hand side. Darken the bottom left some more.
Drawing the cape
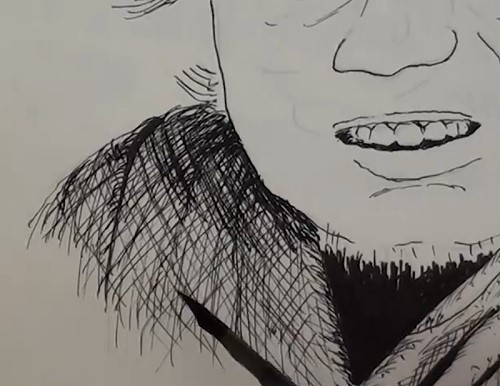
He had this blanket-like cape, so we have not finished drawing folds yet. As previous, add in all the dark shadows first that show up the folds. Darken under the chin but leave space for us to finish his sparse beard later on. With short curved and straight lines lightly draw in the fold shapes.
Continue on to the left side. Because this is in shadow, we can go to town quite a bit with the cross-hatching. It is much darker next to the head.
Drawing the eyes and teeth
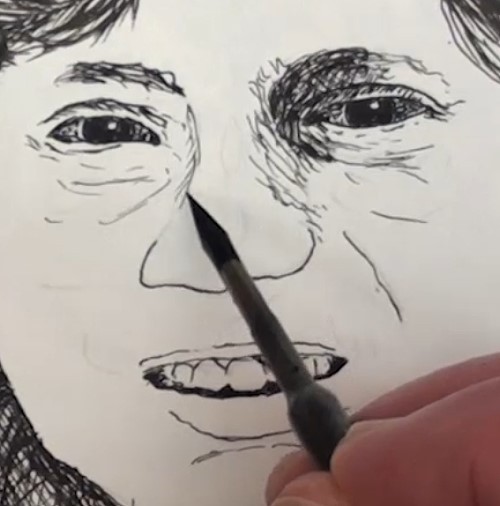
Block in the irises and the highlight and plot the eyebrows and the shadow area of the eye sockets. Add only a few dots in the whites of the eyes. Add the very light shading on the side of the nose. Do the same to the lefthand eye. Darken the shadow of the nostrils.
Teeth - Tidy up the gums and add some subtle shading to the teeth.
Drawing the face shading
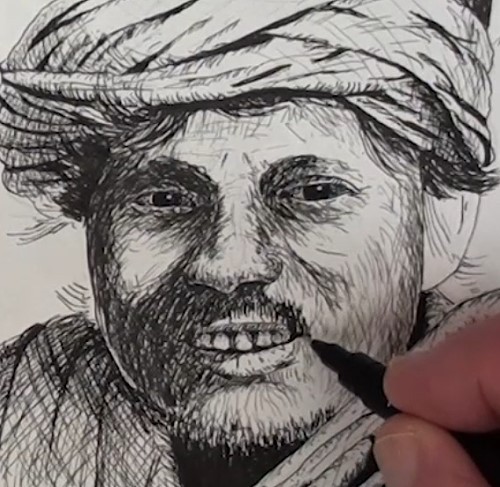
Face - Carefully plot in the guide lines that reveal the shape and contours of the face. This drawing is actually a sketch and not intended to be photo realistic. There are going to be many lines and cross-hatchings added because he is dark skinned and we need to show him as such.
Lips - Indicate the lip with a series of small curved lines. Plot in the shadow caused by the nose and rough in his moustache.
Touch up the upper lip and finish off the beard.
Face shading - Now is the time to do the final shading of the face remembering that the main lighting is from the top right. Again we are using lines and cross-hatching to accomplish this: Add the deep shadow to the left side of the face. Darken up the shadow caused by the nose. Work a bit more around the mouth area.
Check the shadow around the eye.
Spend the next few moments checking, against the reference photograph, and touching up areas that need some extra tweeking.
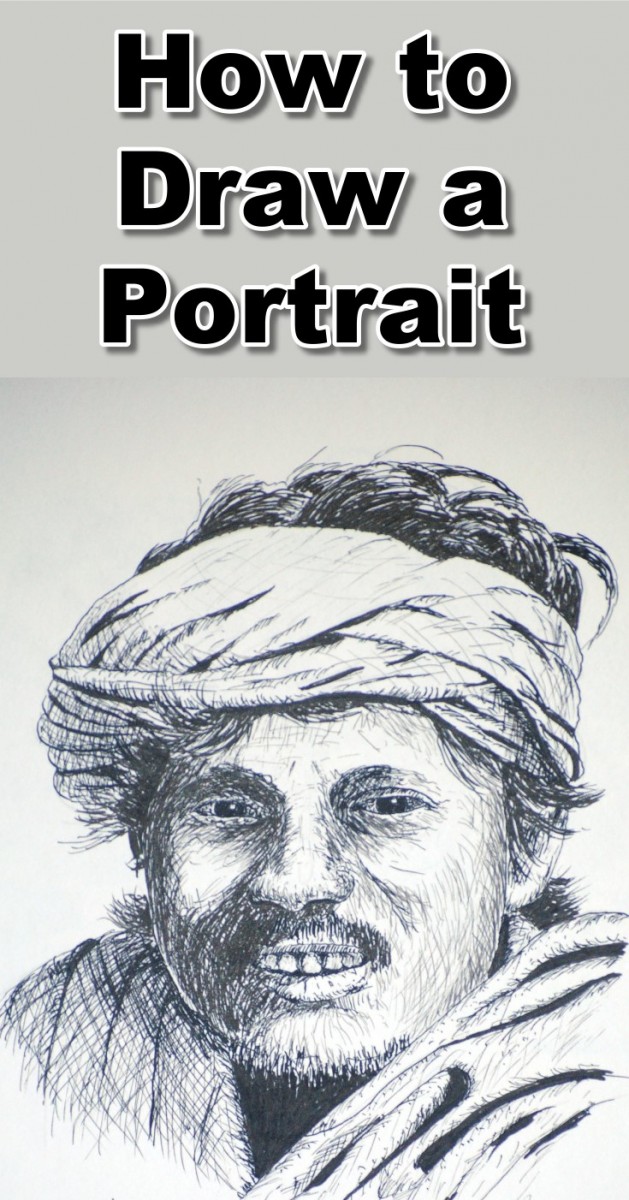
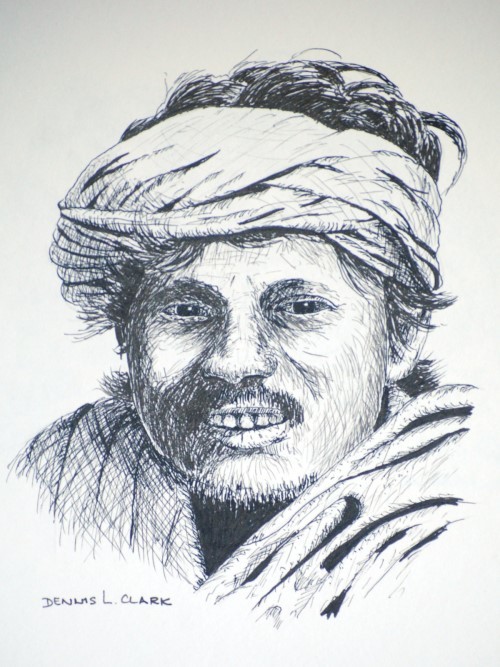
Final drawing
Click the button below to view the real time follow along version of this class:
Pin Me