Ready to mix a little green into your palette? We're not just talking about the color. This is all about stepping up your art game to be kinder to our planet. Welcome to "Sustainable Art: Guide to an Eco-Friendly Studio," where we’re all about swapping out the old for the new – in an earth-friendly way, of course.
Think of this as your go-to guide for making cool art without leaving a mark on the environment. We're diving into the classic mantra of Reduce, Reuse, Recycle, but with a twist that fits right into your art studio. Whether it’s figuring out what to do with that half-used tube of paint or finding the best use for your old canvases, we’ve got some neat tricks up our sleeve.
So, if you’re ready to give your art a green makeover and do your bit for the planet (and hey, maybe even for your own health), you’re in the perfect spot. Let’s explore how your art can not only look good but do good too.
Reduce

Note: this page contains affiliate links to products on Amazon. If you purchase through the links I will earn a small commission for the sale at no extra cost to you.
Who knew that one of the simplest ways to help our planet could start right in your art studio? It's all about getting smart with what we use and how much. Think about it: every time we opt for just enough art supplies instead of stockpiling them like there's no tomorrow, we're not just saving space in our studio; we're also reducing waste and saying a big 'no thanks' to unnecessary manufacturing processes that harm our environment.
Before you click 'buy' on that bulk order of paints or paper, take a moment to consider what you really need. Got a project coming up? Plan it out and purchase accordingly. This isn't just good for the planet; it's also kinder on your wallet. And of course, let’s not forget about those nifty accessories like tube squeezers and pencil extenders. They’re like the unsung heroes of the art world, squeezing out every last bit of goodness from your supplies and ensuring nothing goes to waste.
In a nutshell, adopting a 'reduce' mindset means making those small, thoughtful decisions that add up to a big impact. It’s about being a bit more mindful about our resource use and challenging the old adage of 'more is better.' After all, in the world of sustainable art, less really is more.
Reuse
Before you throw away paint, see of you can reuse it. Left-over paint on your palette can be scraped together to form a mid-tone colour ideal for toning your next board.
Save a few lids when you dispose of the empty paint tubes. Lids sometimes crack and it’s good to have spares to hand.
Use both sides of a piece of paper. Paper is an expensive and scarce resource. Especially when sketching for practice or doing thumbnails use the back as well. Also when printing at home, think about printing double sided to halve the amount of paper you use.
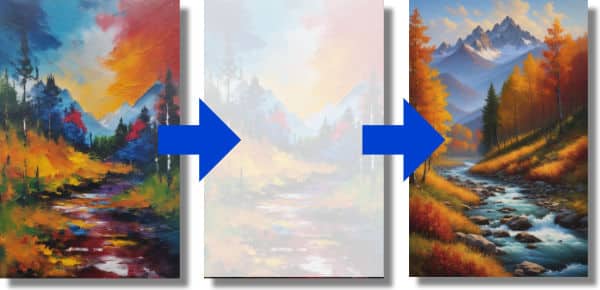
Got a painting that didn’t turn out as planned? No worries, it can get a second life. Here's how:
Acrylic Painting
Start by giving it a gentle sanding if it’s got thick, textured paint (like those impasto peaks and valleys). Once it’s smooth, cover it with a layer of gesso to prep it for its new journey. Just a heads-up: when you’re ready to bring new life to this canvas, stick with the same type of paint as before. Mixing mediums could lead to some tricky issues down the line.
Oil Painting
Lightly sand the previous painting to get rid of the peaks & valleys as well as to rough up the surface. This rougher surface gives the new oil paint some tooth to grip onto. Then before you start to paint oil out the painting using artist's linseed oil.
Important: Just a heads-up: when you’re reusing a previously painted canvas, stick with the same type of paint as before. Mixing mediums could lead to some tricky issues down the line.
Now your old canvas is ready for a fresh masterpiece.
Recycle
Instead of using expensive canvases to practice on, save the cardboard cereal boxes or cardboard from other packaging you may come across. Coat with gesso to seal the surface - (paint both sides and it won’t buckle) - and you can use them for studies and to try out new techniques.
Don’t waste paint. If you’ve squeezed out more paint than you used; put what’s left back by holding the paint tube upright and (gently) tapping it on the table until the paint falls back into the tube leaving a space at the top. Using your palette knife, transfer some of the excess paint to the opening of the tube and gently repeat the tapping. The excess paint will ssink back into the tube.
If your next oil painting session is coming up soon and you plan to use the same colors on your palette, pop the palette into an airtight container and slide it into the freezer. This way, when you're ready to get back to painting, simply take the container out about 30 minutes before you start. The paint will be as good as new. Personally, I've kept paint fresh this way for several weeks.
Acrylic paint can be kept fresh by storing in a stay wet palette if your next painting session is not too far off. Large amounts of premixed acrylic paints can be stored for several days in small airtight plastic containers.
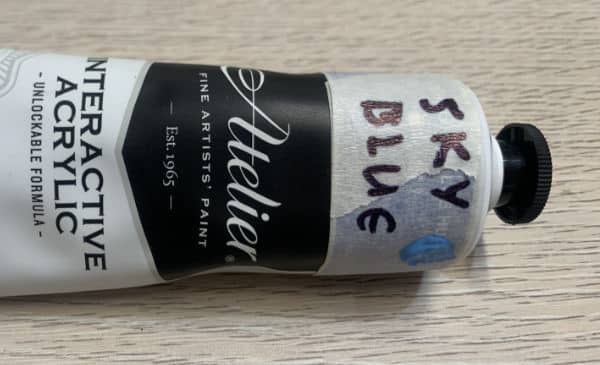
You can also rinse out your empty acrylic tubes if they are made from flexible plastic (like the Atelier brand paints) and use the tapping method above to put a mixed color into the empty tube. That way it will remain sealed as if it was a bought color. You can mark the tube by writing on a piece of masking tape which has been wrapped around the tube label.
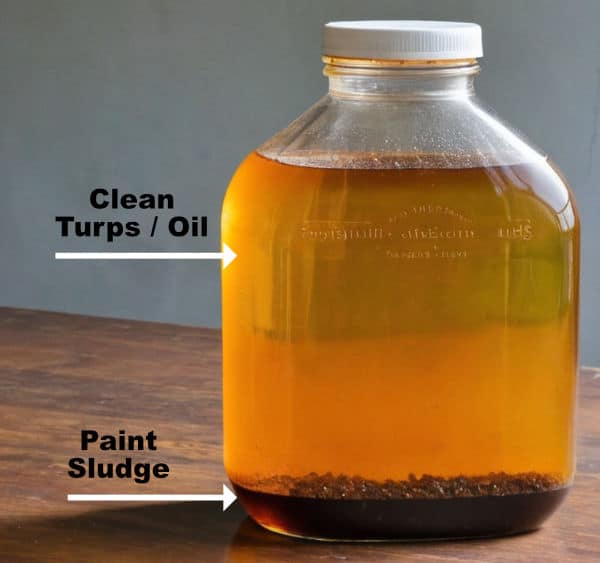
You can recycle the turps / oil you have used to wash your oil paint brushes in during a painting session.
At the end of the session pour the dirty liquid into a container and leave it for a week. The paint particles will settle at the bottom of the container. You can now pour the clean liquid over into a different container which you use at the start of a painting session.
By doing this you can recycle a large (5 liter) container of turps for a year or more.
Eventually your dirty container will become too full of sludge. You can then take the container of paint to a recycling depo for reuse / correct disposal.
A Word About Pigments
All art materials consist of a pigment and a binder. The pigments are the same, irrespective of the binder. For example, cadmium red pigment is the same if it’s in a tube of watercolor, oil or acrylic paint, a pastel or even a colored pencil. The binders however are different. Oil paints use drying oils as the binder, acrylics use acrylic polymer resin and water, watercolors and pastels use gum Arabic, colored pencils use wax etc.
Some pigments are toxic and should be handled with care. Some of the commonly used toxic pigments include the cadmiums, cobalt violet and cobalt blue, flake or lead white, burnt, or raw umber, chrome green, orange and violet, vermillion, Prussian blue and chrome orange. Many others are also considered toxic but just less so.
To be toxic, pigments must enter the body either by ingestion, inhalation, or absorption. As the quantities of pigment are usually relatively small in art materials, it should be sufficient protection to wear gloves and make sure you don’t drink your brush washing liquid instead of your coffee!
If you’re in the habit of sanding paintings as part of your process, it’s better to do this outside and wear a mask. If you use an airbrush or work with pastels, you should also wear a mask to protect against inhaling air borne pigment particles.
Advances in paint chemistry have led to the development of synthetic pigments which look the same as the traditional toxic pigment but are safe to use. These synthetic versions often have the word HUE behind the colour name.
Harmful Additives
Unfortunately, it’s not just the pigments but also the solvents and binders, mediums and additives that artists use to manipulate their medium that can also be toxic to the artist and harmful to the environment.
Possibly the least eco-friendly art supplies are oil and acrylic paints, but there are ways to reduce their harmful effects on the environment. Let's look at some of them now.
Acrylic Paint
Because water is most often used to thin acrylic paints, they are considered non-toxic which is not entirely accurate as some of the pigments are toxic. It’s therefore best not to allow them to come into contact with the skin by wearing gloves.
The problem with acrylic paint is the negative affect it has on the environment if carelessly used. Acrylic paint consists of pigment suspended in an acrylic polymer and water. When the paint is allowed to dry, the water evaporates allowing the molecules of polymer plastic to stick together forming a skin which has the pigment particles suspended in it. While this is advantageous when painting a picture, it harmful when water containing the paint gets into the environment or your plumbing system. The plastic residue takes thousands of years to break down and once in solution in the water supply system it can be ingested by animals, fish and eventually even humans.
It’s crucial to dispose of acrylic paint contaminated water waste properly as it’s potentially very harmful to the environment.
How to dispose of your dirty acrylic painting water
The first step is to cut down on the amount of paint-contaminated water you generate by never washing brushes under the tap but in small amounts of water in containers.
Don’t load too much paint onto your brush. Use a palette knife for mixing colour on your palette. Clean the knife by wiping on a cloth then carefully load your brush, avoiding getting the ferrule (silver part) and even further up the brush covered in paint which can’t be transferred onto the painting surface and ends up in the wastewater.
When you’re done painting, or want to change colours, remove as much paint as possible from your brush by wiping on an old rag. Rinse the dirty brush in a small container of warm water to remove most of the paint and then rub the bristles in soap until a lather forms. Rinse again in the warm water and repeat until the lather is clear, then transfer to another small container of cold water for a final rinse.
It’s best to have different brushes for dark and for light value paints. It’s almost impossible to not contaminate a light-coloured paint with a brush that was previously used on very dark colour – even after rinsing. If you use dedicated brushes for lights this problem is reduced.
At the end of your painting day don’t pour paint contaminated water down the sink. Here are suggestions for safe ways of disposing of it.
Method 1
Buy a bag of cheap kitty litter, (the inexpensive clumping kind), and fill a bucket 1/’4 full. Pour the washing and rinsing water into the kitty litter which will absorb the moisture and capture any acrylic residues thus making it easy for you to lift it out the clumps of acrylic residues that are now inert and dispose of them in the garbage.
Method 2
If you live where there’s lots of sunshine, you could pour the water into a flat plastic bath and let the sun evaporate the water, leaving only a skin of dried paint which can easily be peeled off once it’s thick enough. (Be sure to put your container out of reach of children and animals and preferably cover with net or a similar porous fabric to prevent insects flying in.)
If you’re creative, use these skins in your next painting as a collage otherwise dispose of them in the garbage as they are now inert and won’t harm the environment.
Method 3
You can also use this method as explained by Golden Paints:
Oil Paint
If you use solvents like turpentine or mineral spirits while painting, don’t treat them like you would water in acrylic or watercolour painting. Close the container with the solvent immediately after use. Don’t leave solvent containers open as you paint or leave your dirty brushes standing in solvent which allows toxic fumes to escape and build up in the air you’re breathing.
Even with the odourless varieties, keep the container closed when not in use as fumes are still emitted even though to can’t smell them. Ideally have a fan going to blow away any fumes which may be present.
Solvent Free Oil Painting
A safer, and more environmentally-friendly option, is to do away with solvents entirely. This is very possible and only requires a bit more care.
Lavender spike oil is the oil equivalent of a solvent and paint dries almost as quickly as when using turpentine. It has a pleasant smell as the name suggests, and, as it’s an oil not a solvent, there are no harmful fumes. A brush cleaner using spike oil is made by Chelsea Classical Studio.
If Lavender Spike oil isn’t available where you live, use linseed oil instead which is the quickest drying of the oils. It’ll effectively thin paint, but the paint will take longer to dry than when using Lavender Spike oil.
Some oil painters have qualms about linseed oil yellowing whites when mixed, Chelsea Classical Studio now produces a naturally-produced linseed oil (no chemicals or heat used) which is virtually colourless.
If you like to start your paintings with a very thin wash and using large amounts of linseed oil-thinned paint would take too long to dry, use water-based oils or acrylics for this part of your process then revert to normal oils later. You could also apply the first layers of oil paint with a rag instead of a brush where it’s possible to create gossamer thin layers that dry quickly.
Sketch your initial drawing with oil-thinned paint as its easy to wipe away if you need to make alterations.
There is a video on our Youtube channel showing you how to paint sovent free, go check it out.
Cleaning Brushes During Painting
Turpentine or mineral spirits has been traditionally also used to clean brushes when switching colours, but there are more environmentally friendly and healthy ways to do this.
Before you start the cleaning process, make sure you’ve removed as much paint as possible with a rag.
Then, instead of swishing your brush in turps, substitute Lavender Spike oil or a drying oil instead. You can choose from linseed, poppy, clove, safflower or walnut. Pour just enough oil in a small container to cover the bristles up to the ferrule when you dip your brush.
Thoroughly coat the bristles with oil and using a rag, (more eco-friendly to reuse material scraps than to use paper towels), manipulate the bristles between your fingers to dislodge the paint. Repeat until the rag remains clean.
To speed up the process, have a wire coil, plastic grid, cut off tea strainer or even a rock in the oil container that you can rub your brush against to help dislodge the paint. Don’t bash it directly downwards on the bottom of the jar or you’ll bend your bristles.
It’s a good idea to have 3 containers of oil for cleaning your brushes. Arrange them from dirtiest to cleanest. You start with the dirty container, wipe the brush on the cloth, rinse in the less dirty oil, wipe on the cloth then finish by rinsing in the cleanest oil. That way you can paint longer with cleaner brushes. At the end of the painting session the dirtiest oil is recycled as previously described. The second container becomes the dirty container for your next painting and so on.
At the end of your painting session clean your brushes in baby oil.
Baby oil is a mineral oil which doesn’t dry completely over time as do the drying oils mentioned above. As some of the oil will remain on the brush don’t use baby oil to clean your brushes while painting, or it may interfere with the drying time of your paint.
When you have done painting for the day, dip your brushes in baby oil and repeat the cleaning process above. The nice thing about baby oil is that it is non-toxic and cheap.
If you prefer, you can use soap and water on your brushes after first cleaning in baby oil. The rinsing water can be safely flushed down the sink.
Wipe your brushes well with a rag and set them aside for your next painting session. The bristles will remain conditioned, and ready for your next painting session.
Mediums
Mediums are often added to paint to change its properties. These mediums can be toxic so be sure to carefully read the labels.
Paints to which mediums are added before being placed in the tubes, like the alkyd or fast-drying paints which contain alkyd resin and odourless mineral spirits, can be toxic depending on the process the manufacturer uses to produce them.
It is possible to get an alkyd medium that will speed up drying time but is non-toxic. It is produced by M Graham and is known as Walnut Alkyd medium.
When using liquid mediums that may be harmful, avoid pouring a pool onto your palette into which you dip your brush. Not only is this a very inaccurate method of judging how much medium you add, but it also allows the harmful fumes to escape into the air you’re breathing.
Instead suck up liquid mediums with a syringe or dropper and squeeze out a few drops as needed into your pile of paint.
Soiled Rags & Paper Towels
Rags and paper towels covered with oil paint, can be fire hazard given the right conditions. They should be stored in a dedicated metal container with a lid until you can dispose of them as hazardous waste – don’t leave them lying around the studio. I use a fire bucket.
Brushes
Before leaving the environmental impacts of painting, consider for a moment the brushes you choose. Modern synthetics brushes are of such a high quality that they compare favourably with the revered natural animal hair bristle brushes like sable, squirrel, horse, goat, hog etc etc.
When you consider that the animal concerned didn’t voluntarily donate their hair but probably sacrifice their life for your paintbrush it may be more ethical to relegate these brushes to history.
Other Eco Tweaks

Replace any incandescent bulbs with energy efficient light bulbs – halogen bulbs, CFLs (compact fluorescent lamps and LED (light emitting diodes). Choose a daylight variety if you paint a lot at night.
If you make use of coloured pencils, save yourself money and help the environment by using as much of the pencil before discarding it as possible by buying a pencil extender. stick the unused end of your remaining pencil to the flat end of another inexpensive pencil not necessarily a coloured pencil, so you can sharpen your coloured pencil until there is virtually nothing left.
Don’t lick the end of your paintbrush when using watercolour. It may be tempting to create a fine point using your lips but remember there may be pigment remaining in your brush which you don’t want to ingest.
Save your empty ball point pens as they make ideal indenting tools for creating white lines when drawing with pencils or coloured pencils and charcoal.
Always read the information provided by the manufacturer about your art products. If there is no information, try checking on their website. Consider what’s going to happen to your art materials when you have finished with them. If they contain substances which could be environmentally harmful take extra care in how you dispose of them and enjoy your passion for art with a clear conscience!
Conclusion
Wrapping up our journey into the world of sustainable art, it's clear that every small step we take towards eco-friendly practices makes a big difference. Whether it’s giving a second life to an old canvas, conserving supplies, or simply being mindful about the materials we use and how we dispose of them, these practices not only benefit our planet but enrich our experience as artists.
The tips in this article are however just a start. There are many more ways to improve on the way we work so that we are doing good instead of harm. Keep looking for new and innovative ways to do that. When you find a new way, please let me know about them in the comments below.
If you enjoyed this article you will definitely love this tutorial on 5 Ways to Improve Your Paintings Without Trying.
Pin Me