One of the most powerful tools in an artist’s toolkit is the focal point. It draws the viewer in, guides the eye through the artwork, and helps communicate your intended message. Mastering focal points is essential for creating engaging artwork. In this guide, we’ll explore how to create focal points that guide the viewer’s eye, strengthen your artwork, and enhance your overall art composition.
What Is a Focal Point?
A focal point is the visual "eye candy" of an artwork—the area that stands out and naturally draws the viewer's attention. This works because the human brain craves variety. A focal point is different in some noticeable way from its surroundings, and the greater this difference, the stronger the focal point will be.
Why Do We Need Focal Points?
While you can choose not to have one, most artworks include at least one focal point. Why? Because focal points help viewers understand what compelled you to create the artwork. They give the viewer a visual path to follow, guiding the eye and making the piece more engaging and impactful.
Art is about communication, and focal points are one way to direct the conversation with the viewer.
Creating Depth in 2D
Artists work on flat surfaces but aim to create the illusion of depth. A well-placed focal point can draw the viewer’s eye past the foreground, giving a sense of layers or planes. This helps create a more immersive experience.

John Constable’s landscapes provide excellent examples of how a focal point can create a sense of depth and draw the viewer into the painting.
Can You Have More Than One Focal Point?
Yes—but proceed with care. Multiple focal points can work well if they are arranged thoughtfully. You want the viewer’s eye to follow a deliberate path, moving from one point of interest to the next.
If your focal points compete for attention, the result is visual confusion. The eye won’t know where to look first, which can frustrate the viewer. Make sure one focal point is clearly dominant, and that any secondary points guide the viewer through your composition.
The "Window on Your World"
Your artwork is like a window into your perspective. Whether you're creating deep vistas or shallow compositions, focal points help orient the viewer. Even if your painting doesn't aim for depth, focal points can still guide lateral movement across the canvas.
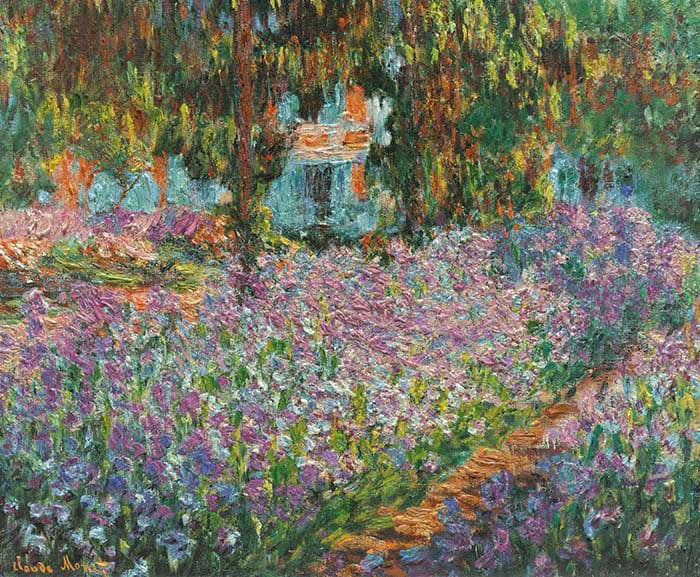
Monet’s "Irises" above demonstrate how movement and texture can guide the eye without relying on a single focal point.
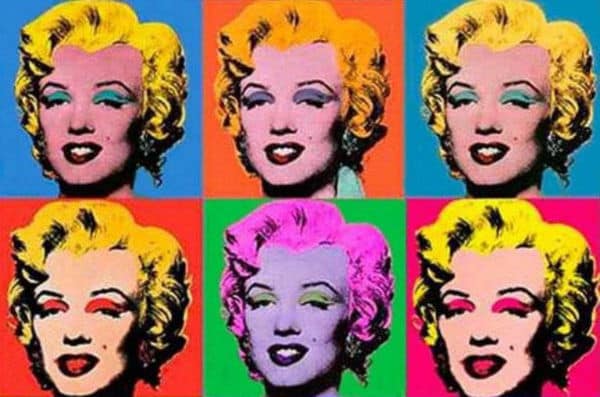
Some artists, like Monet in his "Water Lilies" series, let the movement and texture guide the eye instead of a single, strong focal point. Others, like Andy Warhol in "Marilyn", use repetition as the dominant visual strategy.
What Makes a Good Focal Point?
- Contrast: The focal point must differ significantly from its surroundings.
- Clarity: Too much detail can overwhelm. Keep it bold and simple.
- Balance: The focal point should stand out, but not trap the eye. You want the viewer to explore the entire composition.
How to Create a Focal Point
Focal points are created through contrast. Mastering these focal point techniques allows you to control how the viewer experiences your composition. That contrast can take many forms:
1. Colour
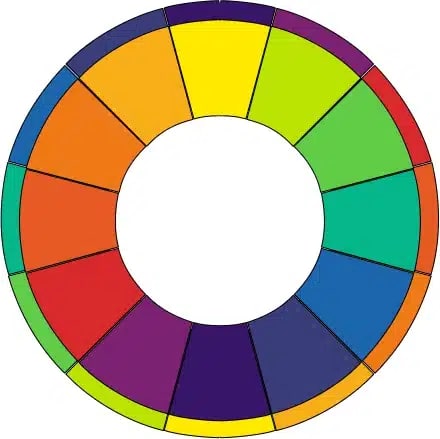
- Complementary Colours: Colours opposite each other on the colour wheel (e.g., red/green, blue/orange) naturally attract the eye. Use a small amount of one against a large area of its complement to create emphasis.
Complementary colours create strong focal points by attracting the viewer's eye to contrasting colour pairs.
- Hue: Even non-complementary colours can create a focal point through sharp differences.
- Value: Light vs dark areas draw attention.
- Intensity: Bright, saturated colours pop against dull, subdued ones.
- Temperature: Warm colours (reds, yellows) stand out against cool ones (blues, greens), even within the same hue.

2. Texture
Contrasting smooth and rough textures can highlight a specific area, even in monochrome works. The eye instinctively seeks out changes in texture, which can create a tactile sense of depth and interest.

3. Isolation
Placing an element apart from others instantly makes it a point of interest. Isolation not only draws the eye but also emphasises the significance of the isolated object in the composition.
Wyeth masterfully used isolation in "Christina’s World" to draw attention to the lone figure in the expansive landscape.
4. Shape
Unique or unexpected shapes stand out against more uniform backgrounds. Organic shapes next to geometric ones (or vice versa) attract the eye. For example, a single curved form in a composition dominated by straight lines will naturally catch attention.
5. Edges
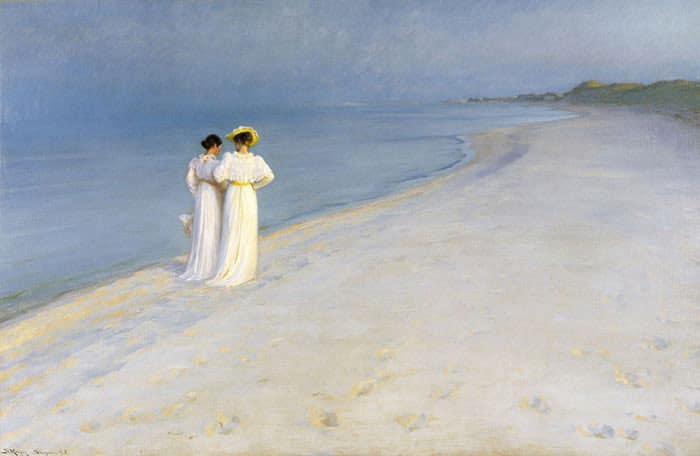
Sharp, defined edges advance; soft, blurry edges recede. Use this to control depth and draw attention. Sharp edges grab attention by providing clarity and definition, while soft edges blend into the background, creating a sense of atmosphere.
Krøyer’s painting above demonstrates how sharp and soft edges affect the focal point, drawing the viewer’s eye to the figures.
6. Scale
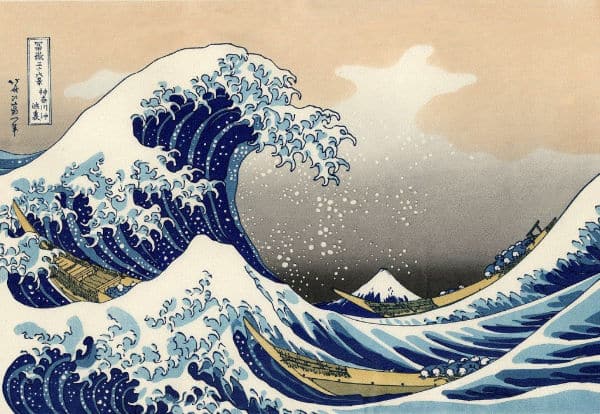
Big versus small can direct the eye. A large object in a field of small ones (or the reverse) becomes the focal point. For instance, in Katsushika Hokusai’s "The Great Wave off Kanagawa", the dramatic contrast between the small boats and the looming wave creates a powerful focal point.
7. Position
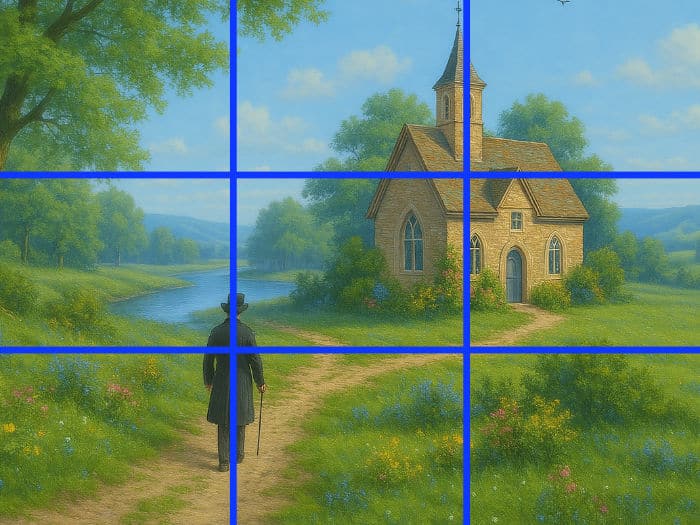
Focal points placed near intersections using the rule of thirds often feel balanced and natural, making them a powerful tool in art composition. The human eye naturally gravitates toward these "sweet spots" within the frame, making it easier for viewers to engage with the artwork.
8. The Unusual
Anything that doesn’t "fit" catches attention: unexpected elements, colours, or placements. Unusual subjects, distortions, or surprising colour choices can create intrigue and draw the viewer in.
9. Convergence

Use implied lines to direct the viewer’s eye. Lines from clouds, branches, roads, or gazes can all guide attention. These lines don’t have to be literal—even the gaze of a figure or the direction of objects in the composition can subtly lead the viewer’s eye.
Nonnenbruch’s painting shows how implied lines, such as gazes and gestures, can subtly direct the viewer’s eye to the focal point.
10. Framing
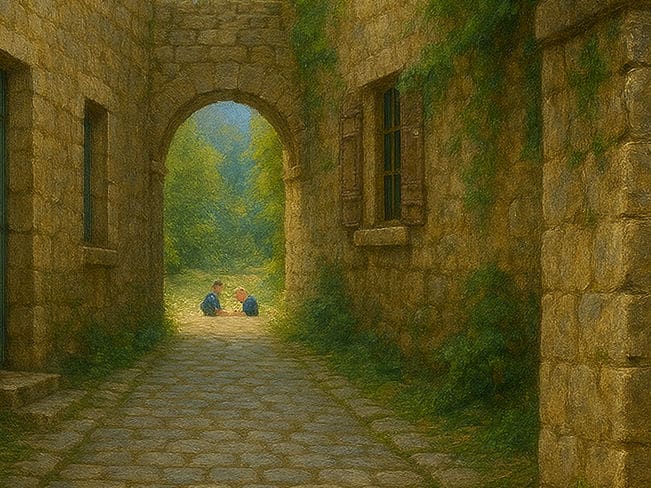
Use elements within the artwork to frame the focal point, drawing the eye inward. By enclosing the focal point with natural or artistic elements, you create a visual boundary that pulls the viewer inward.
Framing naturally draws the viewer’s attention by enclosing the focal point within a boundary that guides the eye inward.
Tip: When using framing in your own artwork, think about how natural or structural elements such as trees, windows, doorways, or arches can serve as a visual guide to lead the viewer’s eye to the focal point. Framing doesn’t have to be symmetrical or rigid. Organic shapes often create a more inviting and dynamic frame.
11. Natural Interest
Figures, faces, and expressive natural shapes naturally become focal points due to our psychological wiring. People are instinctively drawn to faces and living forms, making them easy focal points in any composition.
You can use several of these methods in one painting, but always ensure one remains dominant. Competing points of contrast can be visually overwhelming, so using the right focal point techniques helps maintain balance and clarity.
How to Test Your Focal Point
Stand back from your work. Close your eyes, then open them and notice where your gaze lands first. That’s likely your focal point. If your eye darts around or heads toward an unimportant edge, you may need to adjust the contrast or simplify your composition.
Centre of Interest vs Focal Point
While often related, these terms are not identical. A focal point grabs the eye, while a centre of interest engages the mind. Usually, they align—but not always. You might paint a face that draws attention, yet a background detail holds deeper meaning.
Final Thoughts
When you create focal points intentionally, your artwork becomes more compelling and immersive. Focal points are the silent tour guides of your artwork. They help viewers know where to look, what to feel, and how to experience your message. When used well, they transform a flat surface into a compelling window into your creative world.
If you enjoyed this tutorial, you will also enjoy our one about Creating the Illusion of Movement in Your Artworks.
Pin Me