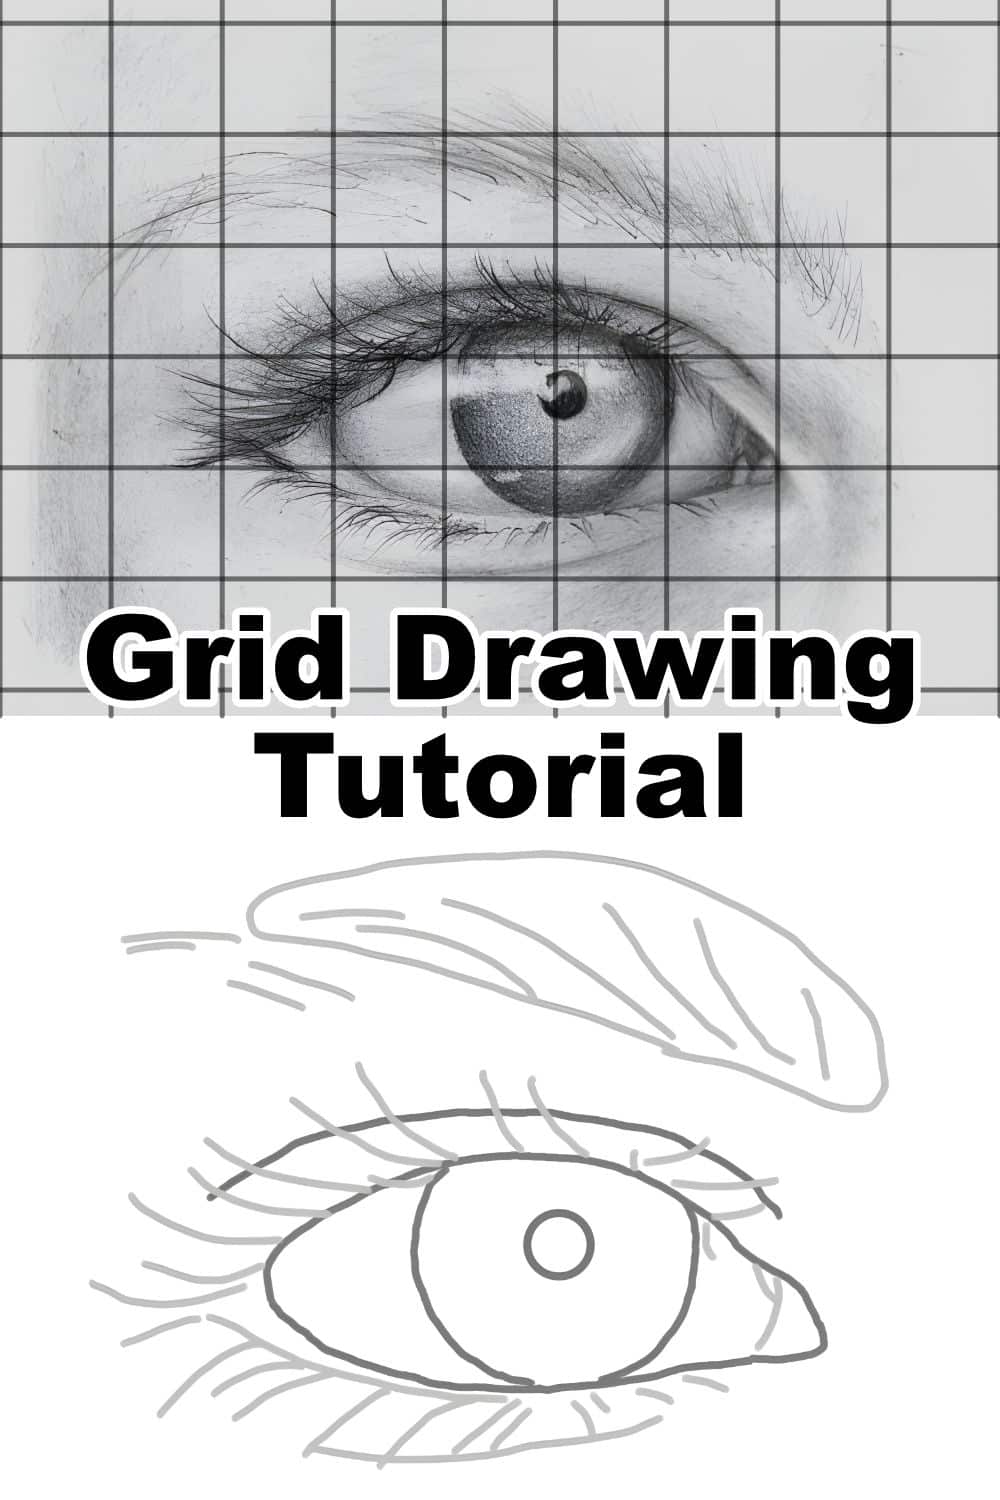
In this tutorial you will learn how to redraw your reference picture outlines onto your drawing paper or canvas using the grid method. The grid method allows you to redraw and resize your reference picture to any size canvas, this includes enlarging the image or reducing it.
The Egyptians used to snap a piece of string, that had been dipped into paint, against the wall to form a grid. They would then work from their smaller version (reference picture) which was painted onto a sheet of papyrus. Their reference picture would then also have a grid drawn over it. This allowed them to accurately redraw the reference picture onto the wall before painting it. Very clever indeed.
Now it's our turn to learn this ancient technique as it is still as relevant and as useful as it was so many thousands of years ago.
How to Create / Draw the Grid
The grid method allows us to redraw a picture to absolutely any size without having to worry about proportions, ratios or calculators. All we need is a grid, ruler and a pencil.
The basic idea is that you divide your reference drawing up into equal squares. You then do the same on your drawing paper, only this time, you enlarge or reduce the size of the squares to contain the same amount of blocks as your reference drawing. The blocks have then divided a complex scene up into smaller bite size chunks which makes it a lot easier to judge the positioning of the (out)lines inside each block.
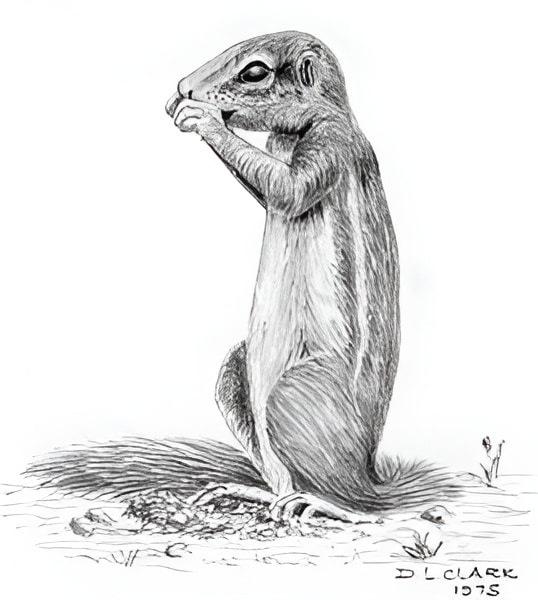
The best way to explain how a grid works is to do a practical example, so we will redraw this squirrel :
Note: We will only show the enlarging of a drawing here as this is the most common use of the grid, but to reduce a drawing, you simply divide instead of multiply in the explanation below.
Step 1 - Choose and Position Your Grid
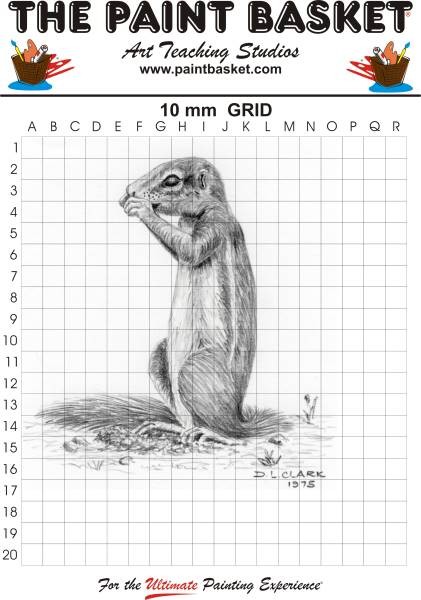
Choose and place your grid on the reference picture.
Tips
1) When placing your grid ensure that everything you need in the picture fits inside the grid.
2) Choose a grid that is a comfortable size for the reference drawing. If you choose a grid that is too fine, then you will go squint trying to follow each block. Choose too big, then the blocks are so big, you loose accuracy. Rule of thumb is to use the 5mm or quarter inch grid for pictures up to A6 size (105mm x 148mm), the 10mm or half inch grid for images up to A5 (148mm x 210mm) and the 20mm / inch grid for larger images. Another rule of thumb would be to use a finer grid for fine detailed pictures and chunky grid for redrawing chunky pictures.
3) You can work in a border around your image by adding blocks onto the sides or top and bottom of the image. That way your picture will not extend all the way to the sides of the paper. You can see how I have left some space at the top and to the left of my squirrel above.
Very Important
Stick the grid into place using a long length of masking tape on one side so that it can't move, but you still lift it. (Just like we did with the lightbox method to form a hinge). Once you start drawing it is vital that your grid does not move!!!
Below are some grids for you to download and use. (Print onto transparency using your inkjet or print onto regular paper and then photocopy onto a transparency)
Step 2 - Choose the Important Side of the Picture
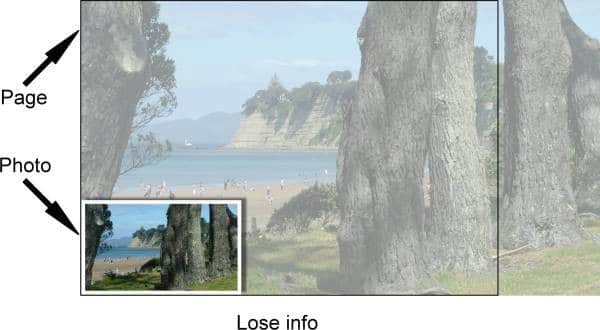
Choose the important side of the drawing. The reference picture you are drawing from will more often than not have a different ratio than your drawing paper, as can be seen below :
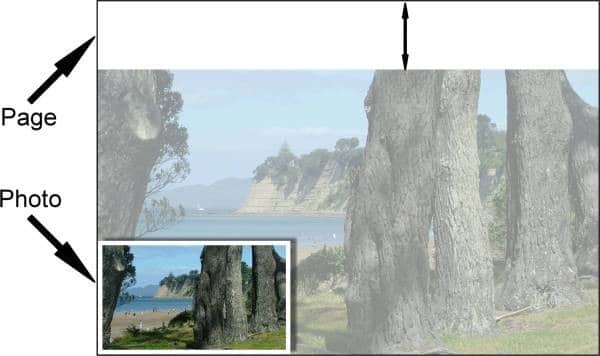
This means you will have either add something into the drawing to fill the page or cut something out of your reference picture or you will have to trim your final drawing paper to the same proportions. You can see how this has been done below.
Here we have chosen the vertical height as the most important side:
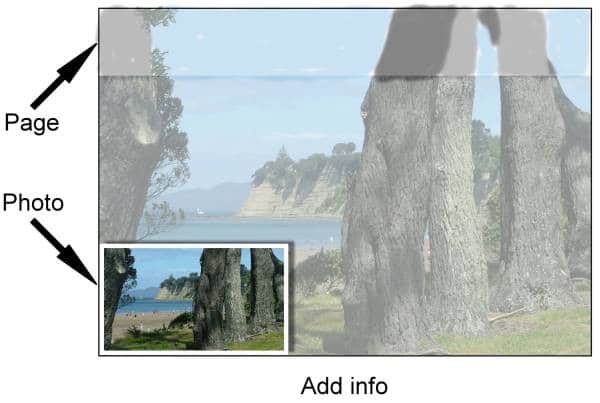
Here we have chosen the horizontal side as the most important so we will have to use our artists license to fill in the empty space on the drawing:
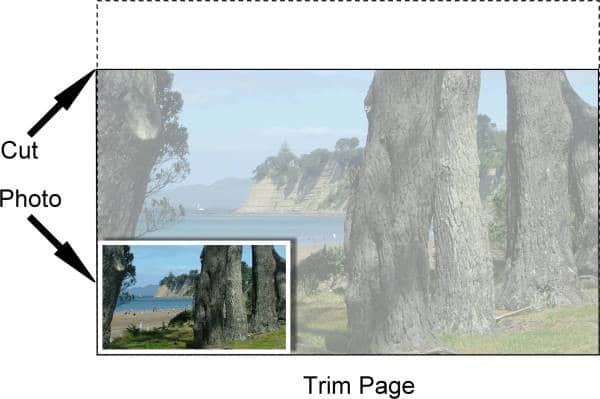
Here we have decided to trim the paper, so our important side is the horizontal width.
It is up to you to decide what is important to you. The bottom line is either the horizontal or the vertical side will be more important to you. That will become your measuring side.
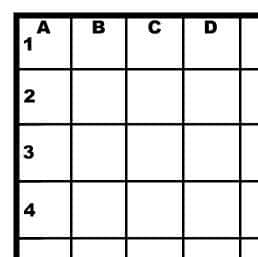
In our squirrel example I can see that he is more square than my page, so if I use the horizontal width and turn my A4 drawing paper portrait, then I will fit him in maximum size possible without losing any info.
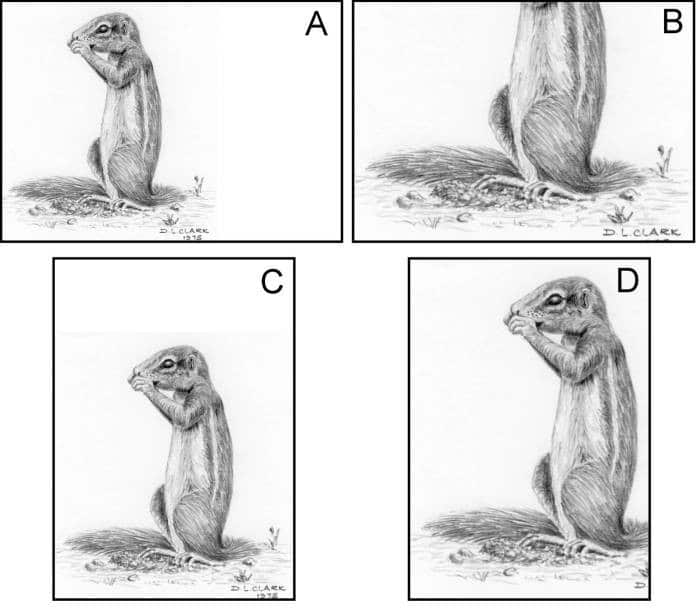
A = Landscape paper plus vertical height chosen – too much blank paper
B = Landscape paper with horizontal width chosen – we lose info
C = Portrait paper with horizontal width chosen – best use of paper
D = Portrait paper with vertical height chosen – we lose info
Step 3 - Calculate the Grid Block Size
As I have chosen the horizontal width as the most important, I will count how many blocks on my grid are filled by the squirrel horizontally.
The squirrel fills blocks A to O, so that gives me 15 blocks. I will now need to divide my drawing paper up into 15 equal parts horizontally too.
Tip
The grid is numbered along the one side, so to read that value off is easy. The other side is lettered, so you usually have to count those blocks. To save yourself counting time, remember the word EJO.
E = block 5, J = block 10, O = block 15 across, so you can now count from one of those blocks to save time.
To divide the chosen side of your drawing paper into the same amount of blocks as your grid size you start by checking to see if the drawing doesn't fit in nicely as an exact copy (the same size) by measuring the same amount of blocks on your drawing paper by “marking off” the blocks along the length of the paper in the same intervals as your gid.
Eg, if you are using a 10mm grid, then “mark” every 10mm onto the side of your drawing paper. If you are using the 20mm grid, mark off every 20mm, etc.
You don't really mark off anything at this stage, we are just testing to see if the drawing will fit or not, so just move your finger along the ruler as though you were marking off.
Tip
Often the reference picture and your drawing paper have such a small size difference that it is pointless resizing it, just draw it the same size and use your artists license to fill in the small amount of empty space.
Most probably though an exact copy will be too small or big so we would need to continue by doubling the size.
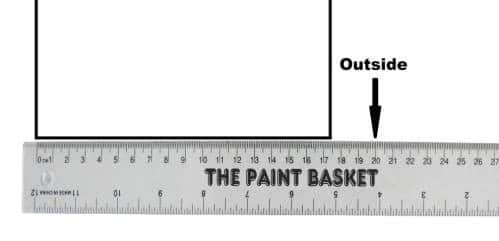
“Mark off” the amount of blocks onto your paper using double the distance to see if the marks are still “inside” the paper or have you gone past the edge?
Eg., if you are using a 10mm grid, you will “mark off” every 20mm this time.
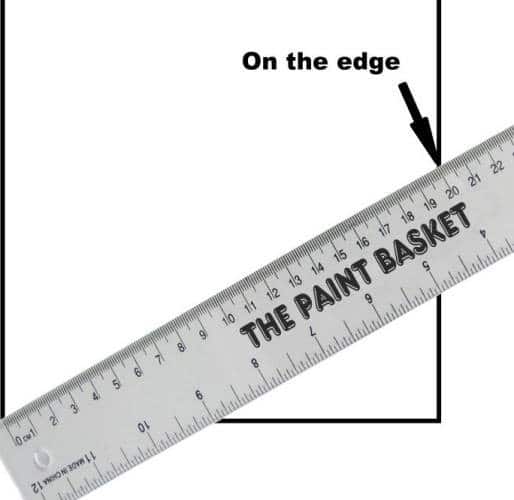
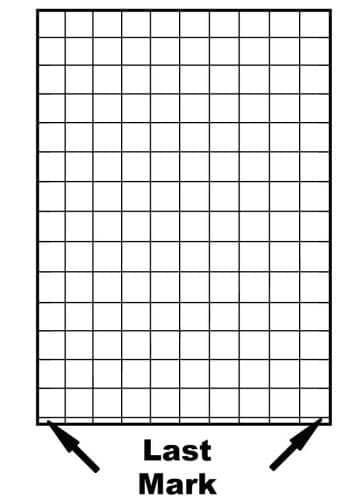
If you are still inside the page, then you need to triple, quadruple and so on until your last “mark” is outside the page as shown below:
In our squirrel example we would need to double the grid to get the last mark outside the paper as the paper is 210 m wide and we have 15 blocks.
Remember how many times you had to multiply your grid size to get the last mark outside the paper. This is your multiplier number.
Eg., if you had to double up the 10mm grid, then your multiplier is 20mm.
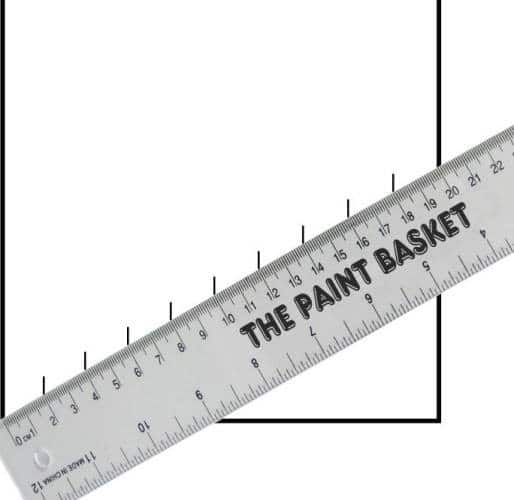
Now wouldn't it be cool if we could just “squash” the ruler a little bit so that our last mark touched the edge of the paper? That would be an ideal world wouldn't it because then we have a nice and easy to remember multiplier to remember (eg. mark every 20mm or 30mm depending on how many times you had to multiply).
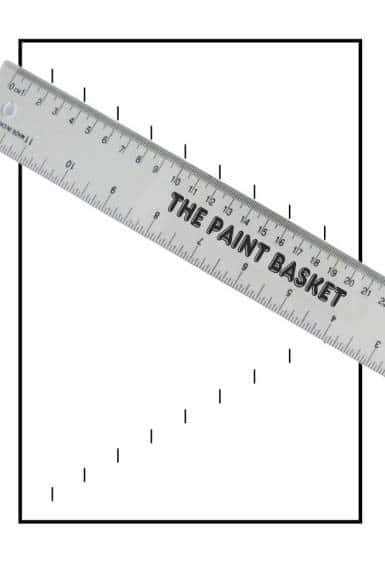
Well guess what there IS a way to “squash” the ruler, you simply turn it sideways until it fits as shown below :
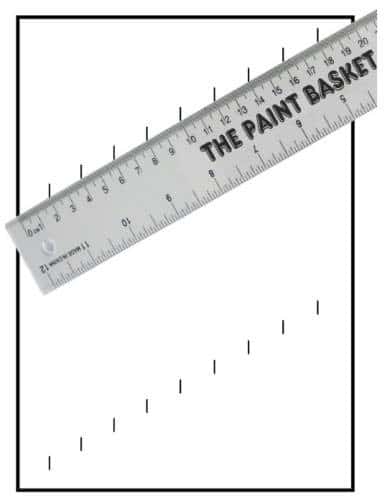
You can now simply mark off your block widths at the multiplier intervals on the paper. It just means your marks will run diagonally across the paper instead of along the length as expected like this :
In our squirrel example we will “squash” the ruler by turning it until the 300mm mark is on the right hand edge of the paper and then mark off our 15 blocks at 20mm intervals as our multiplier is 20mm.
Important
Make sure the zero stays on the left hand edge all the time.
Tip
If possible move the ruler up and make a second set of marks like this :
You could also get your second set of marks like this if required:
You have divided your page into exactly the same amount of equal sections as your reference picture. All we need to do now is turn those divisions into squares.
Step 4 - Draw the First Side Grid Lines
Extend your marks along the entire length of the paper like this :

Tips
1) Make sure you stay parallel to the side of the page. The easiest way to do this is to draw from the outsides inward, that way you always have a close line to judge from. Using a transparent ruler also helps a lot.
2) If you were able to make two sets of marks, simply connect the dots.
Step 5 - Complete the Grid Blocks
The hard work is done. All we need to do now is transfer these widths to the other edge of the paper.
The quickest way to do that is to use another piece of paper and transfer the widths onto the second sheet like this :
Now turn the second page to lie along the edge we need to mark like this :
Starting at the top of the page, transfer the marks from your second page onto your drawing page, moving the page down if required so that you have marked all along the length of the drawing paper. Your drawing paper should now look like this :
Important
More often than not you will notice that the last mark doesn't end on the edge of the page as you would expect. This is normal and not an error on your part. The mark would only end on the edge of the second side if you are lucky enough to have divided the page up into blocks which have exactly the same ratio as the paper – highly unlikely I am sure you will agree.
Tip
When moving the second page down to continue marking, align the first mark on your second page up with the last mark on your drawing paper very accurately. If you are 1mm out with this alignment, every single mark you make from that point on will be 1mm out.
Now move the second paper up and across to mark off the other edge of your drawing paper.
Important
Start marking from the same edge as the other side, eg., from the top of the page, otherwise the marks won't align and the lines going across your page will all end up skew. The only way to avoid this mistake is to NEVER rotate the second page, only slide it across like this :
When you are done, your page will look like this :
Connect the marks again to complete the grid.
Step 6 - Check that Your Picture Fits
Count the amount of blocks you have going vertically as well as horizontally.
Now count the amount of blocks your picture requires but counting the amount they fill on the gridded reference photo.
If you have less blocks on the canvas than on the reference photo, then you need to start over using the opposite side of the grid.
For example, say you chose the horizontal side of the picture as your important / main side. You have drawn your grid and now find that you have too few blocks vertically (your gridded reference picture fills say 7 blocks down, but your canvas only has 6 blocks down), then you need to start over using the vertical side as your main / important side.
Step 7 - Number the Grid
We can now number / letter the grid on our drawing paper exactly the same as the grid on the reference paper. I usually use a 2H pencil to mark my grid against the side line this.
We are now ready to start redrawing our reference picture.
Redrawing with Using the Grid Method
When redrawing with the grid, we use the same outline principle to redraw only the outlines of the major features of the objects.
Step 1 - Choose a Starting Point
Start in one block on the reference picture. Choose any block, it doesn't matter.
Step 2 - Find the Corresponding Grid Block
Find the corresponding block on your drawing paper grid by using the numbers and letters to locate it. Eg., G3 to G3
Step 3 - Find the Intersecting Points
Find where where the lines of your object intersect the grid lines on your reference picture as shown below and then mark them onto your drawing paper :
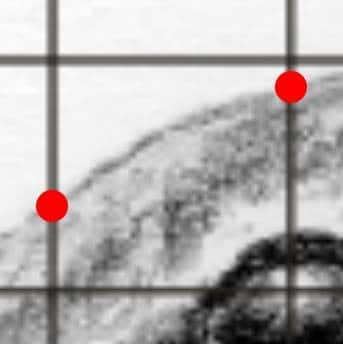
Step 4 - Find the Pattern Between the Intersections
See what the line does between those points can copy it to your drawing paper, eg., as shown below :

Now move to the next block and do the same.
Continue until all the outlines in your drawing have been redrawn as shown below:
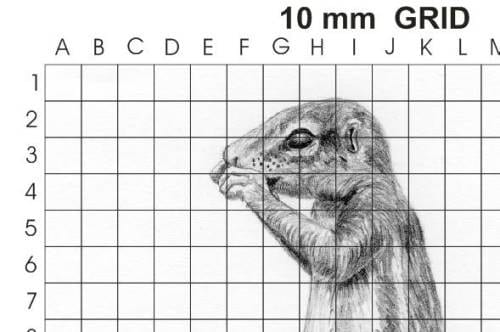
Reference picture with grid attached.
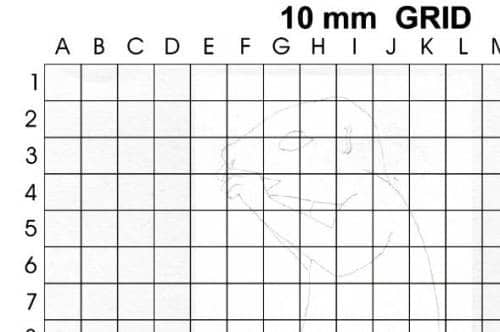
Canvas with grid and images outlines completed.
Tips
1) Always ensure you are working in the correct block by checking your grid numbers often.
2) To ensure you don't skip a block keep your finger pointing to the block you are busy with and then slide it on to the next block when you are finished redrawing the block.
3) Do all your grid work on a scrap piece of paper that is exactly the same size as your final drawing paper, then transfer the redrawn outlines using one of the transfer methods. That way your final drawing paper stays clean and you have the opportunity to reposition the picture on your final drawing.
Pin Me