(Paint Using Random Stuff)
The use of unusual materials when mixing paints can add surprising and intriguing effects to artworks. It is possible to include any number of weird and wonderful materials to create both texture and pigmentation, as demonstrated by some of the world’s most famous artists.
Whilst ‘matter painting’ has been popular since the 1940s and 50s, the practice of including strange materials in paints and paintings is nothing new. Looking back through history, the experimentation of using new dyes, pigments and dusts to create certain effects has been a key driver in artistic expression.
This article will take a closer look at the use of natural pigments and materials prior to the invention of standardised oil and acrylic paints. You will learn the roots of matter painting and the artists who helped the movement to grow into an established and distinct art form today. Finally we will look at practical ways that you can use matter painting in your own artworks. Let's dive in!

What is Matter Painting?
"Haute pâte," a French term translating to "high paste," refers to a painting technique where thick layers of paint, predominantly oil, are applied to a canvas, producing a pronounced texture or relief. This technique, also known as "Matter painting," incorporates thick impasto paint into which diverse materials such as sand, mud, cement, and shells can be added. Applied using a palette knife, brush, or other tools, the approach allows artists to achieve a sculptural quality on the canvas, with paint layers rising notably from the surface and offering an opportunity to experiment with varied textures. The thickness of the application often leaves the brush or painting-knife strokes visible.
The History of Matter Painting
Matter painting emerged in the 1940s in Paris and gradually spread to other European cities. It gained popularity in the 1950s and became the term used to describe the works of a new group of avant-garde painters, particularly from Holland, Belgium and Spain. Matterism focussed on the use of paint as a physical structure and artists interpreted this in different ways.
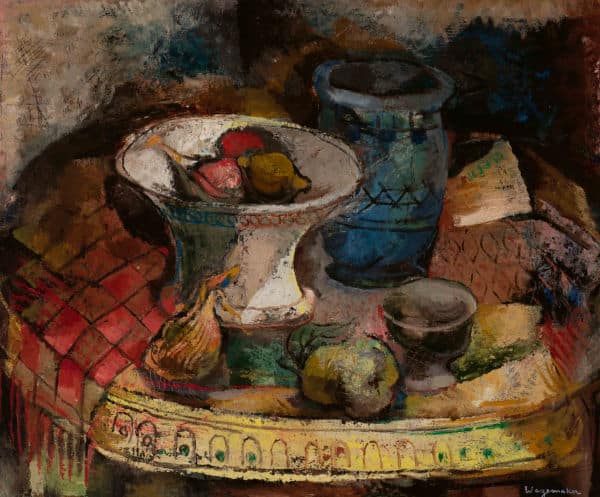
Among those who popularised the term were Jaap Wagemaker and René Guiette. Wagemaker began including matter painting principles into his work around the mid-1950s, mixing sand into his paints and including wood and sacking in his compositions. He was captivated by the textures of organic rock formations and much of his work was heavily ethnographic, inspired by different cultures around the world.
However, exactly when artists first began mixing novel materials into their paints and paintings is less clear-cut. The practice has gone by many names and a number of artists historically and cross-culturally have experimented with using natural materials to enhance their work.
Natural Earth Pigments

In truth, all pigments began as natural or earth pigments. One of the earliest examples of pigmentation use was Carbon Black. Many artists today still create striking monochrome works with charcoal. However, carbon, the primary element in charcoal, has a far longer history.
Carbon black can be made very simply by heating wood or plant material with a restricted air supply. There is evidence for its use since prehistory. Variations on the classic ‘carbon black’ include vine black, traditionally made from charring grape vines and stems, producing a blue toned black pigment. Similarly, lamp black was produced by collecting the soot from oil lamps.
Infrared reflectography makes it possible to see beneath paintings and identify artists’ use of carbon black pigments without destroying the work. Giovanni Bellini’s ‘Virgin and Child’ is one such piece where the artist’s sketching in carbon black has been revealed beneath the layers of other pigments.
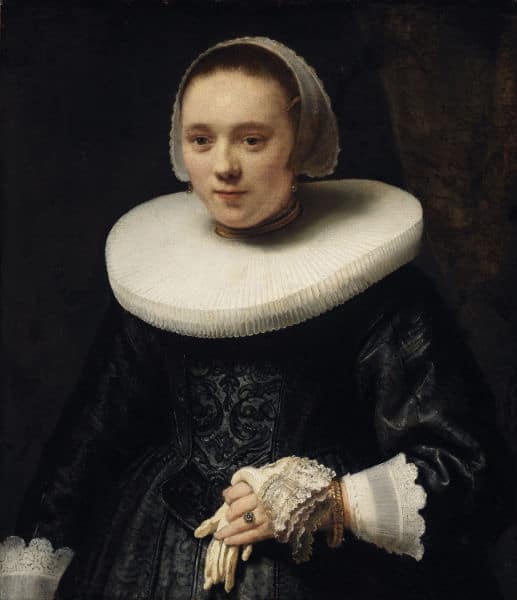
A similarly early black pigment was created using charred bones. Bone black could be made from any waste bones and was sometimes created using ivory. The pigment is denser than vine black or lamp black and was heavily favoured by artists like Rembrandt, to create an intense black in their work. Bone black allowed Rembrandt to create an impact within the already dark tones of many of his paintings and he especially employed it for shading his sitters’ clothes.
Whilst not as widespread as carbon black, bone black has had a continued use throughout much of human history, from the Ancient Egyptians to the Greeks, through the Medieval and Renaissance periods to modern day.
Likewise, ochre is an example of a prehistoric rock pigment, found in landscapes with high levels of iron. Ochre is one of the earliest known pigments in human artistic expression and its use can be dated as far back as 300,000 years ago. The pigment itself comes from iron oxide, hematite, from the Greek word ‘hema’ meaning blood (as in hemoglobin and hematologist). It is possible to create different shades through oxidation, burning the ochre, and these hues include what we know as burnt umber or burnt red.
Native American Art
Native American artists frequently used natural materials to create pigments for their work. This included making dyes from rocks found in the surrounding landscape. Rock dust pigments were commonly applied to animal hides such as buckskin or buffalo rawhide. Colours were achieved by staining, in which dry pigment powders were rubbed into the skins until no loose pigment remained, or painting. Adding clove oil to natural pigments is recommended for modern reproductions as it prevents the growth of mould and bacteria.
In addition to hide and rock paintings, ritual sand paintings were commonly produced. The most prominent examples are from the Navajo tribes with dry pigments coming from a wide range of materials including yellow cornmeal, flower petals and pollens, as well as minerals.
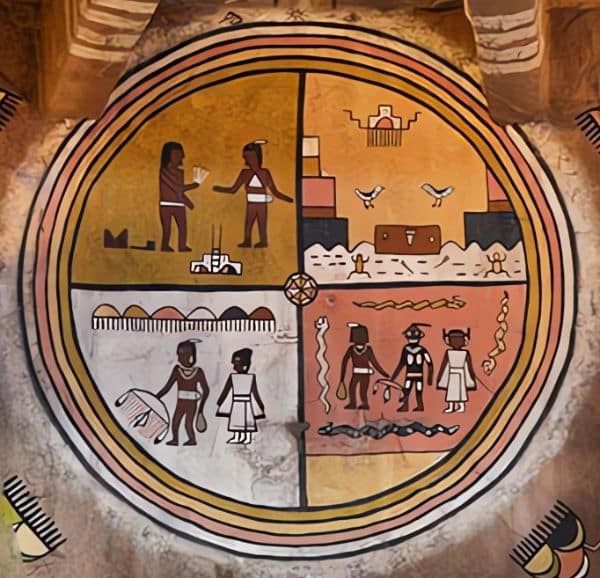
Fred Kabotie is a key example of a Native American artist who used traditional materials to produce original works that gained him national acclaim. He was one of the first Hopi artists to achieve this level of recognition when he participated in the annual exhibition of the Society of Independent Artists in New York in 1920. He often worked on animal hides, using natural mineral pigments and depicting spiritual motifs that have been accredited with preserving traditional Hopi art.
Egg Tempera
Whilst not forming the pigment in paints, egg was a novel material that was extremely widespread in early painting mixes. It may seem surprising but the addition egg created an impressive effect when used correctly. Egg tempera was popular prior to the rise of oil-based paints and was the principal form of painting in the Italian Renaissance, as well as being used throughout the Middle Ages.
Egg Tempera was made by mixing egg yolk with powdered pigment and distilled water. The egg yolk was used to bind the pigment together and the water thinned the mixture into a paste that enabled it to be painted onto surfaces. Only the egg yolk was used. The protein found in egg white, known as albumen, stops the paint from adhering to the panel and hence was was important that the yolk and white were carefully separated. With the correct quantities of egg yolk the paint dried with a glossy finish, giving paintings a jewel-like quality.
As the egg causes the paint to dry quickly it necessitated a section-by-section style of painting. Normal blending, as with oil paints and acrylics, was not possible and hence colours were achieved by overlaying pigments in small strokes, applying different colours on top of one another to create shading and different hues.
Obsolete Pigments
In addition to using earth pigments such as ochre and carbon and animal derived ingredients, the history of art has been witness to some unexpected additions to paints. These pigments have now fallen out of favour in the art world but they are worth discussing just for their fascinating insight into painting.
Maya Blue
A blue pigment, found in artifacts of the Maya and Aztec civilisations, it is not hard to see how Maya Blue got its name. By mixing natural clay, called palygorskite, with the deep blue dye of the indigo plant, the colour of the pigment was created. Chemical analysis has demonstrated that the durability of the colour, which can still be appreciated for its intensity on murals and pottery today, was due to the use of different temperatures during preparation.
The presence of a second pigment, dehydroindigo, formed during the heating and oxidation of the indigo, is responsible for producing a yellow hue. The blue indigo combined with the yellow dehydroindigo created the distinct turquoise tones of Maya blue. It is likely that the Mayans would have manipulated the colour by heating the indigo at higher or lower temperatures to obtain their desired tone. This pigment was lost with the Spanish colonisation of Central America, along with many of the technical advancements of the cultures destroyed by conquest.
Tyrian or Murex Purple
Made from the secretions of a marine shellfish, Tyrian purple was an extremely expensive red-purple pigment. It was favoured by the Greeks and Romans for dyeing togas, partly due to its rarity and associations with wealth. The pigment was extracted extremely slowly, with each mollusc producing just one drop of colorant at a time. As a result of this laborious process, it fell out of favour.
Mummy or Egyptian Brown
As the name suggests, Mummy brown is a dark brown pigment made from crushed mummified corpses. Both human and cat mummies from Egyptian burial sites were used, combined with white pitch and myrrh. Particularly popular among the Pre-Raphelites, the pigment gave artists a unique brown palette. However, in the course of producing the colour, a countless number of archaeological objects were destroyed. The use finally came to an end in the early 1900s.
Lapis Lazuli
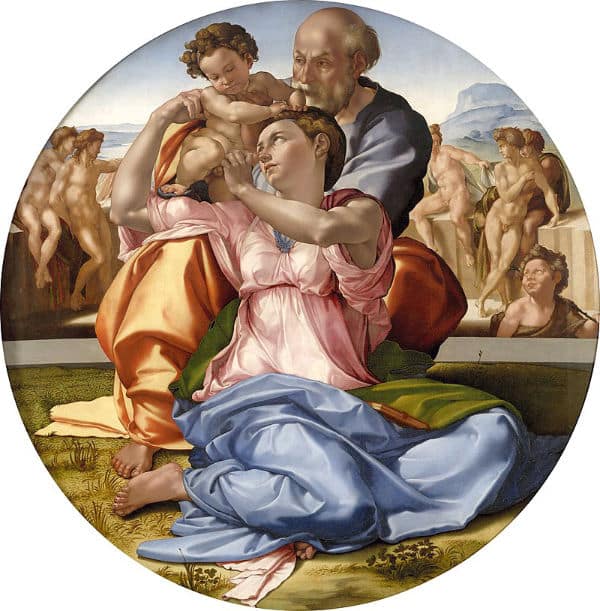
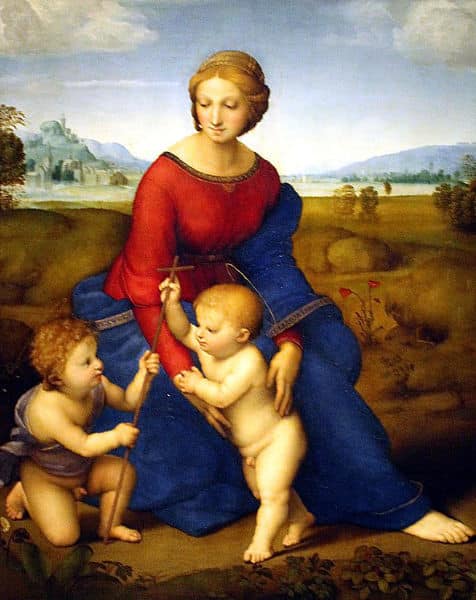
Although not strictly obsolete, lapis lazuli does not enjoy the frequency of use it once had. The famously ultramarine blue is made from crushing semi-precious stones. Dating back to 6th century Afghanistan, where the stones were first quarried, it became a favourite of Renaissance artists for creating a deep, luminous effect in their rendering of the Virgin Mary’s robes in religious paintings.
The process of obtaining the pigment was complex. According to a 14th century Italian recipe, it required the powdered stone to be mixed with melted beeswax and two different types of tree resin. The mixture was then kneaded and left to dry before being heated and kneaded again. Finally, this dough was placed in water and the pigment was squeezed out, falling to the bottom of the bowl to then be dried and mixed into paint.
Modern Matter Painting
These historical insights into early paint mixing are interesting when viewed in the context of modern matter painting. In many ways, the modern artists utilising unusual materials to enhance their paintings are just continuing the tradition of centuries of artists who have come before them. However, by looking at some examples of modern painters, we can also see how they have forged their own novel language of expression.
Antoni Tàpies
Antoni Tàpies first began working as a surrealist painter before experimenting with matter painting in the 1950s. He was one of the first to do so, mixing non-artistic materials into his paints including marble dust and clay. This style became known as ‘pintura matèrica’ or material painting and Tàpies focussed heavily on the use of texture and the power of material elements to bring emotion into his work. In doing so, he also included everyday household objects in many of his pieces, moving into more expressive forms in the 1970s.
Jean Dubuffet
Known for his endless experimentation, Jean Dubuffet included matter painting in one of the many ways he sought to make his work new and energised. In the 1940s, he began mixing materials such as tar, asphalt, pebbles and glass into his paints. He gave these the name of ‘hautes pâtes’ or high pastes. By slathering these gritty, thick pastes onto a surface, he would create a base into which he could carve his satirical, childlike designs. This technique was just one example of his explorations into texture, which characterised his Post-war work.
Anselm Kiefer

Perhaps one of the most famous artists using matter painting in his works, Anselm Kiefer is best known for his use of non-artistic materials in composing his dark oeuvre. Many of his paintings incorporate textured paints mixed with straw, ash, clay, lead, and shellac among other materials. These densely textured pastes were used to form the large, bleak works he designed to confront controversial issues from German history.
Matter Painting at Home
The history of matter painting and pigmentation can give us encouragement to be creative in our own works so lets explore how you can use these techniques to create our own matter artworks at home.
By experimenting with non-artistic materials and things you have around the house, you can produce new and interesting art that will challenge your current painting style.
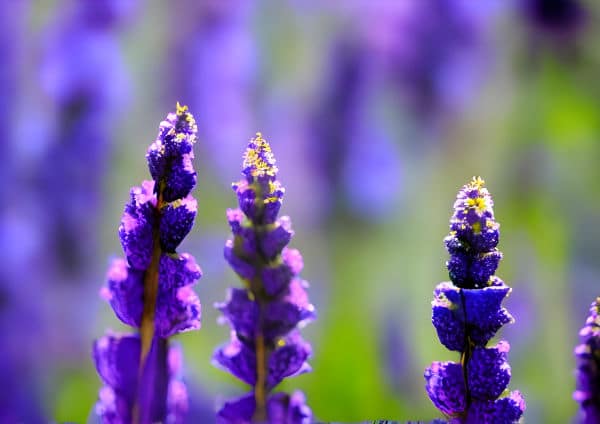
Painting with Pollen
Pollen can be a surprising source of pigment. Flowers that work well for painting are ones where the stamen, and the pollen, is easily accessible. Ornamental lilies are a great choice – that pollen that gets on your clothes whenever you rub against it will now be your best friend!
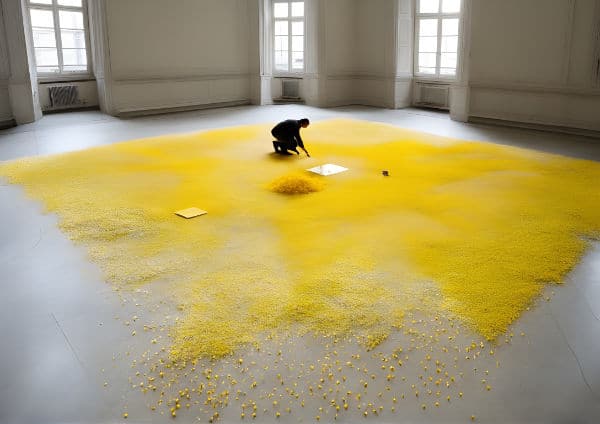
Though not strictly painting, Wolfgang Laib is an interesting example of an artist using pollen in his works. Laib’s modern art installations are produced by painstakingly collecting tonnes of pollen by hand and then ‘painting’ it into geometric patterns. His works are large-scale installations, brought to life by the natural pigments in the pollen. Thankfully, when experimenting with painting in pollen at home, you only need access to a couple of flowers.
The process for making the paint is really simple, just cut the stamen and tap or rub the pollen into your container. Then add a small tablespoon of oil and mix together. Add more pollen for a darker hue. This very basic paint can be used to create interesting effects, especially for simple floral motifs where it is nice to use this unusual medium.
The colour of the paint will change according to which plant pollen you use. Another popular option besides lilies is sunflower pollen but there are really no limits to which pollens you can use. You can even try experimenting with fungal spores if you have access to them, they should create a completely different range of shades. Experiment and see what you can find!
Natural Dyes
It is also possible to create your own watercolour style paints at home, making natural dyes from plants and seeds. These are typically used to dye natural fibres like wool and silk and have been produced for this purpose for hundreds of years. However, as artists we can utilise these pigmented dyes for creating soft, subtle tones that behave in a similar way to watercolours.
As the pigments are much weaker than manufactured paints, they may not blend as well as commercial watercolours. To build up layers in your painting, it is best to let each wash dry before adding the next. This will allow you to add details without the colours all blending into one another.
Whilst the Mayans would have used the dye from Indigo plants, for those of us who do not have Indigo growing in our gardens there are a range of other plant species that give pigments. Ferns, for example, offer a fantastic russet red pigment when soaked in water. Depending on the season and the type of fern, this colour can also range from red to brown.
Similarly, common household waste that would usually be destined for the compost can be used to create some fantastic pigments. Avocado pits turn to pink hues, onion skin to brown, fig leaves to yellow and green, and elderberry to light blue. The beauty of using natural pigments is that the process is all about experimentation. There are unending variations to the plants and the colours they produce and they are constantly changing. Your painting will adapt as the natural world does.
The paint we now know as ‘Indian yellow’ originated from the pigment in mango leaves. Unfortunately, it has quite a gruesome history as it was once made from the urine of cows fed solely on mango leaves. By force-feeding the animals and restricting their water intake, the producers were able to obtain a vivid yellow pigment. The urine was dried and ground for use as pigment. The production was out-ruled in 1908 as a result of animal cruelty. However, the history lives on in the name of the popular paint colour.
In spite of this rather dark past, artists still use mango leaves to make pigment. Thankfully, it is not necessary to use cows anymore. At home you can make your own natural dye by cutting up the mango leaves, adding water and simmering in a pot for 1 hour. You should be able to produce a yellow-green pigment, depending on the plant and the season. It is particularly lovely for dyeing silks and other natural fibres.
As well as dyeing and painting, natural pigments can be fantastic for printing. Several flower species will release their colour when hammered into silk and can produce fantastic patterns. Nasturtiums are a great choice for your first try but you can have a go at using any flowers you find to see which ones work.
Adding Textures
Sand
Following in the footsteps of some of the matter painting greats, incorporating sand into your paintings at home can be a fantastic way to add texture. Far from being an imperfect and unrefined medium, sand can be used to create extremely delicate and expressive paintings. It is especially good for landscapes, lending depth to the painting thanks to its unique texture.
Sand painting can be really simple. It just requires you to mix sand into oil paints. Despite appearing to be a heavy medium, no fixatives are necessary and it can be applied to canvas directly. The oil paints help the sand to stick to the surface. Having said that, it can take a bit of practice to learn how to blend the thick impasto paint. You may find it easier to abandon your brush and use your fingers instead.
Finger painting with sand is an activity recommended for children but there is no reason it cannot be great for adults too! On that note, if you are looking for other multi-sensory painting experiences, you can also try adding thicker materials like oats and wholewheat flour to your paints. These are almost impossible to apply with brushes so you need to get your hands involved. Larger grains are much harder to use but with some experimenting you might be able to create something impressive!
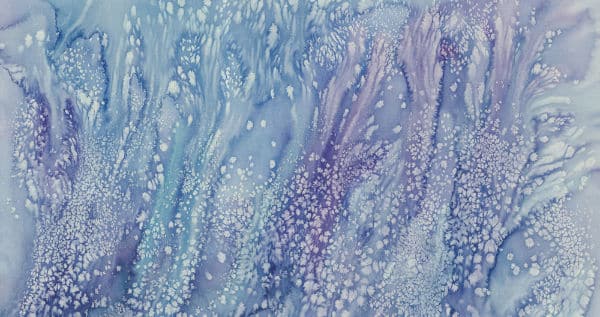
Salt
Salt mixed into oil paints can dry with an interesting sheen, as well as adding a grainy texture depending on the size of the crystals. However, the best effect created by salts is when they are used with watercolours to create visual textures. The salt technique is great for producing naturalistic textures in your watercolour paintings, especially if you are depicting banks of grass, flower heads, or snow.
It is best to use pure salt rather than one packed with fillers as these can produce unpredictable results. Using a salt grinder can be an interesting way to achieve different sized salt crystals, which helps to increase the variety of textures.
The effect the salt will have on your painting will depend on the saturation of your paper. If the paper is drier, the salt will have less impact. As a result, for maximum effect you should put salt on watercolour pieces where you have used a very wet wash. The salt crystals move the pigment around the page by absorbing some of the water. The resulting patterns can range from crystal shapes to sandy, granular textures to large blooms, depending on the type of salt used and the saturation.
On a drier wash, the effect of the salt is lessened but can still create some good effects, albeit more subtly. When the wash is almost completely dry you can gently remove the salt and then add details on top, helping to refine the image.
If you are trying using salt for the first time, it is best to do a few tests or colour swatches before applying it to your painting so that you have a better idea of how it will behave. Much of the technique is about trial and error.
An unusual alternative to salt is using rice grains. When applied to a wet wash on the paper, the rice absorbs some of the water as the salt does. However, the effect is softer with this method and there are no crystal patterns. Bear in mind that the rice will not dissolve so you will need to remove the grains one you have achieved your desired effect.

Paper
Another great way to add instant texture to your paintings is to use tissue paper. By scrunching up the tissue paper to create folds and then unfolding it and gluing it to your canvas, you can add a new edge. You can choose to stick it directly to your canvas and then paint over or apply it on top of your paint. By leaving the tissue paper exposed, you can create an interesting effect that can be used to mimic rocks or waves.
Alternatively, using pre-textured paper within your painting can also be an interesting addition. Depending on the texture or patterns within the paper, you may be able to incorporate the design into your painting. Alternatively, you can play with ripping paper to use the fibres or pressing plastic wrap into wet paint to make waves and geometric shapes. In fact, any paper or material you have around the house has the potential to be used to great effect!
Egg Tempera
Popular during the Medieval and Renaissance eras, egg tempera is a type of paint made by mixing egg yolks with pigment and water. The resulting effect is a luminous finish that gives paintings a jewel-like tone. This paint composition was popular with artists prior to the rise of oil paints, particularly when depicting religious scenes.
As egg tempera dries quickly, it is not possible to blend the paints as you would normal oils. Instead, you need to layer on the different colours, using a cross-hatching technique to build up varying tones within your painting. This makes the style more akin to pastel drawing than painting. It is a great way to challenge yourself and experiment with an alternative style.
Making your own egg tempera paints is very simple and ensures you have a pure product. As it dries quickly, you will have to make the paints new before each session. If the paint is left to sit, the yolk will thicken and it will be too difficult to paint with. As a result, your egg tempera needs to be made fresh.
To create the mixture, separate the egg yolk from the egg white. It is important to include as little egg white as possible as the proteins in the white prevent the paint from sticking to the painting surface. You can achieve this by gently breaking the shell and holding the yolk, letting the white drain through your fingers. Then the yolk can be gently rolled on a paper towel to absorb any residue from the white.
Once you have separated the egg, pierce the yolk with a needle and allow it to drain into your container. Add roughly ½ - 1 teaspoon of distilled water to the yolk and stir until the yolk has been thinned out and there are no lumps. In a separate container, mix the dry pigment with water to create a paste. Add the egg mixture to the pigment gradually, thinning with more water if needed.
Some experimentation might be needed to get the right amount of egg yolk in your tempera mix. The paint should dry with a glossy finish. If too little egg is used, it will be too dry but if too much egg is added it will appear greasy. This is quite a lot of trial and error so you may want to do some tests before making a full scale painting.
Conclusion
All of the techniques outlined above are simple enough for you to do at home, with just a few basic materials. By experimenting with adding different textures to your paints, or even making paints from new materials, you can experiment with your style and discover new ways of making artwork.
The beauty of these materials is that they are all fairly cheap and many of them you will already have lying around your house. There is really no reason not to give it a go! Remember, it’s an experiment so try not to get too nervous about how it will turn out. The more you try, the more you will learn. That’s all that matters with matter painting.
If you want to learn more about creating texture in your paintings, you can follow my tutorial on 20 Ways To Create Texture in Your Paintings.
Pin Me