(Without Really Trying)
In this article we look at 5 of the ways you can easily improve your paintings with little to no extra effort on your part.
1. Use Glazing, Scumbling & Dry Brushing

Glazing, scumbling and dry brushing are useful techniques that all painters should have in their arsenal.
Glazing, scumbling and dry brushing can only be done when the painting is completely dry.
Glazing
A glaze is when you apply a transparent coat over a previous dry layer. The paint is mixed with medium then applied lightly so as not to obscure the object underneath but to subtly change its appearance in some way.
It’s best to use transparent paints for glazing but non transparent paint can also be used if diluted sufficiently with medium.
When painting in acrylics, water can be used instead of medium to form a glaze but medium is preferable because over-diluting acrylic paint with water can lead to problems with paint adherence.
Be sure to buy the correct glaze for the medium you are painting in (oil or water based).
Glazing can also alter the hue, value or intensity of a colour. A beautiful purple can be obtained by glazing a blue over red, or a unique green by glazing yellow over blue etc. Secondary colours made by glazing instead of mixing on the palette have a special luminosity.
Glazing a dark neutral like burnt umber over a colour that it too intense will tone it down. This can be useful in making your focal point pop. Lightly glaze a dark neutral in the area around it and by contrast it will stand out.
There’s no limit to the number of glazes you can apply but just be sure the area to be glazed is dry. When painting in acrylic this is not a problem but in oils it could slow down your painting process considerably. To speed things up a bit when working in oil, use an alkyd fast drying medium to mix into your paint.
If your painting looks too warm, cool it down with a cool-coloured glaze applied over the entire painting. If its lacking warmth, do the same with a warm colour.
Scumbling
Scumbling is when an opaque, lighter-coloured paint is applied, often without diluting with a medium, using a dry brush technique. Scumbling softens edges and lightens.
For example, if you’ve painted a landscape that lacks depth, scumble a mix of white and sky colour over those areas that you want push back. The areas you haven’t scumbled will appear to come forward by comparison.
Mixing white is probably the best white to use for scumbling as it is not as opaque as Titanium white; (although if Titanium white is all you have you can use it but make sure to use very little on the brush and to rub vigorously to prevent unsightly white patches from forming).
If you have a need for dust, mist or fog in your painting, use the same scumbling technique just mix in the appropriate colour with your white.
Dry Brushing
Dry brushing is the same as scumbling except you are using any paint colour. For example you can use dry brushing to darken a shadow area. You also are not restricted to opaque paints. This allows you to do colour adjustments over an existing colour using either transparent or opaque paint.
Just keep the paint and brush dry, i.e. no oil or painting medium in the paint or turp on the brush. Pick up as little paint as you can on the brush at a time so that when you apply the paint, it goes down as a super thin layer of paint with the lower layer still visible.
Tip - As the term scumbling is also used to refer to a random scribbling motion when drawing and painting, you will see that I always refer to a random scribbling motion as "scumbling"; and the scumbling and dry brushing techniques as "dry brushing" in my classes.
Tip - Sometime a glazed area may appear shinier than the rest of the painting and a scumbled or dry brushed area duller. This can be corrected by varnishing the painting once dry. The varnish will equalise the sheen over the entire painting.
2. Save Time by Combining Mediums
Usually painters fall either into the acrylic or oils camp but combing the two mediums can give you the best of both worlds.
Because of the rapid drying time of acrylic paint, it is ideal for toning the canvas and for the blocking in stage. When the underpainting is dry you can continue the painting in oils.
Acrylic usually dries in the time it takes to make and enjoy a cup of tea. (You could of course use a hair dryer to speed the drying process up even more.)
The benefit of oils is that the colours don’t change as they dry and they’re easy to blend for smooth transitions. As they are slow drying, they give you lots of time for adjustments.
Relatively inexpensive artist grade acrylic paint can be used for the underpainting and because there’s already a layer or two of colour down, less of the expensive oils will be needed to finish your painting.
You can use acrylic to tone your canvas or what is known as the imprimatura layer. Water down acrylic and apply with a big brush. Rub off the excess with a cloth and a smoothly toned canvas will result. Because of the thin layer of paint, the white of the canvas shines through, giving a luminous effect. You could choose a warm colour or a cool colour as your imprimatura layer. Having a colour on the canvas other than the white of the gesso also makes it easier to judge your tonal values when painting.
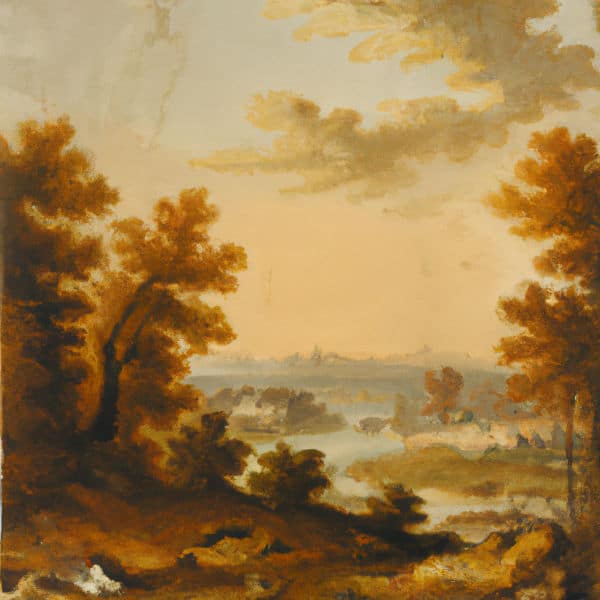
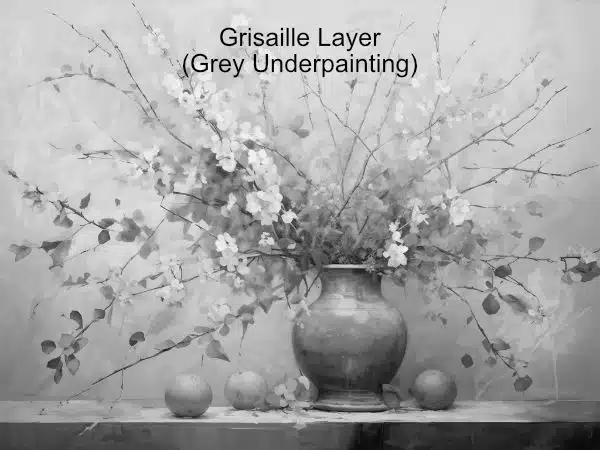
Imprimatura Underpainting
In case you are wondering what the difference between an imprimatura layer and an underpainting is, the imprimatura layer is always done using only one colour - usually an earth colour. A traditional underpainting uses multiple colours mixed with white to establish tonal values before glazing or scumbling colour and detail over the top. An imprimatura establishes a mood for the painting before you even begin.
Be aware that acrylics appear darker when dry so always mix your acrylic paint one shade lighter than what you need it to be.
Acrylics do not blend as easily as oil paint due to their quick drying time. This makes it difficult to unintentionally mix muddy colours on the canvas, as you would experience with oil paint.
Acrylic paint is also more opaque than oils as a result blending is done by letting one layer dry and then painting, glazing or dry brushing over it.
Before you apply oil over an acrylic layer, first “oil out” your surface. To do this take a small amount of your preferred oil painting medium and apply a thin layer over the entire area you are about to paint. I usually use a cloth to do this. Rub any excess medium off, making sure only a very thin layer remains. The oil paint should now flow smoothly when applied over the underpainting.
If you prefer oils but have always yearned to include the modern neon or fluorescent colours which are only available in acrylics, then you can use this trick: Acrylic paint takes on the characteristics of an oil paint when mixed with water mixable linseed oil gel. After that it can be mixed with regular oils if required. It will now also have the same drying time and be as easy to blend as regular oils.
Whatever medium you prefer to finish your painting with, it’s advisable to paint your underpainting with a big brush as its always easier to apply detail over a soft underpainting. Use this opportunity to build up depth in your painting with colour richness and multiple layers.
3. Use Colour Harmony
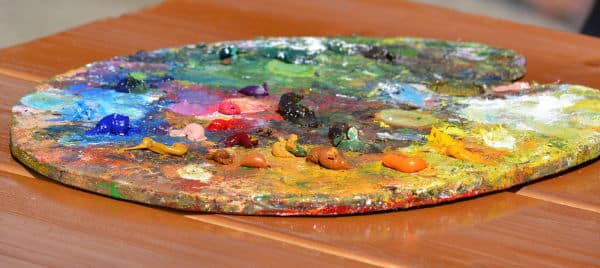
Sometimes a messy palette is an advantage. When mixing up a base tone of local colour and then creating variations by adding warmer or cooler, darker or lighter mixes, don’t make each mix on a separate part of your palette. Rather let the mixes overlap. This creates even more variations of colour and, because there is some of the local colour to be found in all the mixes, the painting will automatically have better colour harmony.
In the same way, the more limited your palette (i.e. the fewer colours you use in painting an artwork), the greater the colour harmony you achieve in your painting. Mixing colours using only a few primaries, means that variations of the same colours appear throughout your painting and visually tie it together.
Beginners who often buy many different colours instead of mixing their own can end up with a painting that just looks “wrong” because there is not harmony of colour tying it together.
4. Avoid Cloned Paintings
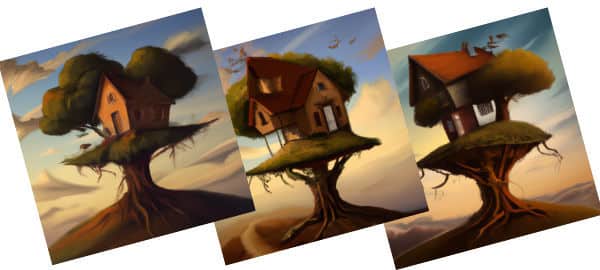
Although it may be tempting to work from your imagination when painting a landscape, be aware that if you do this too often, you may find the same elements creeping repeatedly into all your paintings.
It is far better to work from a reference, or several references. Don’t slavishly copy them though, instead borrow a unique shape, colour or element from each reference and then combine these to form a new, unique composition.
You can change the lighting, time of day, season etc. to suit your mood while combining elements from different references.
A good tip is always to keep the elements in the focal area of your painting contrasty and vibrant with lots of crisp detail while softening the edges and lowering the contrasts as you move away from the focal point. This will draw your viewers eye towards the focal point in the painting.
5. Paint under Good Light
Make sure your easel, or the area where you paint, is exposed to daylight. Ideally the biggest window should be behind your back when you face your easel.
If you paint at night, make sure you have good lighting using daylight bulbs in your lamps and not regular household bulbs which often have a yellow cast. If you don’t take these precautions, you may find that the painting you did using artificial light looks totally different in daylight.
The lighting I prefer to use is standard fluorescent tube lights. You can watch the video below to see how I adjust the light to minimise cast shadows.
As you can see these 5 things are easy to do. You either slightly change the way you currently work (Mixing on the palette) or you do the work once (fixing your lighting).
Each of these can and will make a huge difference to the final outcome of your paintings so implement them today and notice the difference.
If you enjoyed this article you are going to love my tutorial on texture painting techniques.
Pin Me