Class Tutorial
Have you ever wanted to do some drawing in pastel, but you have never known what to buy or where to start? Well fear no more and read on…
Pastels are a wonderful medium to work in as you get bright, brilliant colors and an easy flowing feel to your drawings. The speed with which you can draw is also an excellent plus as you can make quick, yet detailed, drawings.
Pastel drawing works especially well for en plein air. You can get the scene sketched out quickly on location. You then not only have a dimensional drawing of the scene to work from back at home, but you also have a reasonably accurate color reference of the scene as well.
Let’s first take a look at the average bag of tricks a pastel artist uses.
What are Pastels?
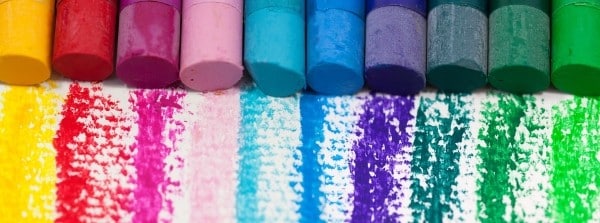
Pastels are made of pure pigment held together with a binder. This mixture is then formed into a stick shape.
You get two types of pastels – Chalk Pastels and Oil Pastels. The difference between the two is the binder, the pigment stays the same. With Chalk pastels a water based binder is used to hold the pigment together. Depending on the amount of binder used you can get either soft or hard chalk pastels. The more binder is used, the harder the pastel stick. Oil pastels on the other hand have an oil based binder.
This tutorial will only deal with hard and soft chalk pastels as they are used together and the technique for using them are the same.
The techniques used to work with oil pastel is entirely different. In fact the techniques are so different that working with chalk pastels is considered drawing where working with oil pastels is considered painting.
Hard chalk pastels are used for preliminary blocking in, Soft chalk pastels are used for detail work.
You can tell the difference between the three pastel variations by looking at them and by feeling them. Soft pastels look and feel soft like regular black board chalk. They also break as easy, or easier than regular white board chalk. They can be purchased as round or square bars.
Hard pastels are usually shaped square and are pretty hard. As the pastel has been compacted together using a lot of binder they also appear shiny.
Oil pastels feel like children’s wax crayons and are also shaped round.
Pastel Drawing Equipment
Let’s take a look at what we will need in order to start drawing with chalk pastels.
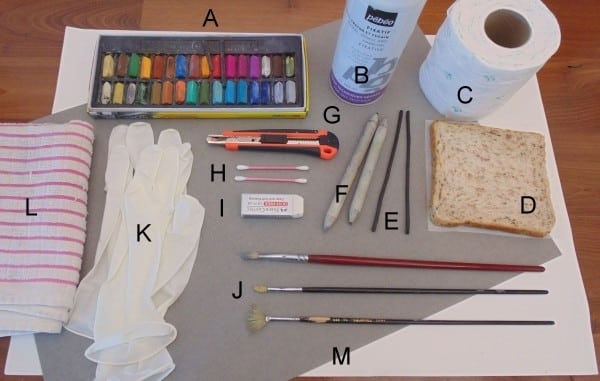
As you can see there are quite a few items, but they are all small. Popping everything, except the pastel paper, into a small carry bag is no problem. Here is a breakdown if what has been laid out on the table:
A = Set of Soft Pastels
B = Fixative spray to fix the drawing when needed
C = Toilet Paper for blending & special effects
D = Bread for erasing mistakes
E = Charcoal Sticks for preliminary drawing
F = Blending stumps for blending and effects
G = Craft Knife for special effects and trimming paper to size
H = Ear buds for blending small areas
I = Soft Eraser for special effects
J = Brushes for blending and special effects
K = Surgical Gloves to protect skin
L = Cloth for cleaning up and keeping pastel sticks clean
M = Pastel Paper for drawing on
Most of these items can be bought from your local art supplier, the gloves from your drug store / dollar store, the rest should be lying around the house already.
We will now look at each of these in turn to learn what to look out for when buying each.
How to Choose a Set of Pastels
There are many different sets of pastels available on the market, deciding which to choose is really quite easy. Pastels don’t really like to be blended as the colors lose their vibrancy. You would then generally buy the biggest set you can afford, with the most amount of colors, to minimize the amount of blending you need to do.
Another point to look out for is the colors that have been grouped together in the various sets. Some sets have been put together with colors that would normally be used in a landscape drawing, some are grouped for portraits, others for seascapes, some are general color sets, etc. Buy a set with a color grouping to suit your subject taste.
The sets also vary according to the format of the pastel itself. There are sets containing round pastel sticks, other containing square sticks, others which only have a half length of pastel stick.
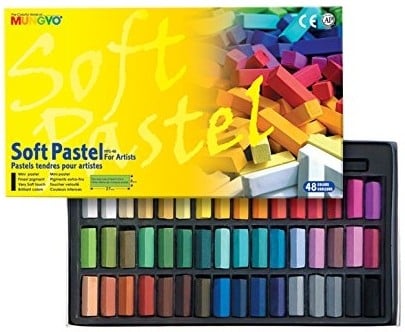
These pastels from Mungyo are the ones I use and can recommend. I normally buy the set of 48 or 64 (You can click the image to view it on Amazon):
Note: this page contains affiliate links to products on Amazon. If you purchase through the links I will earn a small commission for the sale at no extra cost to you.
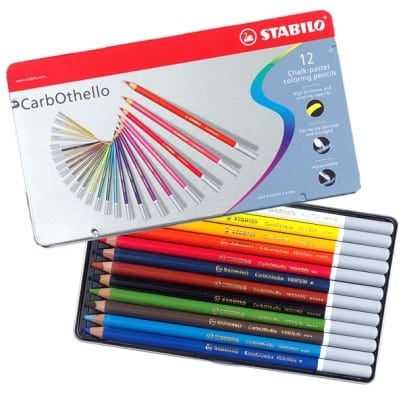
Chalk pastels also come in pencil format. These are fabulous if you enjoy traditional drawing or want to add fine details to your pastel drawings.
They have a lovely soft silky feel when drawing with them and and getting fine detail like animal hair, eyelashes or rigging is a dream when using the pastel pencils.
The set I use is the Stabilo CarbOthello range (you can click the link to view the set on Amazon):
Safety
The biggest problem when working with chalk pastel is that the the powder of the pastel dries out the skin and the texture of the paper can be rough on your skin too, especially when doing a large artwork.
If you wear surgical gloves when working with pastels, you won’t have this problem and you have the added bonus of your hands staying clean too. You can purchase surgical gloves from all drug stores and most dollar stores.
Do, however, avoid inhaling the pastel dust as this can be dangerous. When working with pastel I try not to work in a windy area to avoid the wind blowing up the pastel dust into the air. If you are afraid of inhaling the dust then you can wear a dust mask when drawing.
Choosing Paper to Draw On

It is important to choose your pastel papers correctly. Unlike graphite drawing you can’t just grab a sheet of photocopier paper and start drawing.
The chalk needs a rough surface to adhere to. If the surface is too smooth the pastel will simply lie on top, falling off the minute you pick up the sheet of paper.
Fortunately there is an incredible variety of pastel papers available on the market at reasonable prices.
They vary in their roughness – called tooth – as well as their colour.
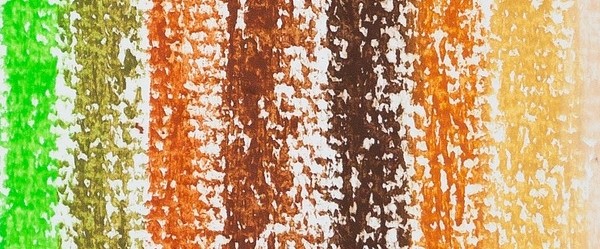
When choosing the roughness of the paper there is always a trade off. The smoother the paper, the less pastel can adhere to it. The rougher the paper however, the more the tooth (texture) of the paper is visible.
Think of it this way: With a smooth paper, the pastel stick just glides over the surface instead of sticking to it. Rough paper has valleys and peaks, as the pastel stick slides over it, the pastel gets stuck on the peaks but cannot reach down into the valleys leaving them exposed. Here is an example so you can see what I mean:
Smoother papers allow you to get crisp details, especially when using pastel pencils. You can however not draw several layers of pastel over each other as the paper is too smooth.
Rougher paper allows you to add multiple layers of pastel down before the valleys fill up. You however loose fine detail as the detail lines break up as shown above and the detail is lost.
In both cases, when the texture of the paper has filled up with pastel dust, you cannot work over that area anymore as the paper simply doesn’t accept any more pastel, it just slides off the surface.
You thus need to decide how much layering / texturing you require in the drawing as well as how much detail and then decide on an appropriate paper texture from there.
The next consideration is the colour of the paper. There are three general rules here:
1) choose a neutral colour for the specific drawing. For example if you are drawing a seascape you will choose a paper similar to the dominant colour in the sea. That way if there is any of the paper texture showing through, it optically blends away.
2) choose the compliment of the neutral colour. For example with the seascape you will choose a brown / orange coloured paper to draw on as that is the complimentary colour of blue. The theory here is that when complimentary colours are placed next to each other, they make each other look more vibrant. So if any of the paper’s texture is visible, it will help to make the drawing look more vibrant.
3) choose a background colour. By choosing a background colour you save a lot of pastel as you don’t need to fill in the background with pastel. This technique is popular when drawing still life scenes.
Pastel papers come in different sizes. These sizes are generally the same as standard canvas sizes as well as the standard paper sizes. Smaller sheets are also available in pad format which are fantastic for when you go on holiday. You can do several drawings while on holiday and not be concerned about how to transport the individual sheets or keep them out of harms way. The pad takes care of that for you. When you get home you can then remove the drawings from the pad and have them framed.
The two most common pastel paper brands are Strathmore and Canson Mi-Teintes
Other Equipment Used
Toilet Paper – Toilet paper is used for blending so just use whatever you have around the house. No need to purchase a specific brand.
Bread – You use bread to erase any mistakes you have made. You can’t use a regular eraser as it just smudges the pastel dust. The bread actually lifts the pastel up off the paper and into the bread. You can use any type of bread as long as it doesn’t have any hard seeds or hard bits in it as you don’t want to scratch the pastel paper in the process.
Charcoal Sticks – You can’t do your initial sketch work with a regular pencil when working in pastel. As the paper has texture, it scores easily. The pastel then glides over these valleys leaving your drawing work showing through. To avoid this headache it is best to either use pastel or charcoal to draw with.
I like using the thin soft charcoal sticks as they allow me to draw thinner sketch marks when planning my drawings. You get two different types of charcoal sticks – willow and vine. Vine charcoal is more of a dark grey than willow charcoal, which is black. It doesn’t really matter which one you use. Both work equally well in my opinion.
Charcoal sticks also come in different thicknesses. For sketching out my pastel drawings I prefer the thin one, which is roughly the thickness of a wooden kebab skewer.
These are the charcoal sticks that I currently have:
When sketching with the charcoal stick, press very softly. Even though it shouldn’t score the paper, it can leave dark lines which you don’t want to show through in your final drawing.
You can use your slice of bread to erase any errors.
Blending Stumps – There are used to blend small areas and also add special effect like dragging the whiskers on a cat. These can be purchased from your local art or stationery store.
Craft Knife – Any small craft knife will do. I use it for trimming larger sheets of pastel paper to size as well as for special effects (as you will see later in the tutorial). Get this from your dollar store.
Ear Buds (Q-tips) – Often when you are busy with detail work you will find that you finger is simply too large to blend a small area. This is when an ear bud comes in hand. The soft tip blends just as well as your finger does.
Soft Eraser – Although this is not something I use often when drawing in pastel, I though I would include it here as you probably have it lying around the house already anyway. As mentioned before, you can’t use the eraser to erase, but you can use it to get interesting smudge effects in your drawings.
Brushes – You can also use blushes to blend and move the pastel on the paper. I use the harder bristle brushes to get the pastel into the texture of the paper when I need an even looking finish without the texture of the paper showing through.
The softer brushes are used to soften blends or create areas with very little colour. To do this I dip the brush in some pastel dust and gently brush it onto the paper in the correct place.
Cloth – A soft cloth is an essential part of pastel drawing. As you work with the pastel sticks they leave loose pastel dust on your hands and the drawing. As you lay one layer of pastel over the other the pastel sticks become contaminated with the other colours on the drawing.
You use the cloth to wipe the excess dust off your fingers as you work to prevent contaminating subsequent colours used. The same thing goes for the pastel sticks themselves. When you see they are getting a bit dirty, you give them a wipe on the cloth.
The cloth can be washed in the machine or by hand when it gets too dirty.
Pastel Shading Techniques
Shading is the most important technique which you need to master when working in pastel as it is the technique you will be using most often.
There are a few ways to achieve smoothly blended colours.
You can lay down the colors you want to blend next to each other, then use your hands to blend the line where they meet away. If you don’t want to blend with your hands, you can use a soft hair brush as well.
The problem with blending in this way is that the colors seem to lose their vibrancy as rub over them. I am not sure why this happens, it just does. There are two things we can do to overcome this.
The first is to blend the colors with your hands or brush, then gently rub over them with the pastel stick itself to leave a thin vibrant layer of untouched pastel on top of the blended colors. This works pretty well, but there is a better way.
Let’s say we want to blend from left to right. Lay in the first color, e.g., left hand side by using the length of the pastel stick. Start from the left and work your way right. Block in past the area where the two colors will merge. Now start with the second color, from right to left. When you get to the area where the two colors need to merge, gradually press lighter and lighter until the stick isn’t touching the paper anymore. You may have to repeat the blending of the colors once or twice, left to right with the one colour, then right to left with the second colour a few times, cleaning the pastel on the cloth after each pass. You now have a perfect Shading with bright vibrant colors throughout.
Here is a practical example of colours blended in this manner :
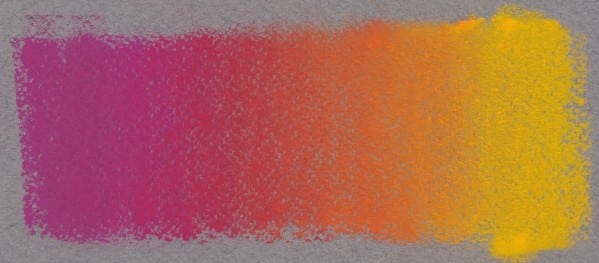
In the example above I started on the left and lay down some light pink. I extended this pink into the dark pink area, pressing softer and softer as I worked my way to the right. I then worked from right to left, laying down the dark pink, extending the colours over the excess light pink, pressing softer and softer as I worked my way to the left.
I then did the same process with the dark pink and red. I blended the dark pink to the right and the red to the left. Then again using red and dark orange. Then using dark orange and light orange and lastly using light orange and yellow.
See if you can spot each colour that I used.
Cross Hatching
The next drawing technique we will look at is cross hatching. Cross hatching is a striking method of optically blending colors together, yet many artists battle with this technique.
The idea is that you lay down lines of color in different directions and at varying distances from each other. The colors will then optically blend together when you stand back.
The problem is that artists don’t know which direction to let the lines run in. This is actually easy to work out and only takes a drawing or two to get the idea. Take a look at the picture below:
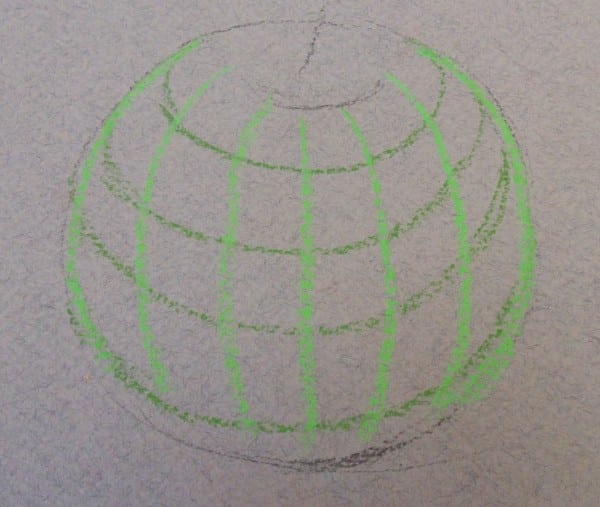
Here you can see that the lines follow the curve of the apple from top to bottom and left to right. Each surface has two natural “directions” that it runs in.We call these lines cross contour lines.
When looking at the light green lines you can see how these lines gradually change angle as they move from left to right. They follow the contour of the apple on the left, then gradually “straighten” as they follow the contour until you have a straight line. The line straight when you are facing the contour line. The contour lines then gradually arc towards the right until they meet the silhouette of the apple.
The same happens with the dark green lines – they change from a tight circle around the top of the apple to a bigger circle around the outside.
Practice ‘seeing’ these lines when you look at objects. You can even take a few real items like a box, a tennis ball and a pear, then draw horizontal and vertical lines on them. Then view these items from different angles to see how their contour lines change, yet always follow the shape of the object. Once you can “see” these cross contour lines on the objects you are cross hatching, you will soon enjoy drawing cross hatched drawings.
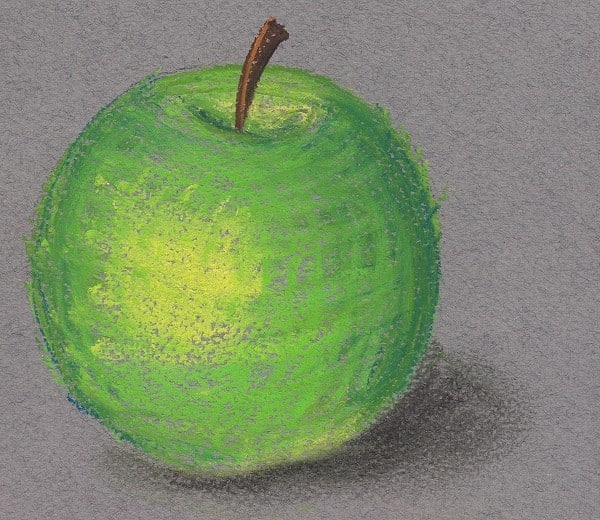
To shade using cross hatching, you simply reduce to number of lines of the one color and increase the amount of lines of the other color. You also vary the width you leave between each line. The closer the lines are to each other, the more of that colour you will see.
Here is the completed apple. Try and see the cross contour lines as well as the varying widths between same coloured lines :
Scumbling
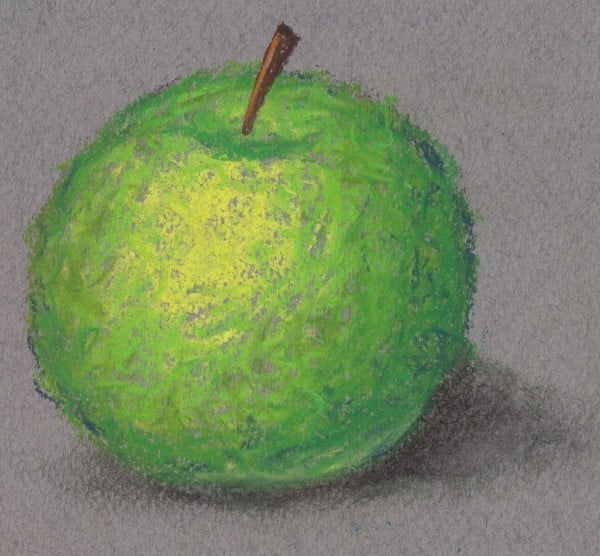
What a funny word! Scumbling is actually a pretty handy technique to learn though, especially when working with natural objects and scenes like landscapes that require a lot of texture.
Anybody can scumble, all you do is scribble in a random fashion on the paper. Here is my scumbling technique:
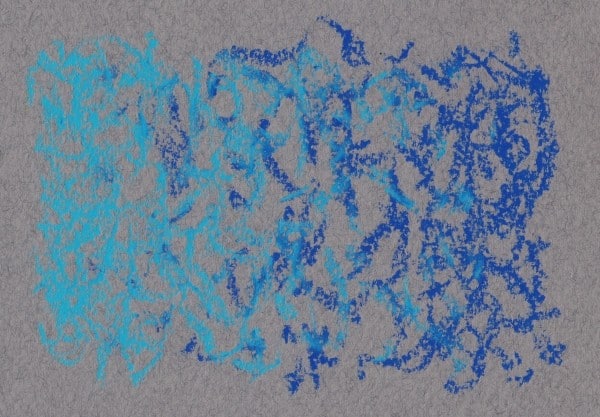
The best way I can explain scumbling is that you are using wiggles and squiggles to draw. What makes scumbling incredible is that the way I draw my wiggles and squiggles will be different to how you draw yours. No matter what your drawing will look different to mine, which is fantastic!
To find your favourite scumbling method, take a sheet of paper then just try a few different styles of scumbling. You will soon feel that one way is more comfortable and natural to your hand than the others. As long as that scribbling motion gives you a random effect on the paper, then you have found yourself a great, and unique, scumbling technique.
Here is an apple I have drawn using the scumbling technique. You try and draw one too:
Pastel Scratching Technique
Often you would like to add some fine detail to your drawings. One way to do this is to trim the stick of pastel using your knife so that you get a sharp point. Here you can see how I have done this:

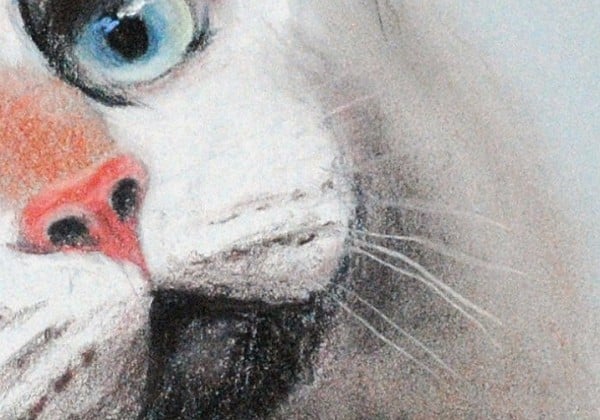
Another way is to use the knife and scratch out some fine detail. Here you can see how I have used the knife to scratch out the whiskers of this cat:
You can even do entire drawings using this scratching technique. Below is an example of scratching where I have laid down two contrasting colors and scratched out the image. The amazing thing about this technique is that the bottom color shines through and not the paper color as one would expect. This means that you need to lay down the color you want to show through before the main drawing is done.
Here is a tree done using the scratching method :
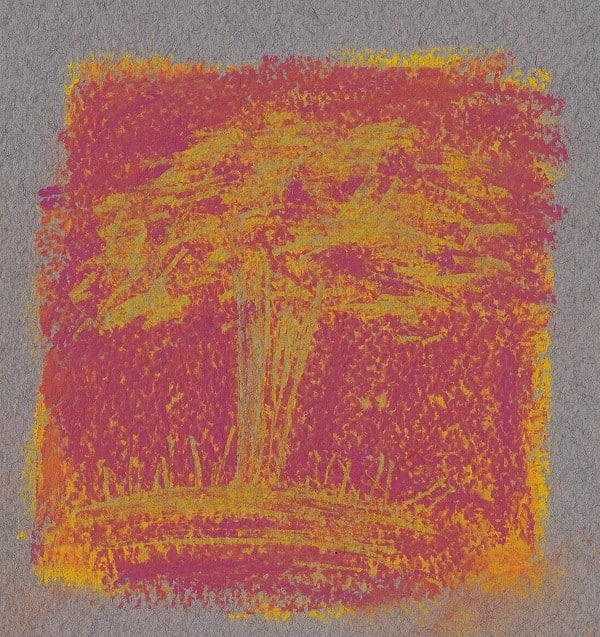
For this sketch I Lay down a layer of yellow, then a layer of pink. I then used a craft knife to scratch out the tree.
Stippling
Stippling is not as fancy as it sounds, but the effects are great.
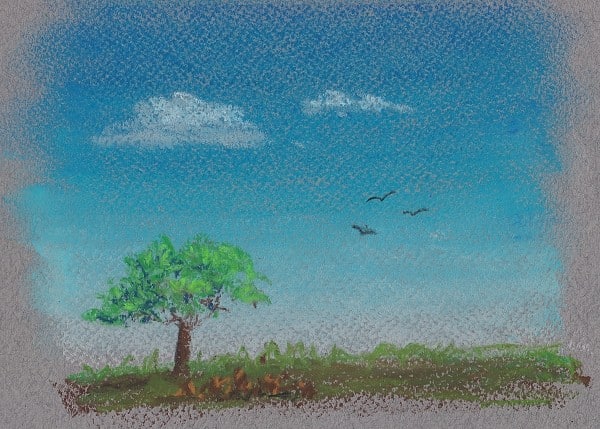
You stipple by dotting the pastel down onto the paper as though you are making a full stop. This can give you the impression of repetitive items like rocks and leaves.
Here is a thumbnail landscape sketch with the rocks and leaves added using the stippling technique. (See if you can recognize any of the other techniques we have discussed in this tutorial):
Protecting Your Artworks
As the pastel chalk is basically sitting on top of the paper, it is very easy to damage the artwork. Any touching, bumps or scratches will hurt the drawing.
For that reason it is important to seal and protect your drawings correctly.
What I do directly after completing the drawing is spray the surface with a fixative spray. This spray can be thought of as a layer of glue which will bond the pastel to the surface.
This layer is however very thin so will still only protect against light touching and bumps.
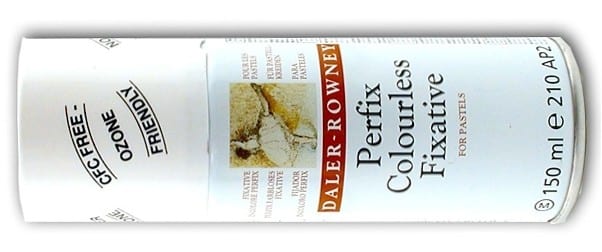
You can see a photo of the fixative I use below (you can click the image to view it on Amazon):
Many people use hairspray as a cheap alternative to commercial fixative, but I would not recommend that. Hairspray is designed to hold the hair in place for a short period of time. It is not made to withstand the test of time and certainly not designed to weather the effects of sunlight falling on it. As a result drawings you have sealed with hairspray will yellow pretty quickly over time.
Always use a fixative spray from a reputable art manufacturer to ensure the longevity of your artworks.
Of the commercial fixative sprays you get two types. You can tell the difference by shaking the can. If it has an agitator marble inside the can, then you know the contents inside separates when not in use. I don’t recommend you use this type of fixative spray as you are never sure if the contents are properly mixed after shaking the can. As a result you may end up spraying your artwork with a layer which is not optimally mixed to protect your artwork.
Purchase the one without the marble in it like the brand above.
Before spraying your artwork, always test by spraying on a spare piece of paper first to ensure the nozzle isn’t blocked. You don’t want the fixative to splatter all over your artwork. If it is blocked I usually soak the nozzle in methylated spirits for a while.
When spraying, start spraying beyond the artwork and spray continuously past the opposite edge. That ensures a nice even layer of fixative over the entire stroke. On the next stroke, slightly overlap the previous one to ensure you cover the entire artwork and don’t leave unprotected streaks across the artwork.
After spraying leave the artwork to dry before continuing with the next protective steps.
From there you would ideally frame the artwork. Pastel artworks should always be framed behind glass to ensure that they cannot be touched or bumped.
If you are not ready to frame the artwork yet, I usually lay my pastel artworks flat, one on top of the other in a place where they will not get bumped accidentally. To separate the artworks from each other I place a sheet of baking / wax paper between them.
If you know you are going to be doing several drawings before framing them, then I would recommend that you purchase a pad of pastel sheets. They are spiral bound and the good brands already have a wax paper sheet between each sheet of paper.
There is one draw back of spraying your artworks with fixative and that is the colours in the artwork darken up. If you are going to spray your artworks, keep this in mind when drawing. What I like to do is touch up the highlights after the spray is dried. If you want to do this too, just don’t end up redrawing the entire drawing, just a few light strokes of pastel over the brightest highlights is enough to make the drawing pop again.
That concludes this lesson. I hope it has inspired you to give pastel drawing a try. It really is a fun and free drawing medium which I know you will LOVE!
To learn even more pastel drawing techniques, you can follow my next lesson in the series:
Click the button below to view the real time follow along version of this class:
Pin Me
