Class Tutorial
Template

Transfer the outlines of the template to your canvas using a sheet of carbon paper. Support the back of the canvas if you are using a stretched canvas. (Do not make it absolutely black as it has to contrast against the headset.)
Painting the background

The background is painted with a very dark mix of raw umber and ultramarine blue. Mix in equal quantities. Use a broad brush and then edge off carefully around the bust profile with a smaller brush. If the background is still too mottled then first dry it, and go over it again with a second coat of paint.
Painting the headset

Mix up a black with the same background mix but with a bit more blue in it. Check it at the edge of the headset to see that it is actually darker than the background. When satisfied, paint some to the sides as shown. Paint some Viridian green in the centre, leaving a small gap.

Blend into the black as shown.

Paint the next band similar to the top section. Notice that the highlight is slightly to the left of the centre.

Paint the yellow areas. Be careful to check against the reference photograph. Add the rectangles with a light orange/brown. The two shadow areas in the centre is from yellow ochre.
Lower band of headset

Paint the sides with yellow and a touch of the green mix as shown and then fill and blend the centre with yellow and a touch of yellow ochre.
Painting the face

Scrub in a very light yellow over the highlight areas. Begin to add the moulding of the face with some Burnt Sienna being careful to note the various vital tonal ranges.
Add the eyes

The eyes and the eyebrows are painted in with the previous black mix. For the iris just add a touch of white. Use the same colour for the shadow in the right eye. Don’t try to make it too realistic.

Block in the mouth with alizarin crimson. Start adding the deeper shadow to the side of the face with burnt sienna.

Constantly compare against the photograph when blocking in the deeper tones.

Most of the shading almost completed. The shadow under the nose is mixed from burnt sienna and a small touch of the black mix. Note the highlight on the tip of the nose.

Darken the nostril area and also darken the upper lip a bit and darker towards the sides. Add the highlight to the bottom lip as well as the two highlight stripes on the philtrum below the nose.

Finish the ears in a rough manner. Note that the ear on the right has been broken. Add the dark lines to the headset to make the ridges stand out.
Paint the neck

First paint a very light burnt sienna over the whole of the neck area. Add the slightly darker section and finally paint in the darkest shading.
Paint the dress decorations

This is where you have to be very careful. Don’t rush. You need to note exactly where to paint which colour. Begin by first using alizarin crimson. Use viridian for the top rectangles.

The lighter green is sap green for the tips of the triangular decorations.

Fill in with cadmium yellow and glaze yellow over the whole strip with the heart-like symbols.

Complete all the decoratives.

Paint in the top of the stand with some gray (black and white) and then paint the base of the bust with the black mix.
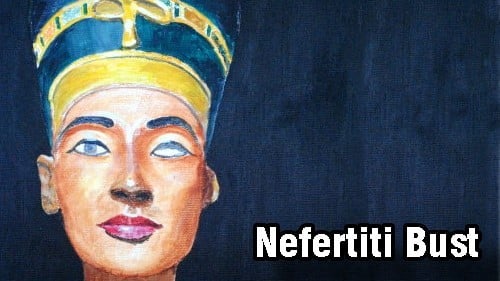
Final painting

Click the button below to view the real time follow along version of this class:
Pin Me
