Short Class Video
Class Tutorial
Paint the background
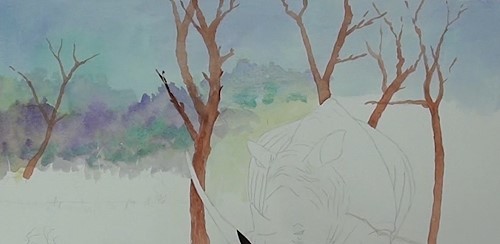
Before you start painting make very sure that you have added masking fluid to all the places where you want to preserve the white of the paper. This includes even the thin twigs and the grass.
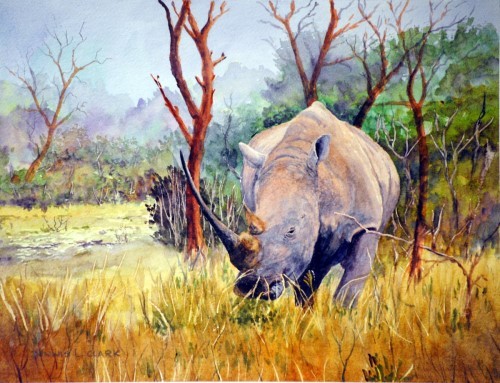
Background – In this painting I’ve plotted in first all the tree trunks which are in the foreground. When it is dry, the sky is vaguely washed in as I want the background to have a hazy effect. While the sky is still damp, drop in a variety of colors to indicate the various types of trees. Some places will be merged while we also need hard lines to emphasize some of the tree tops. The trees get darker closer towards the Rhino.
Trees – Darken up the tree tops so as to push the distant trees further back, and continue around the shape of the Rhino using dark green and purple.
Painting the foreground and middle ground
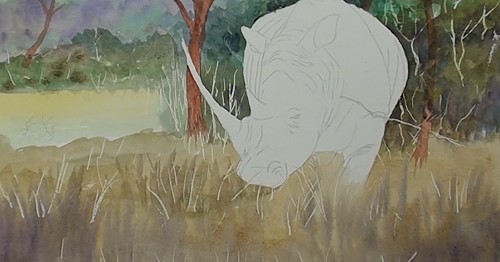
First lay the underpainting with light yellow and light Burnt Sienna. Use a larger brush for the immediate foreground, leaving it streaky and in the horizontal. Using the cutting edge of the brush, stroke in some grass shadows in purple and leave to dry.
Middle ground – Paint these trees in a middle tonal range with no detail at all except the top edges. Scumble the flat area with the side of the brush and touch in some purple for the shadows in the trees and to show up the light-colored grass which also has shadow patches.
Thicket and foreground – This thicket is dark and shows up the very long horn beautifully. The immediate foreground is in shadow. This way I’ve created about 9 perspective tonal ranges. See is you can see them.
Painting the rhino's horn
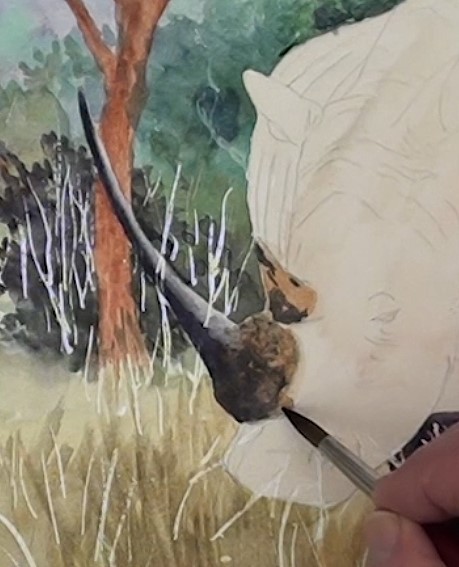
The horn has a dark shadow. Use a small brush and don’t rush it here. This horn is the main focal point of the painting. The base color of the two horns on the forehead is Burnt Sienna and then bring in some of the darker color, but still letting some of the brown showing through.
Painting the rhino's body
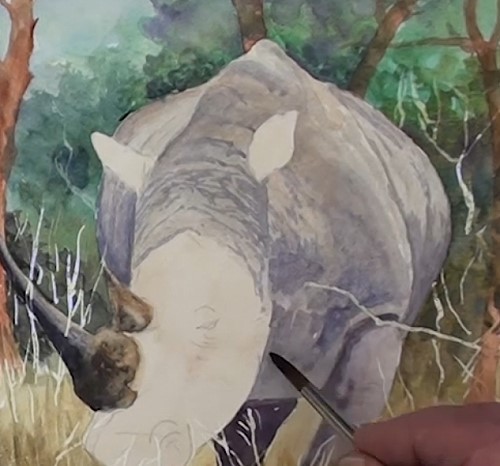
The legs and the very light under-painting have already been painted so here we are starting to plot in the tonal ranges on the body. Start from the lightest first as these are easier to correct than if we start off too dark. Carefully darken up, all the while comparing what you do against the reference photograph.
Painting the ears and face
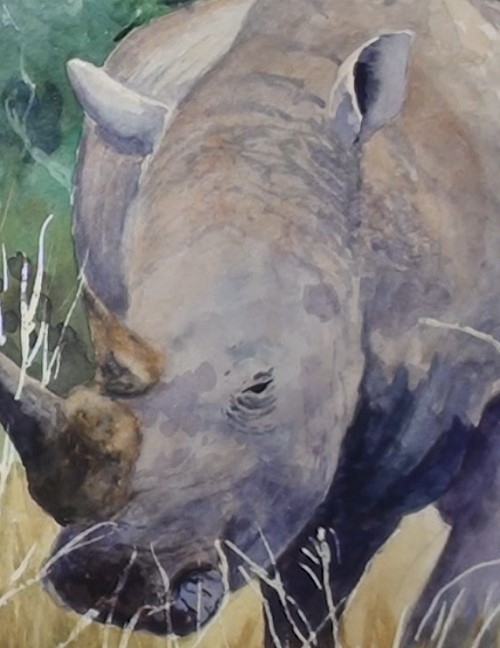
For the ears, paint the dark areas first and then fade out. Don’t lose the highlight on the edge of the ear.
Face – These are the lips of the White Rhinoceros and are in shadow. Note the touch of brown at the nostril. Carefully work on the tonal ranges on the face and body as these produce the 3D shape and contours of the muscles. Continue to work on the face and warm up the shoulders only. I normally paint the eyes first but here I’ve left it practically to the last.
Don’t make the mistake of making the eye too big. After adding the creases under the eye, we can now begin to paint in more details such as the facial folds near the ears. Shadows also need strengthening in places. Let the painting dry.
Adding the finishing touches
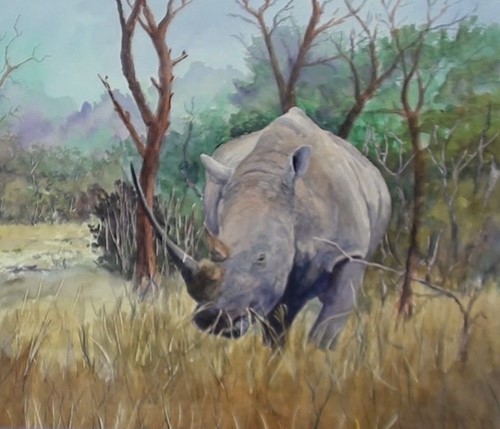
Remove the masking fluid and brush color into the twigs and thicket stems. Do that also with some of the grass.
Trees – Mix a dark brown and paint the shadow sides of the trees and branches, adding in the smaller ones as well. The tree in the distance is painted much lighter.
Using a rigger brush, paint some dark grasses and any other touch-ups.
Final painting
Click the button below to view the real time follow along version of this class:
Pin Me
