Short Class Video
Class Tutorial
Paint the background
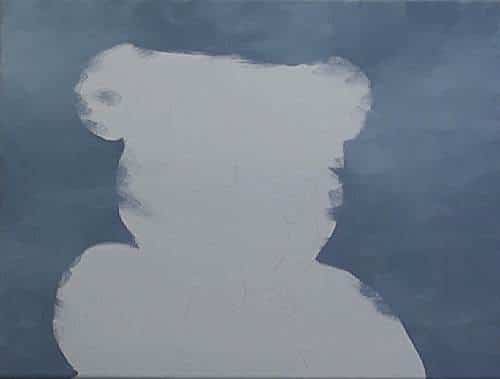
Start by mixing up a blue grey. If you have paynes grey, this will work beautifully with the addition of the same white.
Paint all around the edges of the teddy bear. Don't worry if you go slightly over the lines.
While the paint is still wet, use neat titanium white to add a few misty patches in the background.
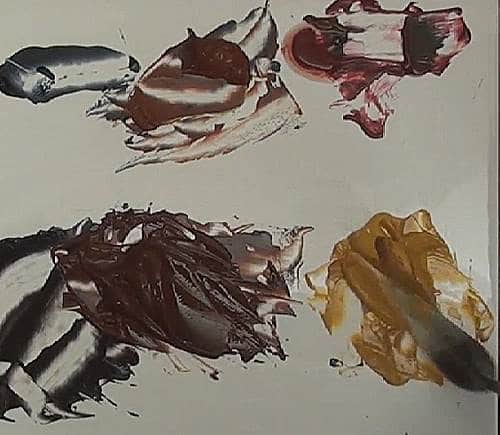
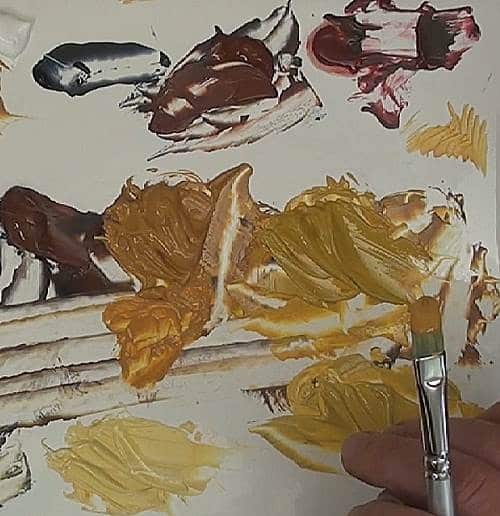
Palette for teddy bear colors
Now we can paint the teddy bear.
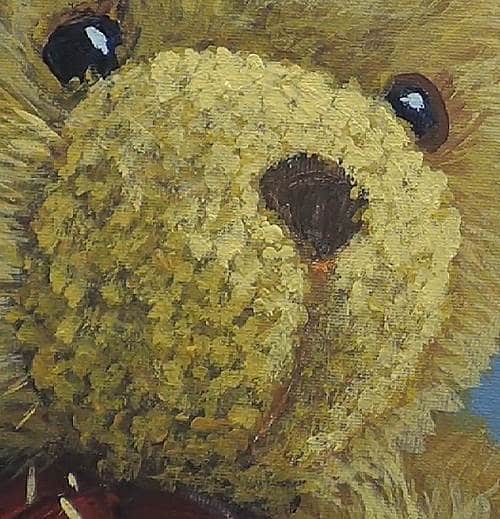
Using variations of brown shade in the bear I have used various shades of raw umber and yellow ochre.
Don't try to get a hair effect at this point.
All you are trying to do is paint the darkest dark colors you can see between the hairs area.
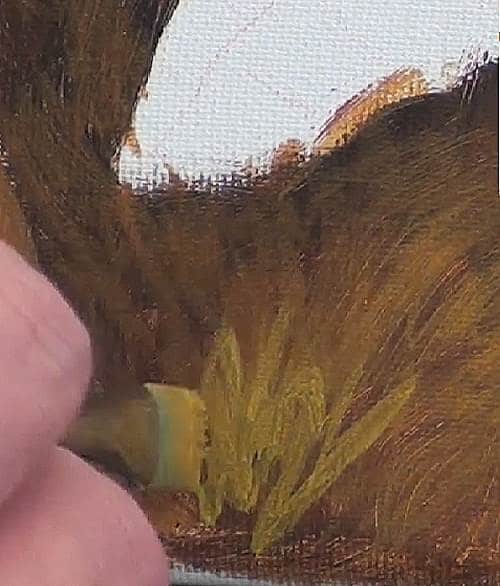
Paint the background of the teddy bear
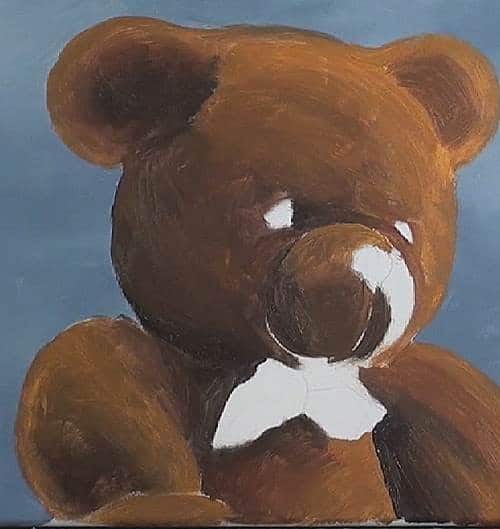
This serves two purposes.
1 - We are getting rid of all the white of the canvas and replacing it with the darkest possible color in that area. This will allow us to create lots of depth in the hair.
2 – We are shading the shape of the bear. This will help us understand the contours of its body and give it an instant 3 dimensional look.
See he looks like a teddy bear already.
Palette colors of the individual hairs of the teddy bear
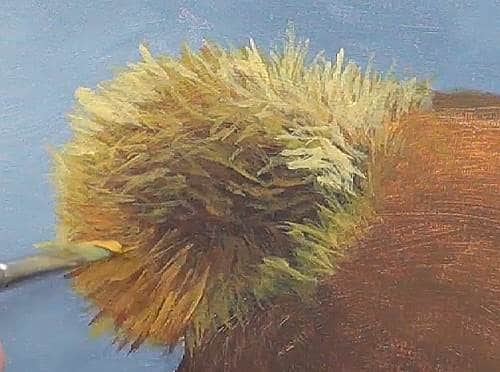
Okay now lets start adding the hair.
We will do this using short sharp strokes using a soft filbert brush or a fine liner.
What we need to do is build up layers of hair to show that they overlap each other.
This will give us that lovely soft cuddly effect.
Paint the individual hairs of the teddy bear
So start off by adding a layer of slightly lighter color hairs, then an even lighter layer, and then an even more lighter layer and so on.
Each subsequent lighter layer you add must be in an area that is darker than the reference photo.
In other words you will only add layers of color in an are until the area you are painting has the same tonal value as the corresponding place on your reference photo.
Painting several layers to the teddy bear
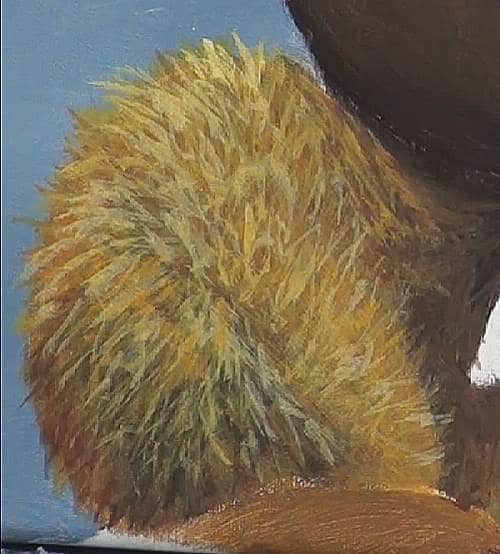
As a result you will find that the darker areas on the bear have only one or two layers of hair and the lightest areas may even have six or seven layers.
So I think you can tell already that you will need to be patient when painting your teddy bear, because if you don't add all these layers, your teddy won't look fluffy.
As you paint in these strokes use a feather-light touch. Only the tip of the brush must touch the canvas.
This ensures the thinnest lines possible, and the maximum amount of suggested detail.
The only way to use a feather-light touch is to constantly pick up fresh paint on the brush.
Two to three stokes, pick up paint and so on.
Then as you paint look very carefully at the directions of the hairs and their lengths.
The directions will gradually change to follow the color of the body.
Hairs that point towards you are shorter because of foreshortening.
Notice how I paint one part of the body at a time.
Whatever is at the back first then the parts above it to get the overlapping correct.
For example the back arm, then the body, then the bow tie.
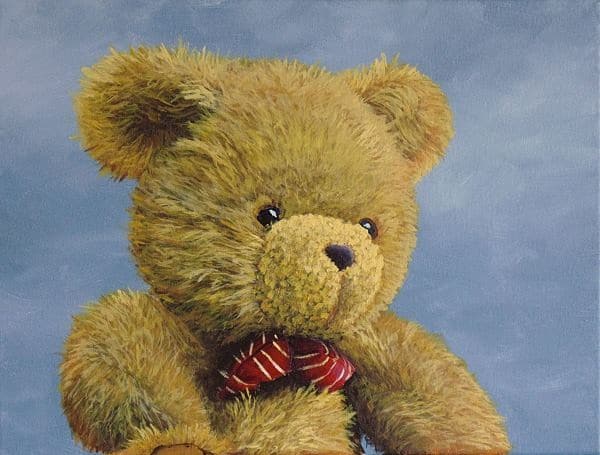
Paint the bowtie
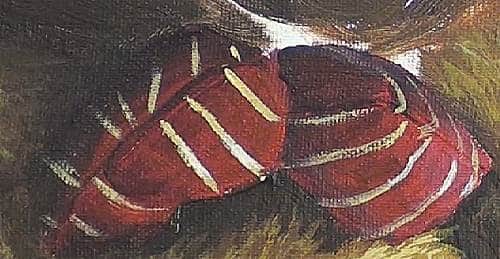
For the bow tie I have used - cadmium red for the sunny areas and alizarin crimson for the areas in shadow.
Gradually darkening with french ultramarine.
Note the shadow the bow tie casts on the body.
For the stripes use a light yellow and carefully paint their directions st the correct angle to show the shape of the bow tie.
Painting the ears
Okay I am going to go ahead and complete the ears and face using the same hair technique.
With the ears don't forget to keep the inside of the ear darker.
Painting the face
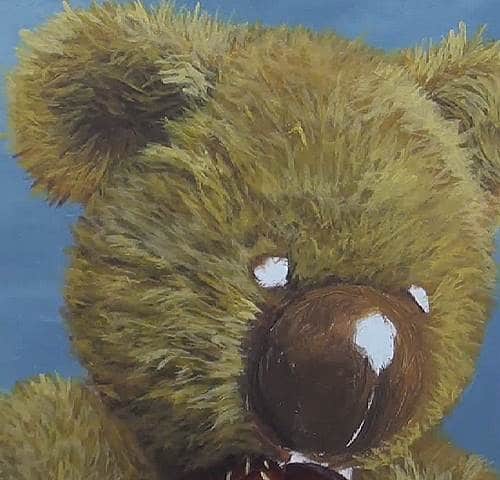
For the face notice that it goes lighter to the right as that is where the sun is coming from.
Painting the eyes, nose and mouth
Now block in the eyes with black and add a reflection with white.
Then add a few overlapping hairs to make the eyes recede.
For the mouth I use a fine round brush and dabbing motion instead of strokes as the hairs are a lot shorter here.
I do still however use the same overlapping technique.
The nose is shaded with raw umber and white to make it look round.
Then to finish the painting I add a few overlapping hairs.
Final painting
Click the button below to view the real time follow along version of this class:
Pin Me