
Short Class Video
Class Tutorial
Painting the background
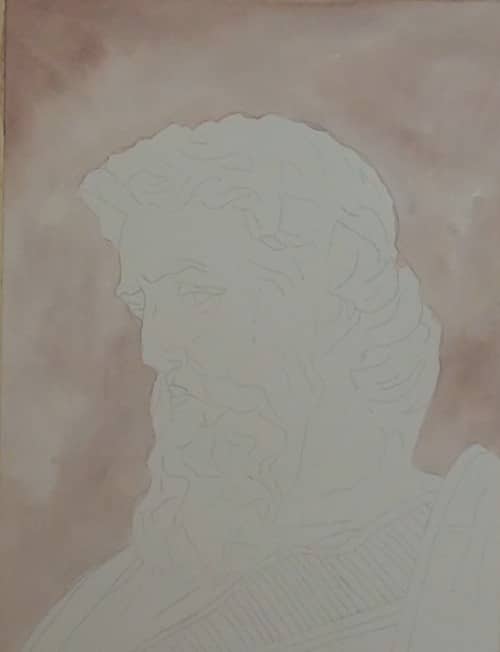
With a medium round brush, begin by wetting the background behind the bust. Be careful not to wet any area inside the bust itself.
The alcove is a warmer colour than the bust so lay in some Burnt Sienna that has a touch of Ultramarine Blue in it. Work carefully around the profile of the bust. While still damp, drop in some Blue and let it merge into the warmer colour.
Background detail – When dry, draw in the markings of the alcove and darken up the top corner to show up the shadow better.
Painting the hair
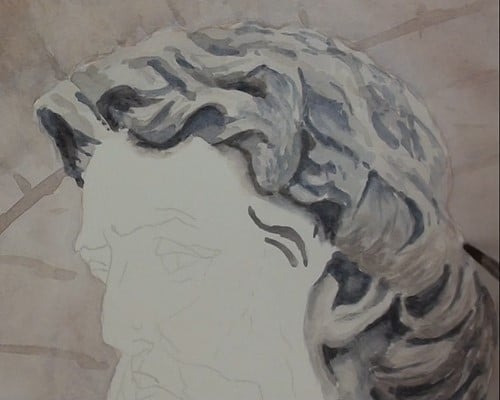
The best way to begin painting hair like this is to plot in all the very dark areas first. This saves you getting lost among the many similar details. We are only using two colors for this painting, namely, Burnt Sienna and Ultramarine Blue. We can now begin to add in some of the lighter tones around the neck area. Build it up by adding darks and blending them down to suit the neck mouldings. Once this is finished we can go back to painting the hair. Being a carving, we will not see individual hairs but only as groups. Darken up some shadows and then work on the ear. There is not much detailing to do here.
Add a light wash over the whole of the hair area and begin to work in the minor shadows, being very careful not to encroach into the light highlight areas. This is where you need to keep referring to the reference photograph. There is no need to copy everything exactly as in the photograph. Simply slightly – don’t forget that this is a painting.
Painting the face

Start with the darks and paint in the shadows around the eyes and then begin the shape of the face with light washes. Take your time with the bust’s left eye as this is the main focal area. Shade in with the flat of the brush and work in the other tonal ranges while the paper is still slightly damp. This prevents very sharp edges.
With a small round brush we can now finish off the eye details and the forehead markings. Soften with a tissue where necessary.
Painting the mouth, nose and beard
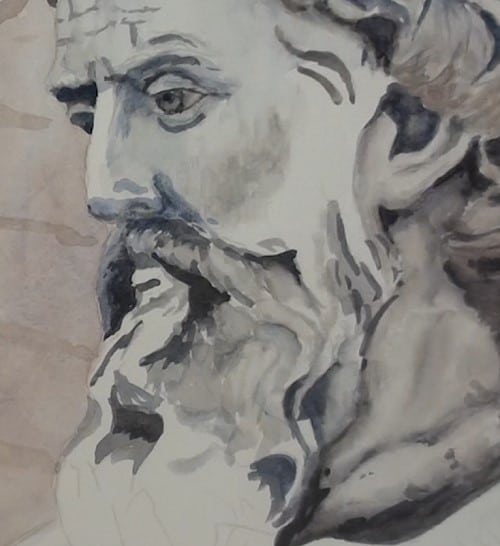
There are a lot of dark areas around the mouth, nose and moustache. Block them in and begin to draw in the basie shadows of the beard. There are not many dark areas in the beard so we can use a lighter colour and darken up later on.
Back to the smaller brush and emphasize the shadow of the moustache and a bit more to the beard. Add the cheek shadow and roughly finish the upper beard.
Adding the finishing touches to the beard

Add the lip shadow and now we can finish off the beard by laying in the darks first and then the different tonal ranges. Again, these are only roughly painted in. Use a damp brush and a tissue to lift out the highlight areas.
Touch up the eye and then, very carefully, glaze a very light Burnt Sienna wash over the right side of the face, a portion of the lower hair, and then the ear and neck.
Painting the tunic

The tunic is bluish so add a bit more blue to the mix. Paint the two areas and the shadow where the shoulder band rises over the tunic.
Painting the shoulder bands
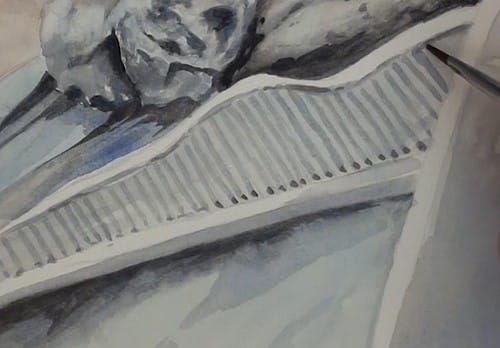
Draw in basic stitching and paint a light blue for the band. Add the fold shadows and dot the right hand side at the same time. We can now paint in all the other small lines in the band together with the smaller shadows.
Painting the outer cloth
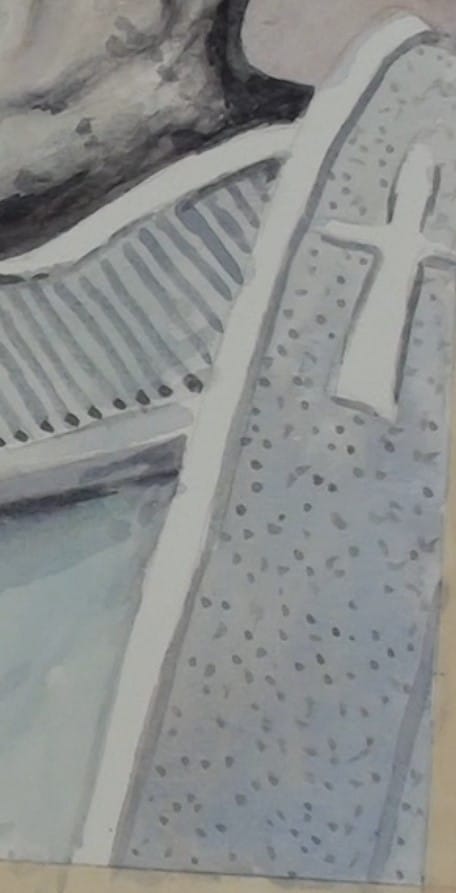
The outer cloth has a cross. Add the dark outlines and all the dots as well. This finishes off the painting.
Final painting

Click the button below to view the real time follow along version of this class:
Pin Me
