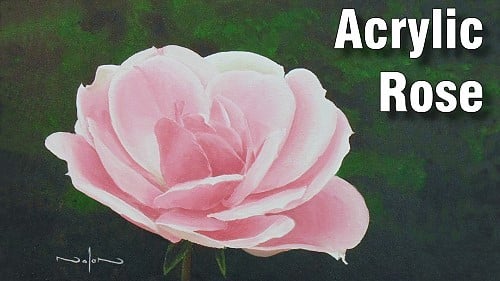
Short Class Video
Class Tutorial
Paint the basic outlines of background
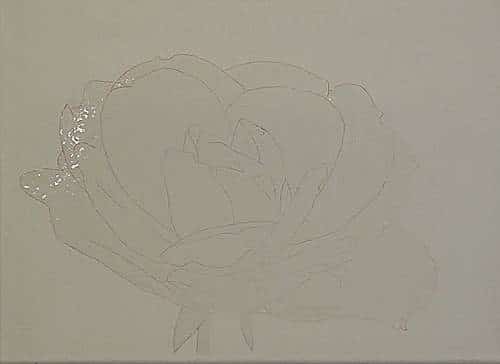
I start off by sketching out the basic outlines of the rose onto the canvas.
I then use clear cover to mask off the rose and the stem.
This allows me to quickly paint the background while still maintaining a crisp silhouette around the flower.
For the background I use three variations of Sap Green to mix a highlight, midtone and shadow color.
To mix these colors I add Raw Umber to the Sap Green for the shadow color and Cadmium Yellow to the Sap Green for the highlight color.
I start off with the dark mix blocking it in solid at the bottom of the canvas and then gradually paint more dappled towards the top.
Paint the different tonal ranges to the background
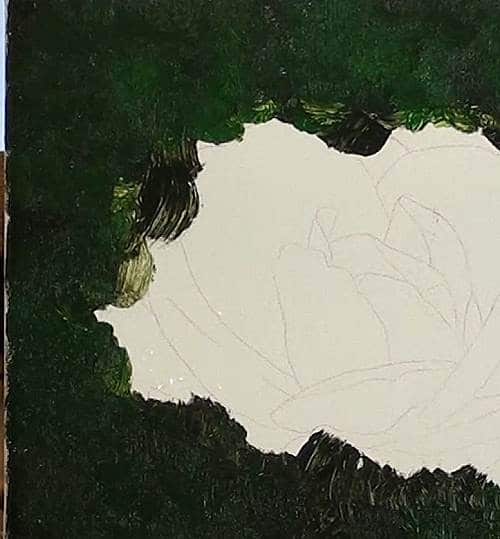
I then add the midtone, which is neat Sap Green dappled over the entire background.
I add some highlights to the background using the lightest mixture. I add these mostly in the top area of the canvas with less and less patches as I progress downward.
I soften all these patches by gently blending adjacent colours into each other.
This blending gives a mottled, out of focus effect to the background.
As a result you will notice that my background is much more out of focus than on my reference photograph. By adding less detail into the background I am forcing the viewer to look at the rose which is the focal point of this painting.
With the background complete I dry it using a hair dryer and remove the mask.
Tonal colors for the petals
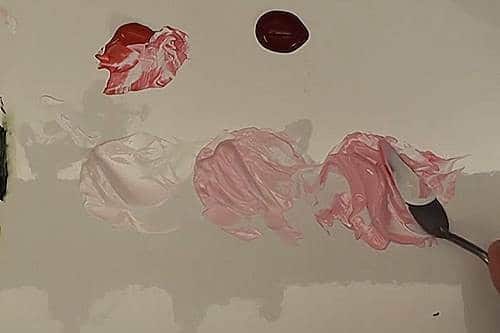
Our rose is pink so I am going to use Magenta as the base colour adding Titanium White to get the lighter colours.
The lighter I need to go the more White I add to the Magenta.
On the lower petals you will notice that there are some shadows and reflected colours too.
To get these colours I will add Sap Green to the Magenta as that is it’s complimentary colour.
I will also add touches of yellow and orange where required.
Painting the rose
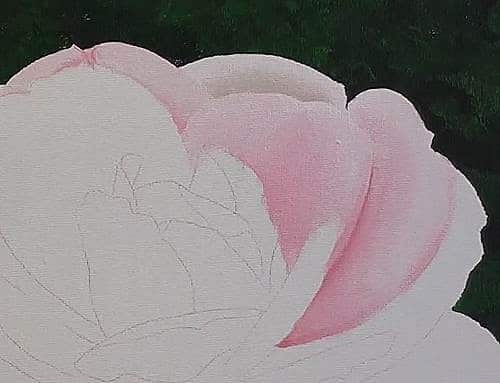
When painting a rose I will always starts with the back petals and then gradually work my way forward. That way I automatically get the overlapping effect correct.
The biggest difficulty in painting roses, or any other flower for that matter, is judging the correct tonal value.
Surprisingly you can be way off on your colours, but if you get the tonal values correct then you will end up with a beautiful flower full of depth and dimension.
So this is what I want you to concentrate on the most – getting those tonal values correct.
When you first start painting the flower though you are painting onto a mostly white canvas. The problem here is that the petals you are painting will look darker than they actually are.
For this reason you must always continue to look and compare as you paint.
Look at what you have already painted and compare it to the reference photo.
If you see you need to go lighter or darker in an area, then stop and fix that total value before continuing.
If you don’t, then adjacent petals will appear lighter or darker than they should be.
Then by the time you’ve completed all your petals, all the tonal values will be completely off making your rose lose it’s realism.
So don’t make this mistake, keep looking and comparing as you paint.
Painting one petal at a time
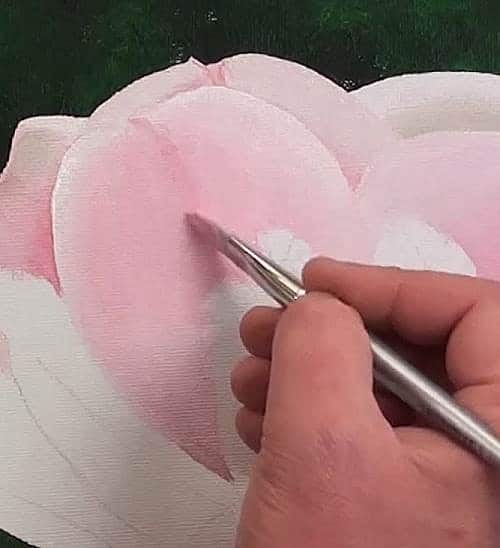
I complete the rose petal for petal, this breaks down the complex flower into small manageable bite-sized chunks.
As I paint the petals I initially ignore the fact that it is a petal and only see it as a random shape with shading in it.
I will look to see what colour’s I can see inside this random shape.
I then lay down these different colours where I see them inside the petal.
From there I will look to see how do the individual colours blend into each other.
Do they blend slowly and gradually? Do the end next to each other in a sharp line or do they meet in a lost line?
I then blend them into each other accordingly using a soft haired brush. My favourite to use is a soft filbert as you can see me using in this painting.
This blending ensurers I have painted the overall shape of the petal correct.
With flowers, the changes in tonal value on each petal indicate the curves and curls of that petal.
If you don’t get these correct your rose will look flat.
Once I have the shape correct I then look at the detail inside the petal.
Are there little fine ridges that I need to paint? Are there different coloured lines, spots or dots that I need to add to the petal?
These I usually add using a fineliner.
The flower we are painting doesn’t have much of that detail which makes it the perfect rose for beginners to paint.
After painting in the detail of the petal I look at the petal in relation to the surrounding petals.
Are there any petals next to it that are casting a shadow onto the current one. If so I will check my initial shadings and colours to ensure that the shadow is correct.
Paint the shadows
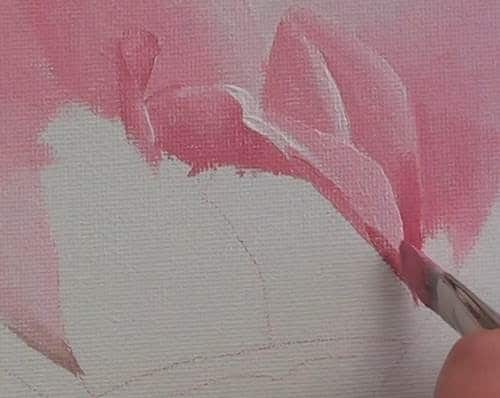
Painting the shadows correctly are critical as they indicate the height of one petal off the other. It is in fact your shadows that indicate light in your painting.
Without these shadows your rose will look dull and lifeless.
In general you will find that the outside edge of your petal will be light. It will then fade darker towards the inside of the flower as the surrounding petals start to cast a deeper and deeper shadow onto the current petal.
When painting your shadows look carefully at the shadow colour. Is it simply the petal colour becoming deeper as you can see in the centre of this rose;
or is the colour being shadowed so that you need to add some of the opposite colour to get it correct? You can see this in the bottom right hand petal;
or is there a reflected or secondary colour that you need to mix separately? You can see this in the bottom central petals.
Lastly I concentrate on the edge of the petal
The edges, along with the shadows, indicate height and distance between the various petals on the flower
If there is a sharp found line you have lots of distance between the petals.
As the petals get closer to each other the hard found edges gradually become softer lost edges.
Where petals touch each other you will often not even see a line where they meet. Their colours will be identical in this area.
The other thing to look out for on the edges is the quick curling over of the edge. This will give you a narrow quick shading which you paint in using a fine liner.
Painting the thicknesses of the petals
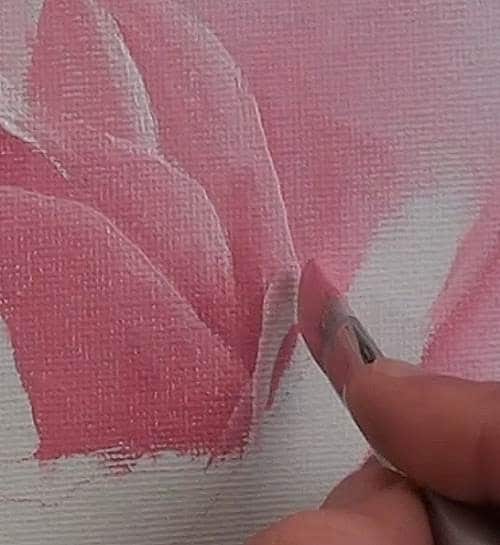
Lastly on the absolute edge also look out for a super thin line indicating the thickness of the petal. In this painting this thin line is especially visible on the central upright petals.
As you can see my progress with the flower is very methodical. I complete one petal, move on to the next, completed that petal, move on to the next, and so on, occasionally adjusting previous petals as I keep looking and comparing.
As you paint you have to keep trusting yourself because you will often only see the full effect of your hard work once the final petal has been painted and there is no more white canvas to confuse your eye.
After that final petal has been painted be sure to stand back and you recheck your tonal values from normal viewing distance and adjust if required.
Paint the stem and leaves
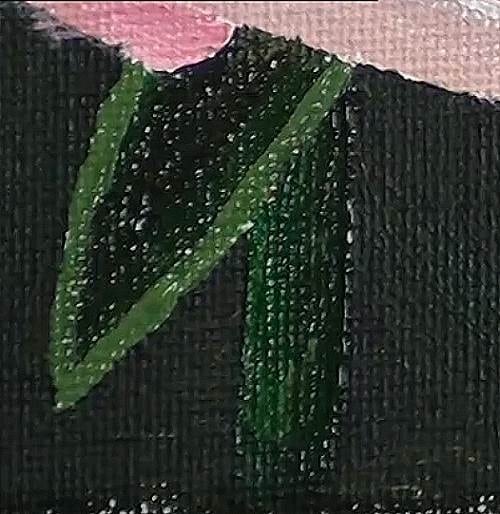
For the leaves and stem I block them in dark using a mixture of Sap Green and Alizarin Crimson.
I then add Titanium White and a touch of Cadmium Yellow to this mixture to get the highlight color.
I only add basic shadings to the leaves and stem as they are barely visible and as with the background, I don’t want them to attract too much attention away from the flower itself.
With that our rose is complete and I hope it has given you a deeper understanding of how to paint them.
Final painting
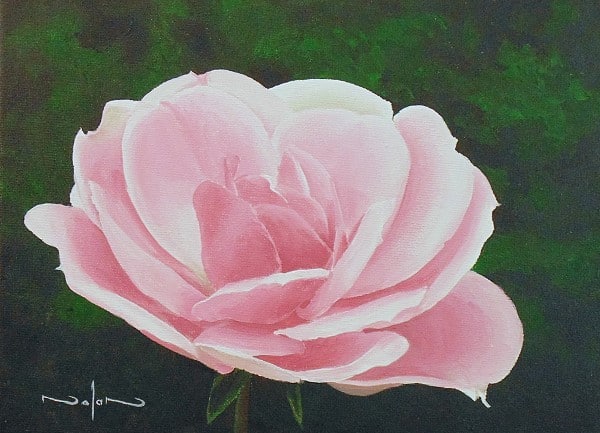
Click the button below to view the real time follow along version of this class:
Pin Me
