How to Paint a Mouth in Oil
Skill Level : 2 Intermediate, 3 Advanced
Medium : Oil Painting
Subject : Portraits
Tutor : Nolan Clark
Class Length : 2 hours 7 minutes
Avg Rating : No Ratings Yet
Silver Level or Higher Class
Class Description
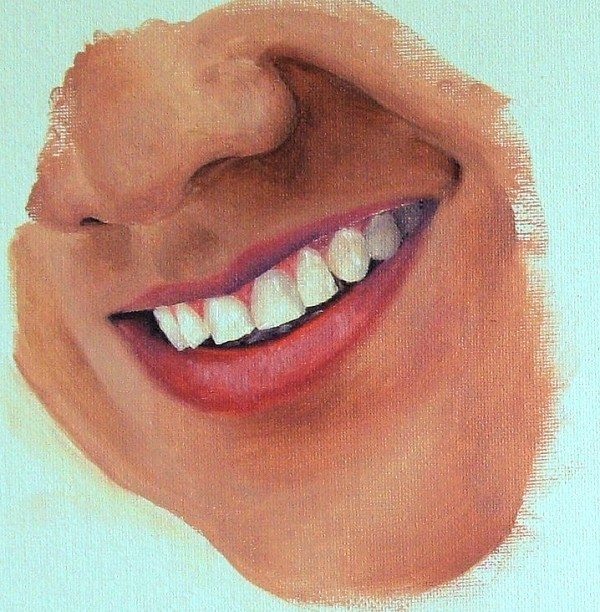
In this portrait painting class we will paint the mouth.
During the class you will learn :
1) About the different ways to compose your portrait paintings so that they are interesting to look at and ensure they captivate the viewer.
2) How to check that your composition will work
3) How to paint mouth and teeth that sparkle and add emotion to the portrait.
Latest Reviews
No Reviews Yet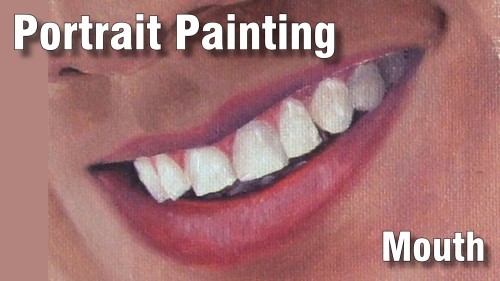

Class Tutorial
Tracing the Template

Transfer the mouth template to the canvas. Take advantage of Nolan's very useful tip on using baking (waxed) paper to be sure you get the lines in the correct places.
Colour Mixing

Study the reference photo to determine all the tones and then prepare to mix the paints for the mouth, teeth, and surrounding skin.
Blocking in Various Tones of Paint

Refer to your reference photo and block in the colors for the various lip, teeth, and skin tones in the appropriate places on the canvas. Mix additional tones as needed.
Blending the Skin Tones

Once you have the basic colors in place, begin the blending process on the skin surrounding the lips. Start by blending the colors of the upper and lower lip into each other. Remember the importance of getting the shaded areas correct to ensure a good likeness.
Enjoying This Tutorial?
Blending the Lip Tones

Take care in getting the planes of the upper and lower lips correct, in creating the "looking in" effect, and accurately portraying the roundness of the lips. Refer to the reference photo to get the proper "cracking" effect on the bottom lip.
Blending the Teeth Tones

Painting the teeth will require more steps.
A. Block in the overall value for each tooth. Do the same for the gums.
B. Add the shadows that will clearly define each tooth while enhancing the thickness of the upper lip.
C. Use a touch of tooth color to suggest bottom teeth
Refining the Painting

Continually clean your brush and work carefully so as not to contaminate your colors. Stand back occasionally and compare your work with the reference photo. Allow your painting to dry before going back to rework the areas of the brightest brights and darkest darks which might have lost their definition during the blending process.
The teeth especially will require fine detailing to get the gleaming highlights correctly.

You May Also Like |