
Short Class Video
Class Tutorial
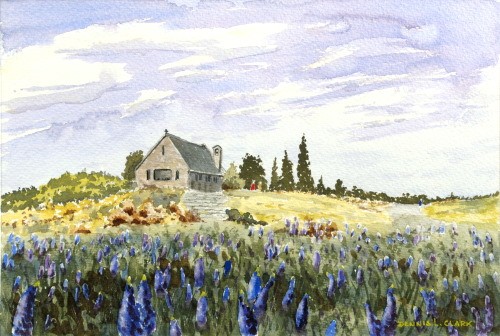
Painting the sky
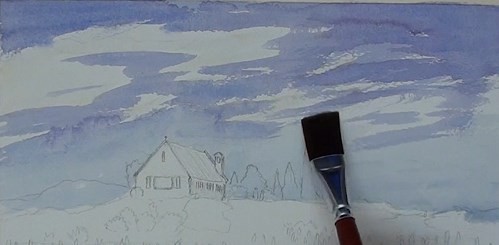
Mix A Touch of alizarin crimson into the ultramarine sky color so as to tone down the bright blue.
We have some clouds in the sky, so leave out some white areas. Do this in a very random fashion. Start dark at the top and gradually lighten up towards the horizon. Use a tissue to regulate the wetness on the paper.
Brush a very light orange mix into the cloud areas because the clouds are never truly white. They reflect everything that is around about them.
Apply the masking fluid
Use a small round brush to mask out all the lupines. Don't make them all the same size. The closer ones will obviously be larger than the distance flowers, and also, the flowers themselves are not always the same size. It is very important to remember to very regularly clean the brush in water to not to let the masking fluid harden on the brush hairs.
Painting the trees and bushes
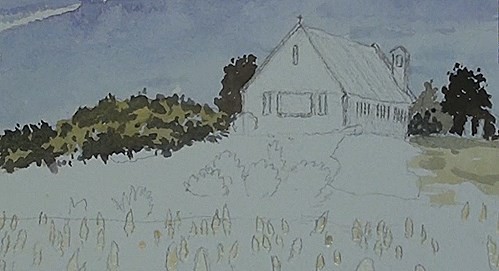
Trees - You can use the same brush that you used for masking the flowers to paint in the dark trees. Do this in a dabbing manner and don't forget to leave gaps for the birds to fly through!
Bushes - Yellow with a touch of the dark green is used for these, and then a much more yellow mix for the open grassy area. We can now add in all the smaller darker bushes to the left side, and a hint of shading to the grassy patch.
Painting the building
Apply a light orange color to the stonework walls of the building and a blue grey to the shadow side, as well as to the roof area. Also add a glaze over the previously painted wall in the sunshine. Make sure that some of the orange color must still be visible.
Painting the middle ground
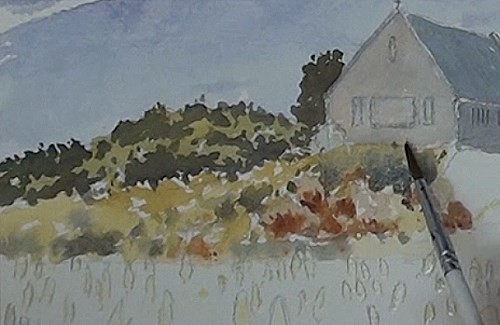
The tussocks are painted in with burnt Sienna and then paint in all the other smaller bushes in an impressionistic manner. We want a lot of tonal ranges in this area.
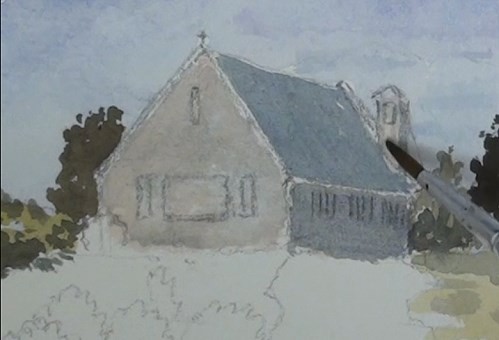
Adding finishing touches to the building
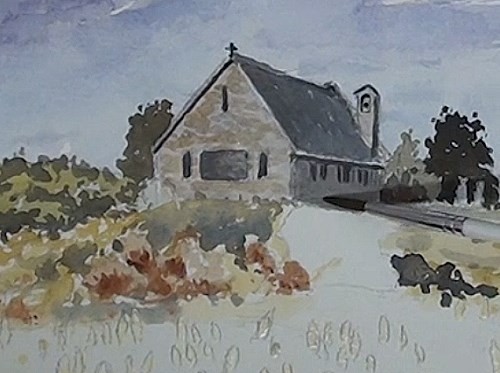
With a darker grey colour paint the roof, the tower details and openings in the stone walls. Dab out a section of the large window to simulate reflection of the glass.
Use the side of the brush, in a dabbing action, to give the impression of stone work in the walls. Some stones will be of different sizes as well as of different tonal ranges.
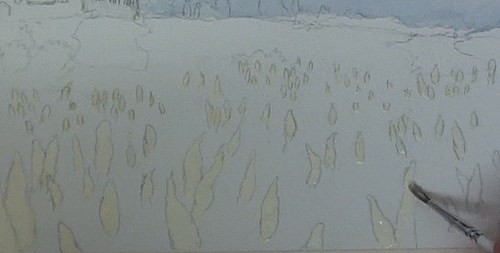
Painting the lupine patch
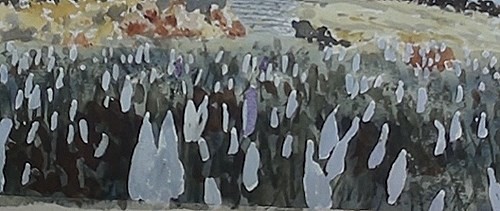
Start by placing all the shadow patches in as an underpainting. Notice how all the masking fluid is beginning to show up. If you need to add more masking fluid, now is the time to do it. First make sure the paper is completely dry before adding the masking fluid.
To show aerial perspective in the painting we need to darken up some of the foreground area using the wet-in-wet technique, and work in the rest of the darker shadow areas, being careful to keep it darker in the foreground and going lighter towards the distance.
When this under-painting has dried, begin, with a darker color, to add in all the risers and leaves, going smaller and thinner and lighter towards the distance.
Steps and Figures - We can use in HB graphite pencil here to gently add in the shadows to give the impression of the steps. Very roughly add color to the three figures, as well as finalizing the shadows on the building.
Back to the Lupines - To emphasize the lighter colored lupines we need to darken up the areas next to them. While doing that we might as well add some more vertical lines for leaves. Go over the whole patch until you are satisfied with the effect you want to achieve. Notice how I started the field fairly large on the left side and made it disappear into the distance towards the right. It would have been too monotonous if it had all been the same size. Now we can remove all the masking fluid.
Painting the flowers
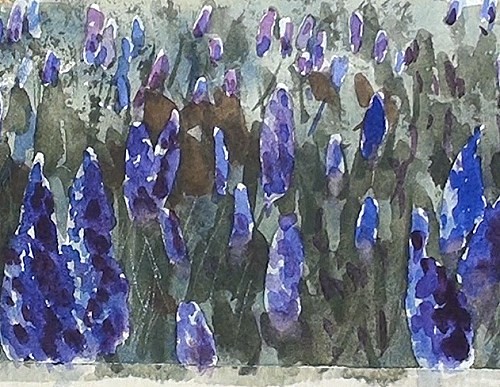
Add a very light purple color to some of the flowers and spot in the darker purple and blues for the flower heads. Continue painting the flowers in the centre area, keeping it brighter and darker in the foreground. Now we can work towards the sides of the painting, with some of the flowers, also using a warm purple color for interest in some of the flowers.
Final painting
Click the button below to view the real time follow along version of this class:
Pin Me
