
Short Class Video
Class Tutorial
Drawing the background - distant mountain
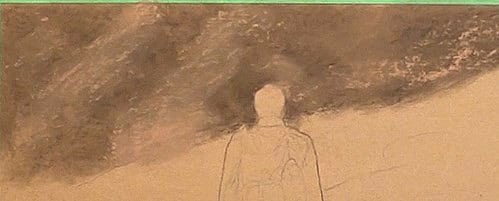
Reinforce the outline of the subject so that you don't lose it while adding the background color. Use a medium brown here to indicate the valleys. Smooth it out and then lightly layer a cover of light green for the distant trees. Keep all this area out of focus.
Drawing the middle foreground
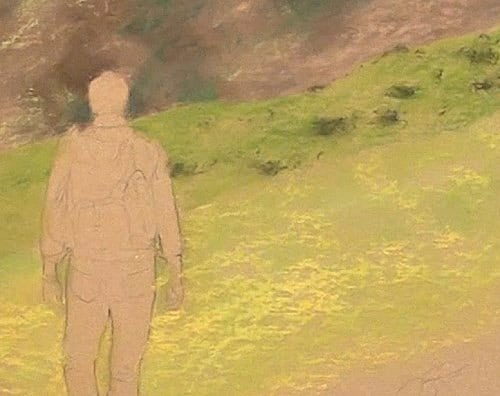
For this middle distance we can use this green more densely, allowing some of the paper colour to show through. Most of the time a toned paper allows us the privilege of not fighting the white of the paper. The lower half has some green and yellow lightly layered over the top of it. Now blend them to become a lovely yellow-green colour. Lightly blend all the colour slightly over the outline of the hiker. We don't want a halo around the figure.
Work some small yellow patches for tufts of grass and some darker green on the top portion. With a very dark green smudge in some of the distant bushes. Try to add these in a random fashion. Lightly smudge them with a finger to make them more distant-looking.
Drawing the trees
Draw in the distant trees and then edge them off to make them appear from behind the rise. After this use a light yellow or yellow-green pastel stick to show up the ridges on the slope.
Drawing the pathway
Notice the sudden change in the middle of the pathway as it ducks down the slope, and to reappear again in the distance. The closer part is in shadow.
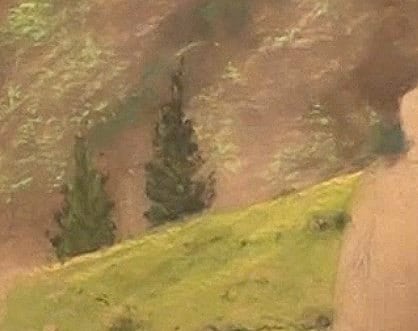
Drawing the closer trees
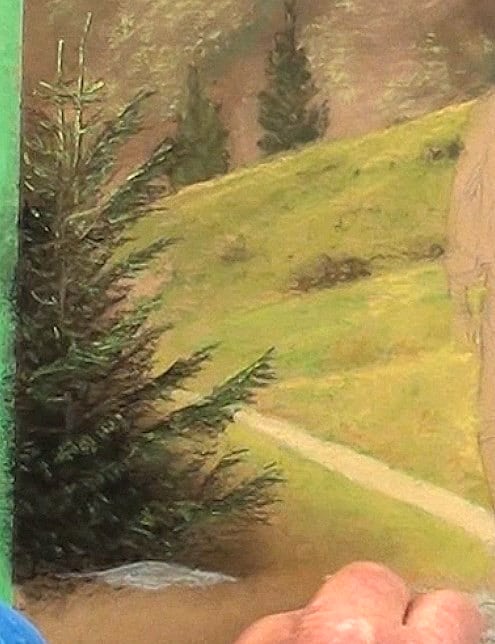
Block in the basic darks of the two trees with dark brown and smudge the edges. Paint in all the protruding branches with a very dark green stick and “feather” out the small leaves. Notice how I left portions of the path between the branches. Add the new growth to the tree tops and then paint the highlights with a lighter green.
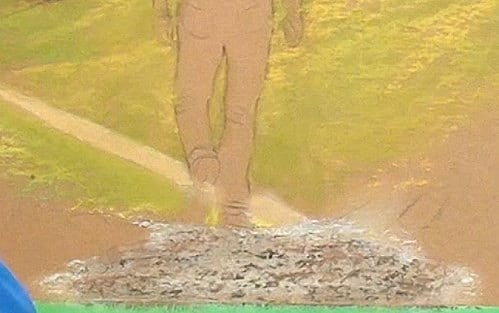
Adding detail to the foreground
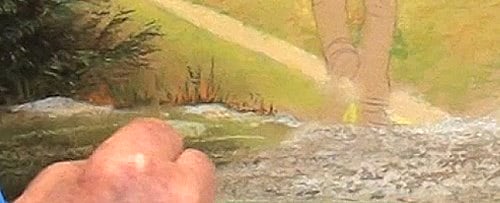
Adding in these rocks pushes the trees optically further into the distance. They are actually some way down the slope. Emphasize the rocks and the grassy area.
Drawing foreground bushes

Work in some green and then with a dark brown pastel pencil, push out a whole lot of dead twigs. Use a light green pencil to add lighter twigs and also to paint in some fern fronds. Do the same to the left hand side.
Drawing the rocks
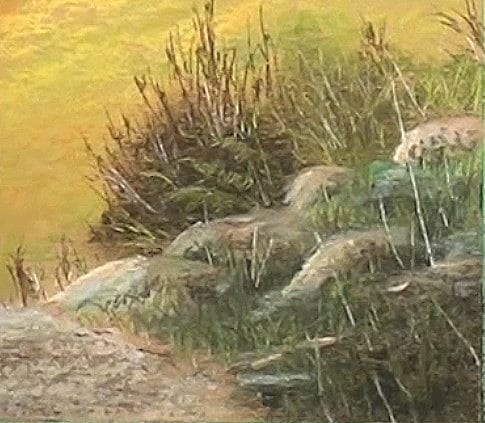
A light Burnt Sienna pencil is used here to shape out the rocks. Fill in with dark green and black for the shadows. Add in some tall grass.
Drawing the hiker

Be careful not to make the head too big. Carefully shape out the hair and add the ears and the neck.
I will just be using pencils for the hiker, because of all the small details. I will also simplify details in some areas, because we are making a painting and not a photograph. It is best to mark out all the darker areas first before going into too much blending.
Add the shadows for the hands. Block in the jeans with a very dark Blue or Pthalo Blue. Keep a nice clean sharp edge to them. Carefully, and constantly, keep referring to the reference photo as you add the lighter areas to the jeans with a white pencil. Add the white turn-ups of the trouser legs and draw in the shoes. Take your time here, we want them to look like shoes. Add the shadow on the ground.
Final drawing

Click the button below to view the real time follow along version of this class:
Pin Me
