Short Class Video
Class Tutorial
Drawing the sky

Spread a layer of soft White over the sky area and then spot in some Blue and blend with the finger to produce a hazy cloud effect, with the sky just peeking through in places. Near the horizon, just indicate some clouds reflecting the sun.
Drawing the mountains

With a very dark Brown outline the mountain on the left, and before starting the dark misty mountain in the distance, darken up the outlines of the tree with a dark pastel pencil. The reason being we don’t want to lose the outlines when applying the dark pastel over it
Drawing the distant mountain

Spread a very dark Blue for the distant mountain in shade and smooth it down with the finger and then lighten it to suit with some soft White to the tonal range we need it to be. Work it that the tree outlines are just visible to the naked eye. Indicate some of the peaks jutting out from the mist.
Drawing the mist

Very gently, and with the side of a soft white stick, stroke in the effect of misty clouds in front of the mountain. Touch up some of the mountain texture, remembering that we are seeing no actual detail at all.
Drawing the cliffs

With a very light Burnt Sienna or pinkish stick and the Brown pencil paint the portion of the distant cliff to the right.
Drawing the rocks

These rocks are blocked in with the light Burnt Sienna, a soft Black stick and a Brown pencil. Just block them in and softly blend at this stage.
Drawing the tree

With a Black or dark Grey pencil begin to paint the tree trunks and the branches. When drawing in the smaller branches and twigs use a pushing action so that they end up thinner at the ends. I normally twist or roll the pencil while doing so. This action keeps the pencil point reasonably sharpened.
Drawing the leaves

Tap on the small leaves with a light Green stick and a darker Green for the shadows. Add some highlights to the branches. The lower unfinished leaves will be attended to later.
Drawing the cliffs in shadow

Block in the lighter areas and then some of the main darker patches. Lay a light covering of Black over the paper and blend slightly. Darken up the lower end without blending at this stage. It is easier to use a Brown pencil to work on the skyline. Using the flat side of the pencil point is the best method for this. There is virtually no detail in the cliff, so here we will be looking at tonal ranges as well as color differences. Make good use of the reference Photograph.
Drawing the cliff highlights

A light Burnt Sienna stick is used to stroke in the cliff edges and use a paper stump to work in some texture and the unevenness of the cliff face. Notice how some of the lines, and patches of lighter areas, are at differing angles and are not always vertical. All this adds character to the cliff face.
Drawing the flat rock faces

The light colored and sunlit rocks form a sharp line and contrast against the dark cliff. Smooth over the light color enough so that you can still see the penciled lines. Now, with a pinkish pencil, roughly work on these rocks. Do it impressionistically.
Plotting the shadow areas

At this stage of the painting it will be much easier if we first plot in all the main shadow areas. This means all the cast shadows as well as the rocks in shade. Finish off the rocks on the right hand side as well as the lower part of the tree.
Drawing the main rock slab

An Orange pastel stick is used to block in the main color and blend it all in smoothly. Roughly place all the lighter colored areas and start painting all the shadow areas caused by the edge thickness of the slabs. Carefully build up the slabs and smoothing off where necessary. Add all the minor slab indications at the edges and darken up where the one slab is slightly lifted over the lower one.
Drawing the cast shadows

With a blue pencil smear in the cast shadows on the edges as well as on the flat surfaces. Make some final touch-ups and adjustments to the painting.
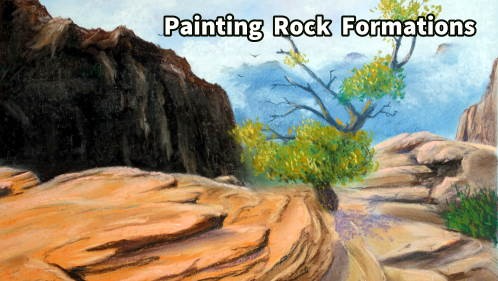
Final drawing

With a blue pencil smear in the cast shadows on the edges as well as on the flat surfaces. Make some final touch-ups and adjustments to the painting.
Click the button below to view the real time follow along version of this class:
Pin Me
