Short Class Video
Class Tutorial
Drawing the background

Because this is early in the morning, I’m using a Phthalo Blue stick for the sky and leaving some open areas for the clouds. Soften up the edges of the clouds because we are not looking for hard edges here, add a few darks for cloud shadows.
Drawing the distant mountains

Add in the two distant mountains. Don’t try to add details to them – they are too far away.
First block in the sunlit areas before beginning to add the very dark blue for this mountain. Again, add the darkest areas first and then, with a finger, blend in all the in-between areas. We will finish this mountain later.
Drawing the left-hand-side cliffs

A light Orange stick is cleaned and used to paint in the sunlit cliffs. Smooth them with the finger and then paint in the dark shadow areas. Lightly stroke some of the Orange over these darks to harmonize the colors, and again, lightly blend the colors together. The highlights will come later.
Drawing the closer mountain

For this mountain, blend some of the blue into the Burnt Sienna under painting. Continue blending until you have a mountain with the correct range of values, ie, the light and dark areas. This will be the under-painting. Compare the values between this mountain and the cliffs.
Drawing the cliff highlights

Use a pink pastel pencil to begin adding in the highlights. Alternate between this pink pencil and a dark blue pencil for the narrow crevices in the cliff. Here, a paper stump works better than fingers for blending small areas.
Adding detail to the closer mountain

We can now begin to show the ridges and valleys. Do some soft blending because there are no sharp details in the main shadow area.
We now need to paint in the crevices in the cliffs. I’m using a Black pastel pencil to do this so this just darkens up the underlying color. Add a few highlights to these cliffs and begin the mist in the lower left hand corner.
Drawing detail to the right-hand-side cliff

Using a dark pencil, and a finger, we now need to finalize all the tonal ranges in this mountain, drawing and blending, drawing and blending. Finally, all the very dark shadows are added. Portions of these dark areas are forests but too far away for any detailing.
The pink pastel pencil is used for the sunlit area. Gradually build up all the highlights.
After this paint in the shadow areas on the distant mountain.
Drawing the mist in the mountains

Here you need to keep the reference photo handy and nearby. Some very careful blending is necessary here so that we can obtain a natural looking mist effect. There is a large amount of subtle work here. If you happen to overdo it, then lift out the color as best you can and start over again. Remember that the mist is the main feature and focal point of this painting.
Drawing the foreground

Build up the foreground with dark pastels as well as a small touch of brown. Roughly blend all smoothly together. We have lots of pine trees in silhouette that show up very nicely against the mist. This adds depth to the picture.
Plot in the trees and balance out the various heights. There is no need to count all the trees. Do your own thing here. Once you are satisfied with placing of the trees, you can begin to paint in all the branches and foliage. Notice how I’m holding the dark pencil to do this. The large left hand tree has is slanted slightly inwards to keep the viewer’s eyes in the painting. Give just an impression of the other trees and bushes.
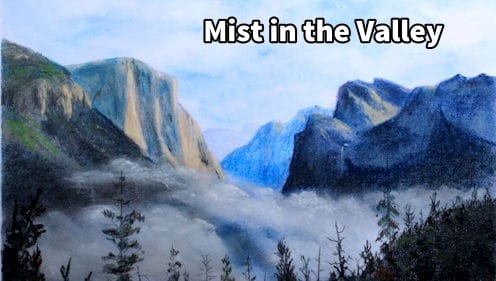
Final painting

Click the button below to view the real time follow along version of this class:
Pin Me
