Short Class Video
Class Tutorial
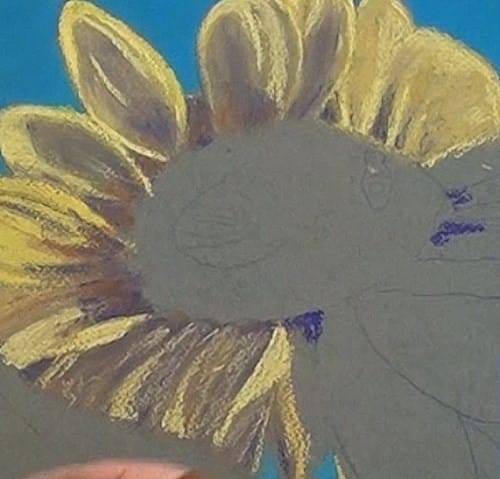
Drawing the background
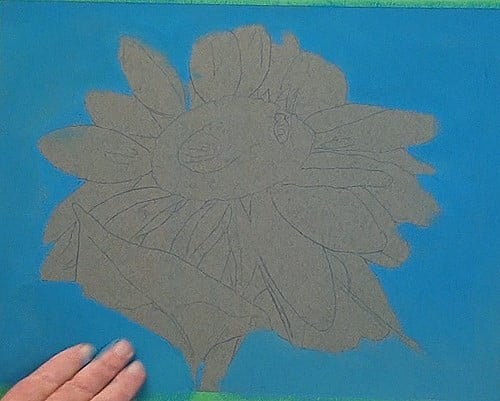
Cover the entire background with a Blue pastel stick by first carefully working around the entire edge of the subject. It is then easier to complete the whole background. Smooth out the background color. Do so lightly over the edges of the drawing so that the outline is still visible.
Drawing the petals
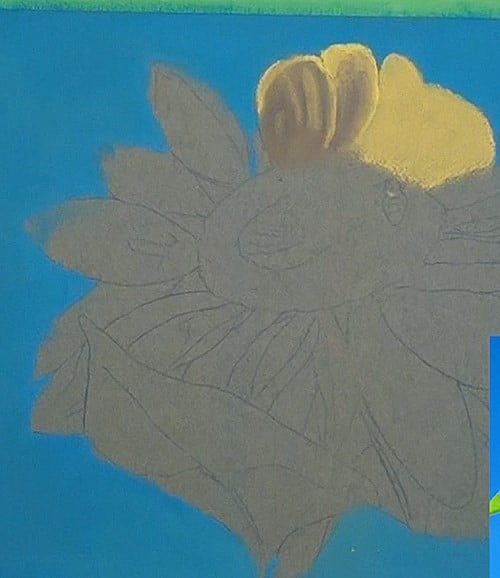
Start at the top petal, using a bright yellow pastel stick. Where possible, it is easier to paint petal for petal – at least with the major tonal ranges. Detail will come much later. Because the paper is a dark gray it is relatively easy to smudge in the shadow areas. Use a Yellow Ochre for the shadows if you are painting on a very light or white paper.
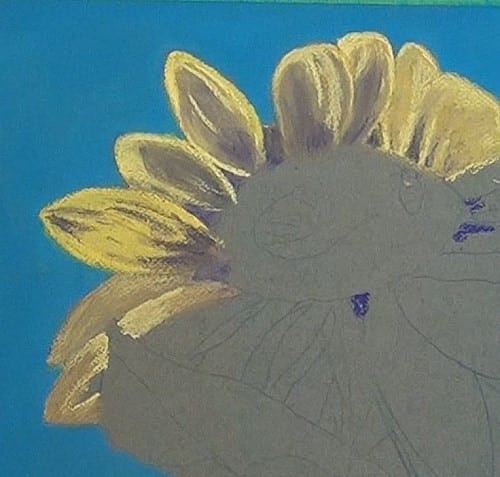
As you progress add in the shadows between the petals at the base of the central portion or crown with a darker pastel. Don't rush with the petals. Take your time because if you move too fast it is easy to get lost between the multitude of petals. Be sure to keep the separation between each of the petals, especially those that overlap.
It is essential to note that the light source is from the top right.
As you paint each petal keep comparing it to those already painted, and also to the reference print. Plot in the shadows inside of each petal as you go.
Work in the shadows at the base of each petal with some light brown in addition to the Yellow Ochre.
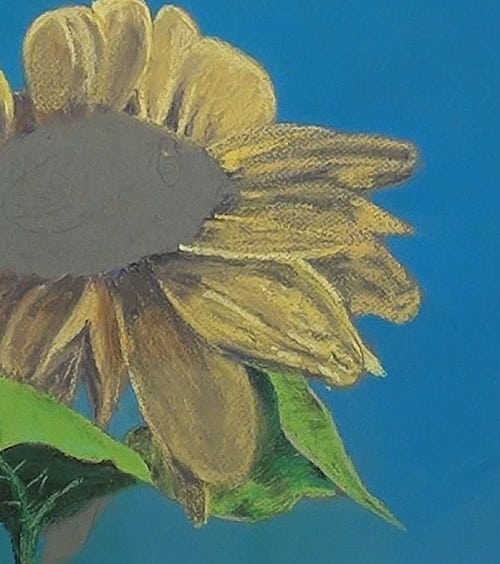
Drawing the lower petals
Because these lower petals are more in the shade, it is perhaps better to plot in all the sunlit areas first. This will save you getting lost. Once you have done this, paint in these shadow areas. Now it is easier to refine the other half tones.
Drawing the main leaf

While we are in this area we may as well paint this main leaf. It helps keep everything in perspective. Use a nice yellow green color and a medium green for the markings and the underside of the leaf. Overlay this with a very dark green and smudge, keeping the right side lighter than the upper left of the leaf. A light green is used for the veins.
Use the same color to paint this other leaf, except that it is much easier to use a very dark pastel pencil for the shadows. Only the top corner has the darkest value.
Continue drawing the petals
This large petal is in the shade and also has some orange color in it as well as the one next to it. Lightly work in some of the petal details.
We come now to the last few petals in the sunshine. These also have more crinkles to them so we can do more detailing here. Work in the shadows and the highlights on them. Continue painting them the same way as all the other petals.
When you have completed the last petal we can now go over each of the other petals to bring some uniformity to them. Brighten up all the sunlit areas.
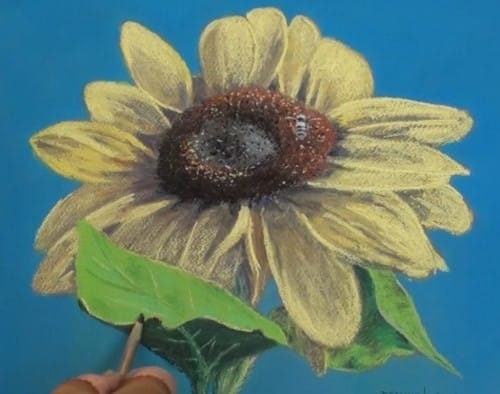
Drawing the center ring of the sunflower
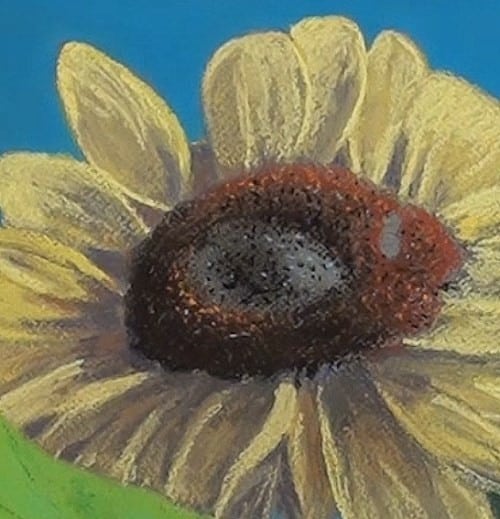
The basic under-painting for the center is Burnt Sienna, which is actually a dark orange. Be very careful not to fill in the area where the bee is. This is a built-up ring so we have to watch out for the light and dark areas. We want it to look 3D. The bottom part of the ring is a mix of Black and Burnt Sienna. The lower section of the ring also has some of this shadow color. Lightly blend and bring some of this color in the hollow of the ring.
Take a light brown stick or pencil and tap a whole series of dots into the ring to give the impression of many seeds. Do the same with an even lighter color.
Drawing the Bee
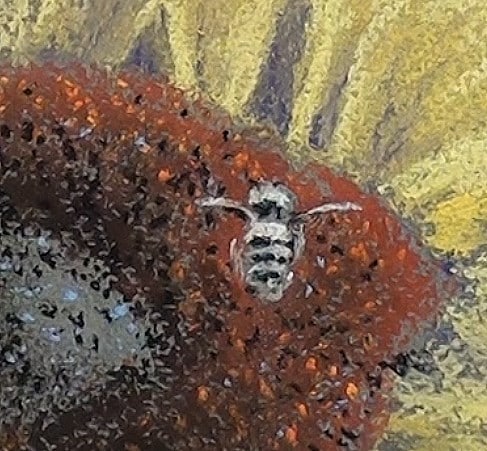
A Black and a White pastel pencil is used to paint the bee. Don't try to add too much detail to the bee.
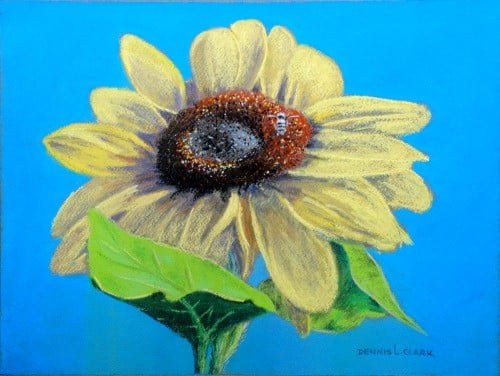
Drawing final details
For final details and touch-up see where you can improve on the petals. Take a yellow pencil and dot in some lighter highlights on the seed ring, and Black and Gray dots in the center hollow.
Add the Yellow highlight along the edge of the leaves.
Add the shadows caused by the leaf veins.
Final drawing
Click the button below to view the real time follow along version of this class:
Pin Me