Class Tutorial
Drawing the wooden slats
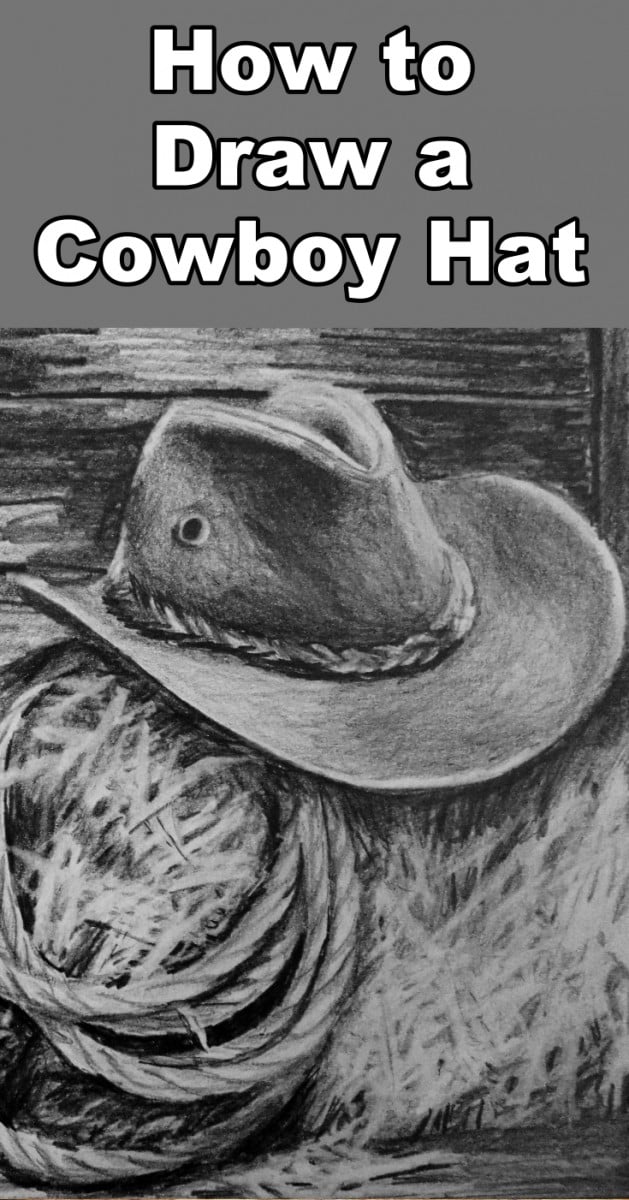
We are going to draw a cowboy's hat in a barn, and in the process you will learn how to draw wood, a hat, rope and a hay bale.
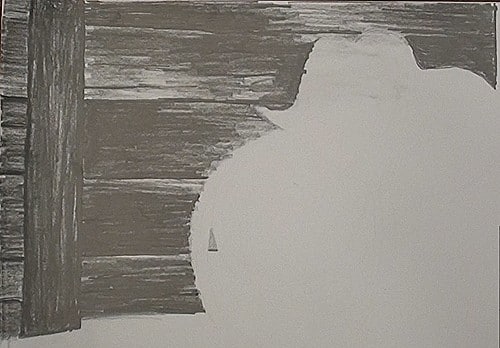
Start off with an 8B and plot out there where the slats in the wooden wall meet.
To create a wood texture use a rough and random zig-zag motion.
Notice how I am creating all sorts of rough textures and tonal values over the surface of the wood plank.
I am also keeping he top edge of the wood light and the bottom edge dark.
This ensures that I don't loose the separation between the planks.
Here and there I also add an extra dark line to indicate a crack in the wood.
As you draw be careful to not draw into the hat area.
Drawing the hat area
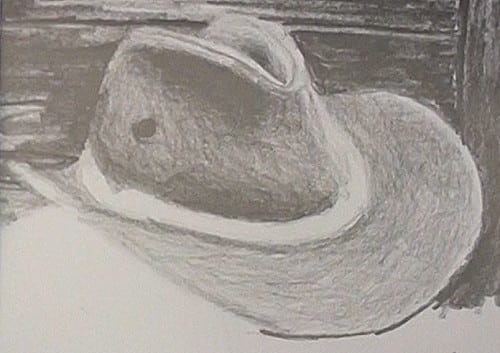
For the hat area I am going to continue drawing with the 8B I draw I will vary the pressure on the pencil to go lighter and darker.
If you are new to drawing I suggest you also use softer and harder pencils to ensure you get the correct tonal values.
The hat is simply a series of continuous shadings.
I start with the darkest areas and then shade them lighter in the correct directions.
As you do this keep the direction of the light in mind. The more an area on the hat points towards the light, the lighter it becomes.
You can see this happening nicely on the rim of the hat.
The rope around the hat casts a shadow so work that in as well.
To draw this rope just suggest the dark lines between the weave of the rope and create a wavy edge to show the outside contour of the rope.
Drawing the eyelet on the hat
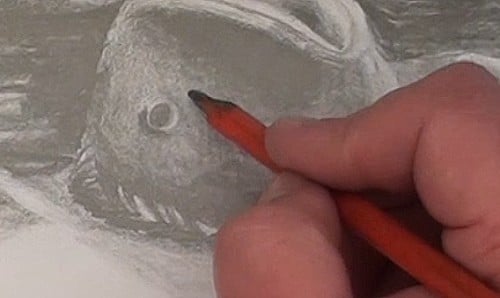
For the eyelet in the hat, make the inside dark, the eyelet light and then cast a shadow on the hat.
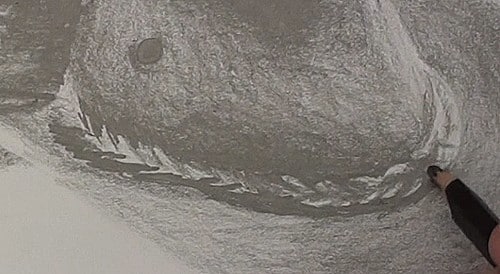
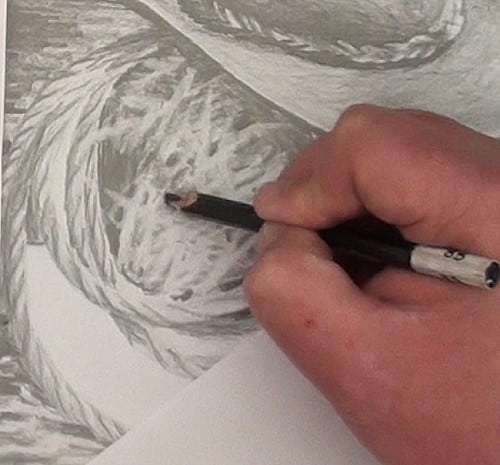
Drawing the straw

Now we can move onto the straw.
Don't panic, it looks more difficult than it really is.
Start by laying down a basic shading.
Then lift out the straw using a pen shaped eraser. Use the photo as reference to get the general directions of the straw correct, but don't try to draw it exact. All you are trying to do is to create the impression of straw.
At this stage you have your straw effort in place.
All you need to do now is add in the shadows between the straw.
Use a dark pencil with a sharp point to do this.
This step does take a while so be patient. I think you will agree though that these shadows bring the effect to life quite nicely.
Drawing the rope
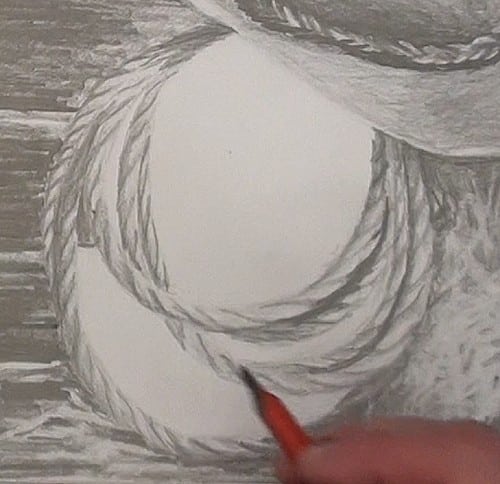
Drawing the rope also looks like a difficult job, but if you follow my technique it will be easy.
You are going to draw one loop of rope at a time.
Start by adding a mid-tone shading to the whole area.
Then lift out the highlight with your pen shaped eraser.
What is critical here is that you get the S shapes formed by the weave in the rope correct. You will see that these S shapes change direction as the rope curls around.
Then use a dark pencil to add the shadow S shapes between each highlight.
Lastly make the rope look round by adding a shadow shading to one edge.
Also add the shadows cast by the one loop of rope onto the next.
Drawing the straw between the rope
Draw the straw in the center of the loops in the same way as before.
Just look out for the shadows cast by the hat onto the straw and rope when drawing this area.
To really make the rope stand out from the background, make the gaps between the rope as dark as you can get it.
I finish off my drawing with a touch of fine tuning here and there.
Final drawing

Click the button below to view the real time follow along version of this class:
Pin Me