Sample Video
(Log in to watch real time class)
Class Tutorial
Introduction
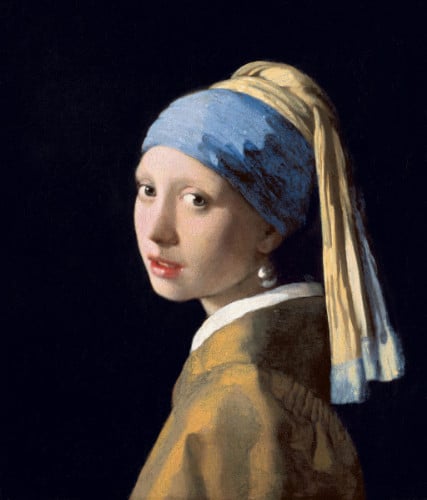
In this tutorial we are going to be painting Girl with a Pearl Earring.
If you would like to see how I paint this portrait in real time then you can follow the link in the description to my website. You will then be able to paint along with me.
The idea with this exercise is not to get a 100% replica, but rather get a feel for the techniques Johannes Vermeer used to paint this portrait.
In this tutorial I will be painting in acrylic paint.
Painting the Background
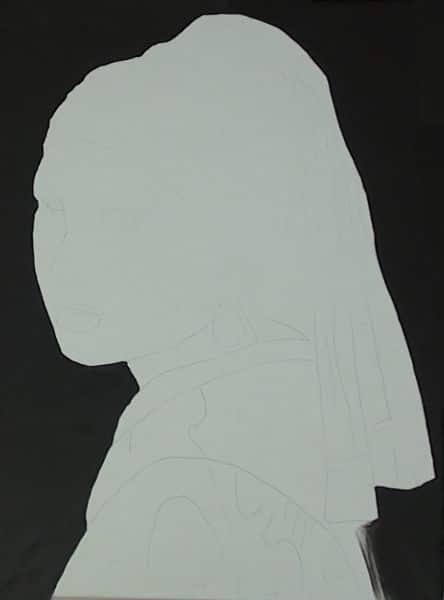
We will start off with the background and work our way forward. For the background I have used Mars Black I don’t see any textures in the background so I’m simply going to block it in using a large soft filbert brush. The Filbert brush allows you to get nice sharp edges in one instant then quickly shade broad areas the next.
I start off by outlining the edge of the portrait and then blending away towards the edge of the canvas. As I do I make sure that the brush marks in the paint don’t form a halo outlining the portrait. There are one or two fine detail areas around the eye and neck. Don’t be shy to use a smaller brush in these areas to ensure that you don’t go into the portrait with the dark colour.
If you do go into the portrait area with the black you would need to instantly lift it out before the paint dries.
Before continuing dry off the background using a hair dryer.
Painting the Headband
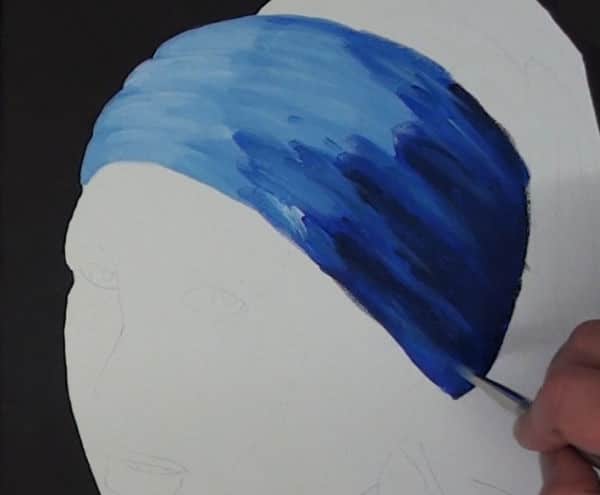
I have decided to start with the blue headband you could also start with the face and then do the headdress afterwards. The tie in between the two is a reasonably sharp line so in this case it wouldn’t matter which you do first.
The colour that Vermeer used was French Ultramarine. My Ultramarine however is not the same as his so I have modified my Ultramarine but adding some Pthalo Blue to the mix.
With the headband there are two things that we need to look out for:
1) it’s tonal value changes from left to right as it curls around the head.
2) the headband is however not smooth so it’s full of a ripples which you can see going from the top to the bottom of the headband. We will need to paint these ripples in as Johannes has done.
For the left to right shading there are four colours. On the lightest, I have added a lot of white to the Ultramarine. On the second lightest I’ve added less white. As I paint these colours in, to make sure that I don’t lose the ripples in the headband you can see that I have added a few stripes indicating their position using a darker tonal value.
Because of the ripples in the headband it suddenly goes from sunlight into shadow. For the lighter shadow colour I have used neat Ultramarine. You will notice that I am using a soft filbert brush which helps me to get those rounded edges where the shadow starts and the highlights stop.
Although I’m trying to get to the ripples reasonably accurate I’m not trying to get them identical. To lighten the shadow colour I have added a little bit more white into the mix and to darken I have added more Mars Black.
I can see that Johannes has painted this area as quick as possible because the strokes are really quick and loose. He was not trying to paint every detail in the headdress but rather just an impression of the folds.
I then do the same with nice loose flowing strokes.
Painting the Top Headdress
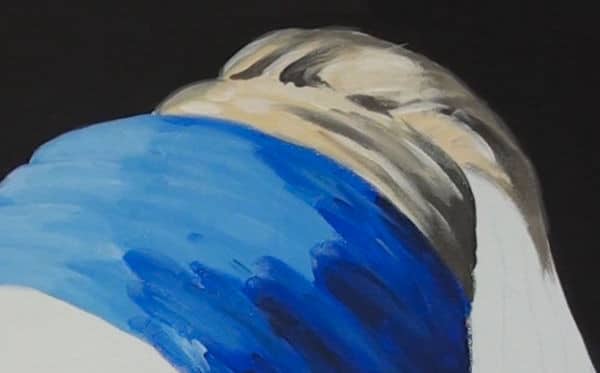
For the top part of the headdress I add Yellow Ochre to Titanium White for the lighter values. For the shadows I use Raw Umber.
These colours are added in using the same loose flowing strokes as for the blue area. It is simply flicks, dabs and dashes that are used to paint this area.
Here the folds are however more prominent so you can see the area inside folds are really dark. What is important in this area is to look at the directions of the folds to get the curling over effect.
We won’t paint the back part of the headdress yet as it overlaps the blouse. This area will wait till the last.
Painting the Portrait
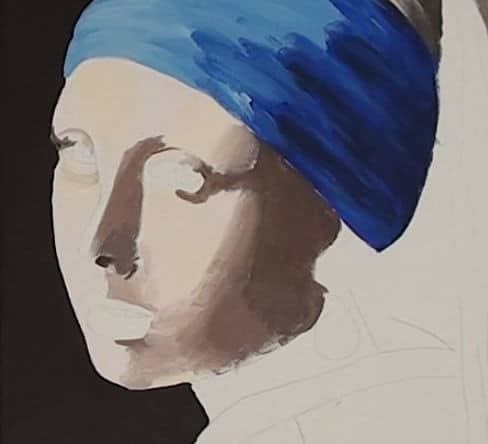
Moving on to the face area.
This area of the portrait has perfectly smooth shadings and a level of high detail, whereas the rest of the portrait is actually quite impressionistic. This tells me that this portrait was painted in real life. The model was sitting in the studio posing for the painting. When painting from life you have to work quickly because it is not comfortable for the model to sit perfectly still for hours on end.
As a result Johannes did not spend much time on the headdress and blouse in order to give himself as much time as possible on the face.
Base Layer
For the skin tone I have used Titanium White, Yellow Ochre, Alizarin Crimson and Raw Umber.
As I am working in acrylic I will paint the face in several stages. The aim of the first stage is simply to cover the canvas and get rid of the white gesso. I then lay basic colours down on the canvas where I see them, paying attention to getting the correct tonal value in the correct place. I do not try to do any blending and I’m also not overly concerned if the colours aren’t correct yet.
I dry this initial layer before continuing to the next stage.
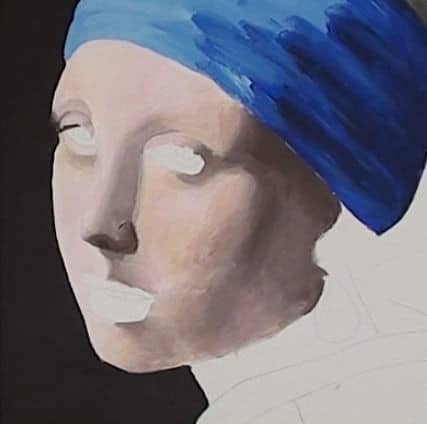
Rough Layer
During this stage I am going to work on getting the different colours more accurate as well as getting them roughly shaded into each other.
When one colour shades into another that shading can be quick forming almost a hard edge, or the colours can fade into each other really slowly. It is these transitions that I’m looking out for now.
The colours will also fade into each other at a specific angle because of the shape of the face. I’m then also looking to get these angles more accurate as I shade.
If I can get the general transition from the one colour to the next correct then I am happy.
The face will however still not have perfectly smooth shadings. Acrylic likes to be built up in layers so subsequent layers will give us the perfectly smooth skin we are looking for.
Before moving on to the next stage I again dry the painting.
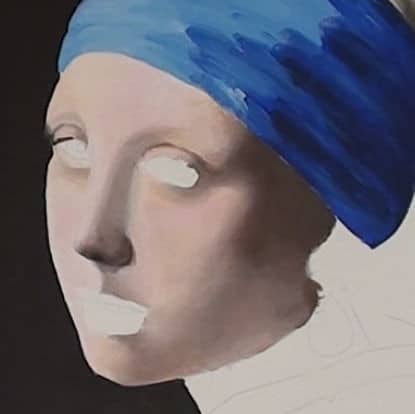
Smoothing Layer
At this point we can see that the general shape of the face has been established so the aim now is to work as accurate as we can.
I will use glazes to fine tune the shadings and the colours.
You will find that as you shade you are initially only able to see rough details because there is nothing on the canvas. As you get the rough details down on the canvas then suddenly finer details or differences between what you have painted on the canvas and what you see on the reference become visible. That is want to this stage is all about.
You will find yourself moving smaller and smaller shadings around to get them in just the right place. You will find yourself tweaking tonal values to get them more accurate. You will find yourself glazing intermediate colours over transition areas to get smoother shadings.
Ironically the stage of the process takes the longest so don’t rush it, take your time.
I am working on adjusting transitions, adjusting tonal values, adjusting colours and even spotting reflected light areas, like on the side of the cheek and adding them in.
Very small contrasts like the nostril wing are now also becoming visible so I am working them in.
When working with acrylics you also have to be really aware that your paint is going to dry one to two shades darker so what I often do is work in one area for a while and then move to another area to give the first a chance to dry before revisiting it.
Once I am happy with my shadings then I dry the paint using a hair dryer.
What you want to do at this stage is stand back and compare your painting with the reference. Depending on how smooth your shadings are and how accurate your details are, you can continue to use glazes to adjust and fine tune on your painting . As you do step back every now and again to ensure that your tonal values are correct, the colours are correct, the angles of the shadings are correct and that the skin is looking nice and smooth.
Painting the Ear
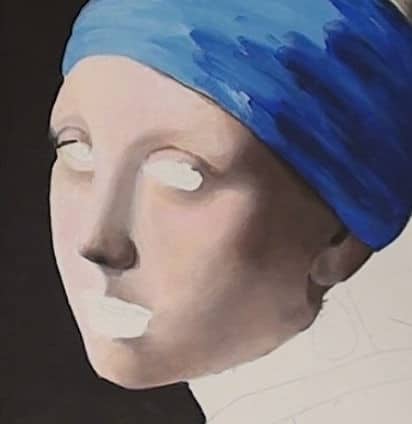
The headband casts a shadow on the face I add in this shadow using Raw Umber. It starts off quite broad on the right then gradually becomes narrower and the lighter towards the left.
To complete the face paint the ear. As you can see this area is in full shadow so I’m using very dark colours and really low contrasts. I paint in the recess on the ear really dark and the ear lobe using literally no more than two shadings difference. As this area is in shadow, we can’t see much and that means we don’t need to put in too much effort in this area.
Painting the Neck
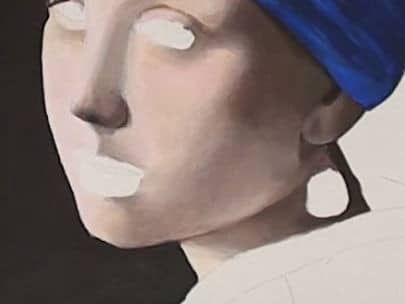
For the neck I block in the basic colours in their general places then see how do these colours fade into each other and emulate that on my canvas.
What is really important in this area is the tie in between the neck and the face. The face casts a shadow on the neck. There is also a thin darker shadow area as the face curls in underneath to meet the neck. It is this shadow that creates the distance between the neck and the face showing that the face protrudes forward and is closer to us than the neck.
Before moving onto the eyes I want to briefly tell you about the other real time paint and draw along art classes here on the website. For a very small amount you can get access to over 400 paint and draw along tutorials where you pack out your art supplies and follow along as I show and explain to you in step by step detail how to complete each project. There are classes in acrylic, oil, watercolour, pencil, soft pastel and even lesser know mediums like pen and ink and scratchboarding.
There is a button below which you can click to get more info about becoming a patron. You will be amazed at all the awesome classes and how much you will learn.
Painting the Eyes
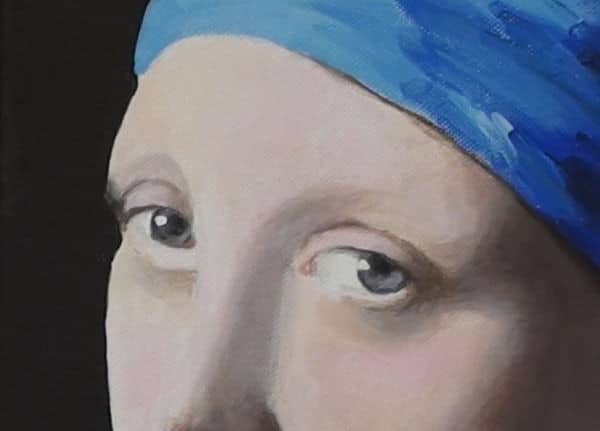
For the eyes I block in the white of the eye using Titanium White. The iris is blocked in using a mixture of Mars Black
along with a touch of Ultramarine and White. The pupil is blocked in with neat Mars Black.
The eyes are the most important part of a portrait. When you look at somebody you look at their eyes. For this reason I spend quite a bit of time shading the eyes correctly.
To show that the white of the eye is not flat but around I add a tiny touch of Mars Black to White to get a grey and shade the rounding using this colour. To get the iris correct I fade it lighter towards the right-hand side this makes the iris look transparent.
With this model the eyelashes are not visible so I don’t paint them in either. According to X-ray studies there used to be eyelashes but the paint faded so we can’t see them anymore. The upper eyelid does however cast a shadow onto the eyeball so I paint this in using Raw Umber.
The thickness of the lower eyelid gets a highlight so I am careful to work this highlight in.
I also concentrate on painting the tear duct in on the right hand eye. For this I use a fineliner.
Lastly I use some white to tap in the reflection on the eye. This makes the eyes look wet and alive.
Painting the Mouth
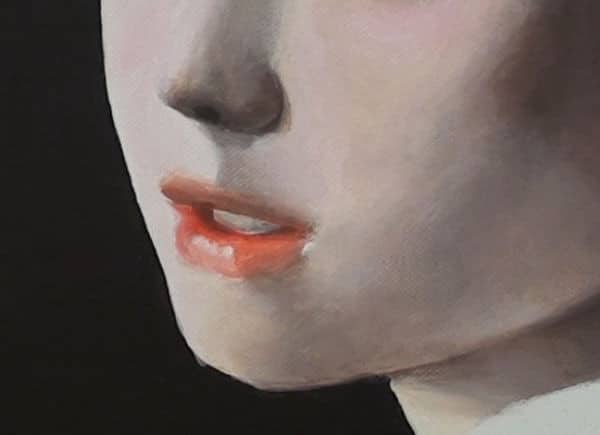
Next up it’s time to paint the mouth. As before I start off by blocking in the correct colours in the correct places in order to get rid of the white of the canvas. The colours I have used are Alizarin Crimson, White and Raw Umber.
These colours are then locked in using a hair dryer before starting to shade them into each other.
As with the face I’m looking at getting the colours, transitions and tonal values correct. As I adjust these tonal values I also work on tweaking the shape of the mouth to get it more accurate.
Notice how there is a highlight on the bottom lip because it is pointing more towards the light. The top lip however is in shadow because it is pointing downwards so you can see that the colours on the top lip are more muted than the bottom lip.
There isn’t much light getting in to illuminate the teeth. As a result they are not white. I block in the teeth area using a grey and then add the odd highlight using off white.
I then work on getting the tie in between the lips and the face by glazing some of the skin colour over the edge of the lips.
Lastly I use titanium white to add the highlights to the bottom lip.
Painting the Collar
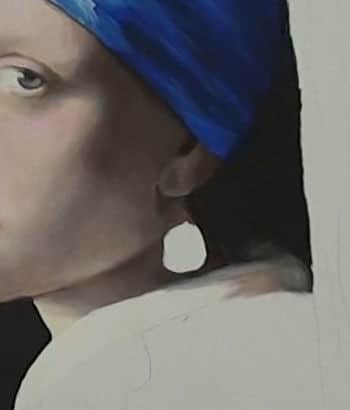
With the face complete I move down to start working on the blouse.
The white collar is painted in using Titanium White, Raw Umber and Mars Black.
Even though the collar is white and so is the canvas, I still give the whole collar a layer of Titanium White. You will find that your white paint is brighter than the gessoed canvas so the paint gives you a better finish.
In this painting the sun is coming from the left to the right so the colour gradually goes darker towards the right. Because the collar is white you’ll also notice that the colour of the headdress is reflecting inside it. This reflection is added in using Raw Umber.
You will then also notice that there is an area between the head and the headdress where you can actually see the background. This was not initially blocked in because we needed to tie in where the collar, the face, neck and the headband end.
This is blocked in now using Mars Black and then faded into the surrounding objects to show that the neck, headband and collar curl around away from the light.
Painting the Blouse
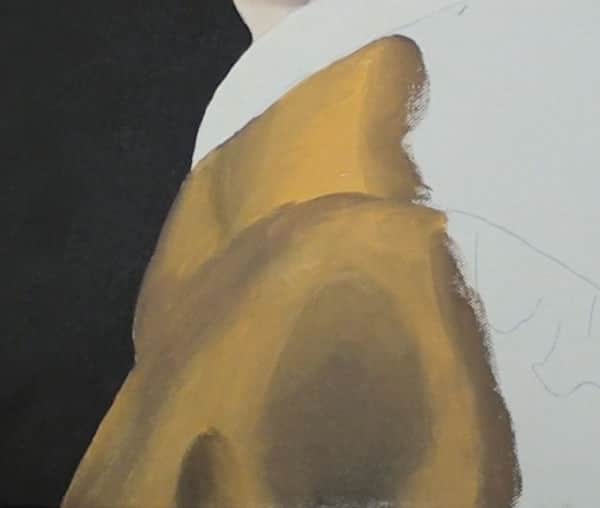
The rest of the blouse is a dull Yellow Ochre type colour so I have used Yellow Ochre as a base, then adjusted it using Mars Black, Titanium White, French Ultramarine and Crimson until the colours where more accurate.
Starting with the sunlit area of the blouse I block in the basic colours in the general places, then roughly blend them into each other. There are no real folds in this area rather just undulations so I am careful to just gradually blend the colours into each other without forming any hard edges.
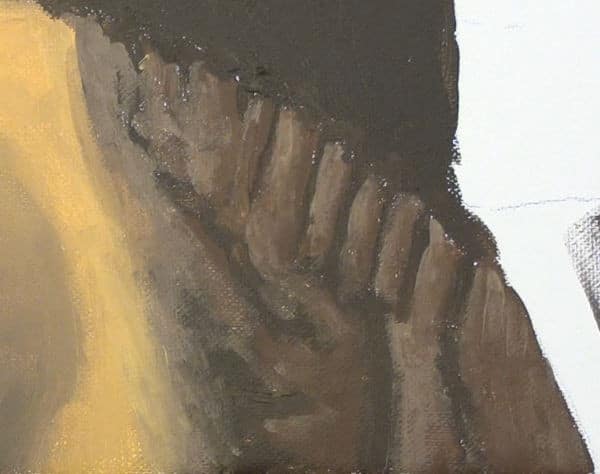
As with the headband, there is a quick transition between the light and the dark side of the blouse. This tells us that the light source was very strong. She was probably sitting in a darkened room directly in front of the window in order to maximize these contrasts.
The back area is blocked in with a dark brown which is essentially Yellow Ochre and Mars Black mixed together. The are some low contrast shadings in this area but I leave the basic block in to dry before coming back to complete them.
The back part of the blouse does have some fancy pleat work which we will need to paint. I block in each pleat using it’s basic colour leaving a little gap in between to make sure that I don’t lose their shape.
I then add a shadow to the right of each pleat and a highlight to the left. Adjacent colours are then blended into each other using a fine liner.
The rest of the shadows in the bottom area are then shaded in, in the same way making sure to not add too much contrast in this area as it is all in shadow.
I am also careful to make the transition between the light and the dark sides of the blouse nice and smooth.
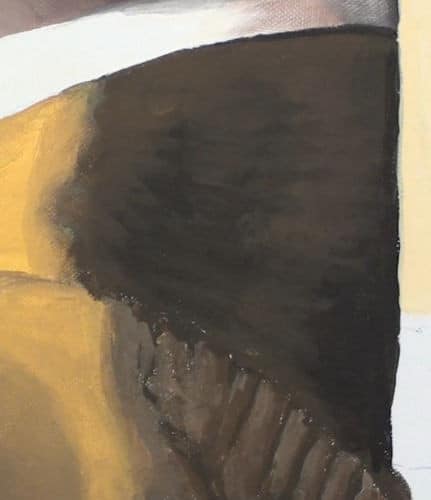
Now that the top shadow area has had a chance to dry, I can go back in with a little bit lighter colour and add in the low contrast shadings. In this area you can actually see that Johannes had used a broader bristle brush because some of them individual bristle marks of visible. I’m still using my soft Filbert brush so I use it on its side to suggest some of these brush strokes.
I dry off the blouse using the hair dryer before moving to the back area of the headdress.
Painting the Back of the Headdress
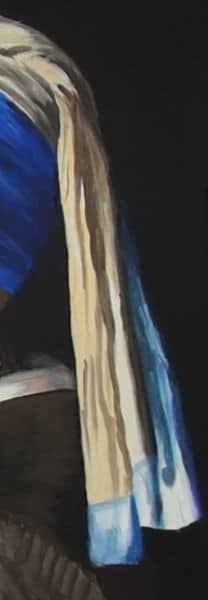
For this area I again use Yellow Ochre and white for the highlights, adding Raw Umber for the shadows.
Keeping in mind that Johannes painted this area very impressionistic I put in the basic colours in the general places and only very quickly suggest the shadings between them.
The main thing to look out for in this area is that there are three major folds running down the length of the headdress. One Yellow Ochre fold, a lighter yellow central fold and finally a blue fold.
To show that there are three folds you need three major shadows as those folds curl away from the light.
For the blue have used French Ultramarine and White for the highlight and French Ultramarine plus Mars Black for the shadow side.
All the other shadows are quite subtle so I haven’t put in any effort with them.
On the bottom blue ridge I’ve merely emulated the shadings in that area without spending too much time.
As this area of the headdress was painted in a different session to the initial top portion, I work some of these colours into the top area to tie and marry the two together. This ensures that they look like one continuous piece of material and not two separate ones.
I dry this area off before moving on to the earring.
Painting the Earring
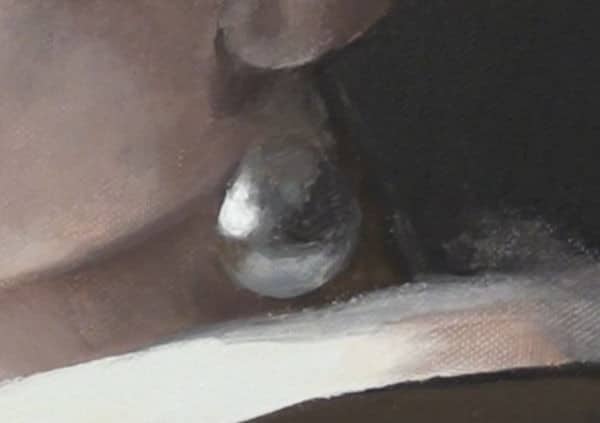
The earring is quite interesting. It is called a Pearl Earring but I’m not convinced. Looking at the size, colours and the amount of reflections in the earring I think it’s merely a silver earring.
The colours that I use are Mars Black and White. I block the basic colours in their general places. From there you can tell that the left hand reflection is from the window and the reflection on the bottom is from the collar.
I then carefully observe how these colours blend into the surrounding areas and do the same from the canvas.
Lastly I tidy up any surrounding areas using the skin colour.
With that my version of Girl with Pearl Earring is complete. This is what the final painting looks like:
Completed Painting
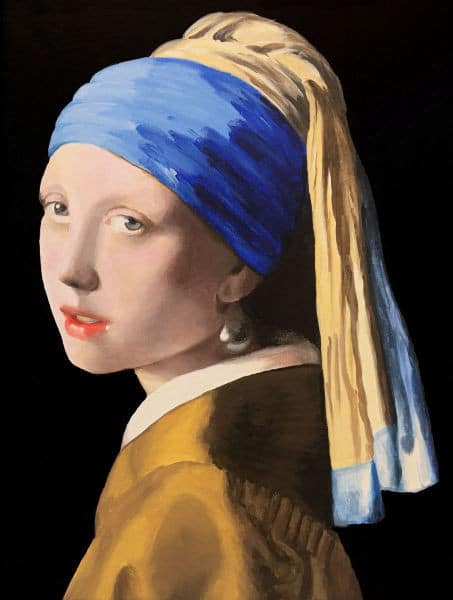
Click the button below to view the real time follow along version of this class:
Pin Me
