Since the first time oil paint was put into tubes in the 1860’s, people all over the world have been getting creative with this popular medium. If you’re keen to give it a go yourself, here are the basics of what you’ll need to get started.
Index
You can click any of the links below to jump to a specific place on the page.
Paint
Canvasses
Palettes
Painting Mediums
Gesso
Varnishes
Brushes
Knives
Drawing Equipment
Mahl Stick
Cleaning Equipment
Odds and Ends
Paints
Note: I have tried to find the actual or close product on Amazon so that you can get more info about each piece of equipment. The links on the page are affiliate links which means if you purchase through the links I will earn a small commission for the sale at no extra cost to you. You do not need to purchase them via Amazon. Most of these will be available at your local art store as well.

There are three types of oil paint that come in the familiar tube form; regular, alkyd and water soluble (also known as water miscible or mixable).
Close relatives in the oil painting family are oil sticks and oil pastels but they are not included in this tutorial although they can be intermixed with oil paint.
Oil paint is made using an oil as a base – usually Linseed oil – and then pigment is mixed into the oil to give it it’s colour. Pigment is a fine coloured powder which can be made from many things – it could be a stone that has been ground to a powder, it could be charcoal, it could even be dried beetles.
Oil paint in tubes come in a wide variety of brands. Their price is generally a reliable indicator of their quality. The reason for this is that the pigment which gives the paint it’s distinctive colour is expensive. In order to create a paint which has lovely vibrant colour which does not fade over time, you need to add lots of pigment into the paint mixture.
As a result manufacturers mix two variations of each colour. One is a student grade paint which has just enough pigment in it to create a good painting, but not enough pigment for the colours to last (the colours fade quickly).
The other type of paint is called artist quality paint. This paint has a lot of pigment in it so it is vibrant and will not fade significantly over time.
Most manufacturers will mark their student grade paints as “student grade / quality”, but not all. Some will give the student grade series of paints a brand name so it is always best to check on the manufacturers website to ensure the paint you are about to purchase is the correct grade.
For a beginner it isn’t necessary to invest in artists’ quality paints until you’re sure you want to carry on in the medium. Although artists’ quality paints have more pigment in the mix and have better archival (longevity) properties, good student grade paint will give you a feel for the medium and enable you to achieve excellent results without the high price tag. Once you see that you are enjoying painting in oil, then you can upgrade your paints to artist quality.
Important : Never sell a painting created using student quality paints. The paint colours will fade very quickly, leaving you with a very unhappy customer.
There is such a variety of colours available in oil paints that it is probably best for the beginner to invest in a starter set of a well-known brand’s student quality paint. This should include at least the primaries (red, yellow and blue), black, white and perhaps a brown and a green.
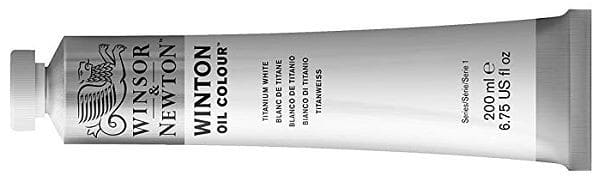
Get an extra tube of white as you always use much more of this colour; or if you’re buying individual tubes and not a set, opt for a jumbo-size tube of white. From these few colours you can mix most of the other colours you’ll need. Colour mixing is an essential skill to learn if you are going to paint, so best practice from the outset. Another big plus of using a limited palette (only a few colours), is that you’ll get a better result as your painting will be more harmonious.
Another way of distinguishing student grade from artist grade paint, (besides the cost), is that the artist grade paint will have full information on the pigments used in the mix as well as the opacity (how see through they are) and the lightfastness printed on the tube. Student grade paint often doesn’t have pigment information included. Don’t be misled by the name manufacturers give their paint; “artists” in the name is no guarantee that it actually is artist grade.
You can’t go wrong with brands like Winsor & Newton or Daler-Rowney or Gamblin which are available internationally.
Before purchasing a new brand of paint, it is always best to have a quick look on the manufacturer’s website to ensure you purchasing the correct grade paint for the task at hand (student vs artist grade).
There are other reliable paint manufacturers like Van Gogh and Maries. Avoid the extra low-cost brands though as the quality is usually equally low and may put you off painting altogether.
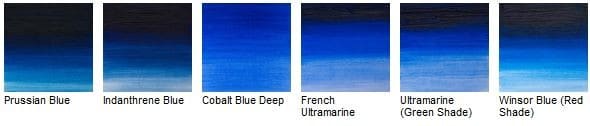
Be careful when choosing your colours. Different manufacturers often call the same colour different names. The only way of knowing exactly what you’re getting is by checking what pigments have been used. Pigments have generic colour index numbers to identify them e.g. PB28 means the pigment (P) is blue (B) and 28 is the number of to a specific blue pigment called cobalt blue. There may be only one pigment or several mixed together in a tube colour.
What I have found over the years is that I prefer different colours made by different manufacturers. For example I like the Cadmium Red of Daler-Rowney but prefer the Alizarin Crimson manufactured by Maries and so on. Don’t be afraid to try the same colour by different manufacturers. As you use the various colours you will also eventually find your favourites.
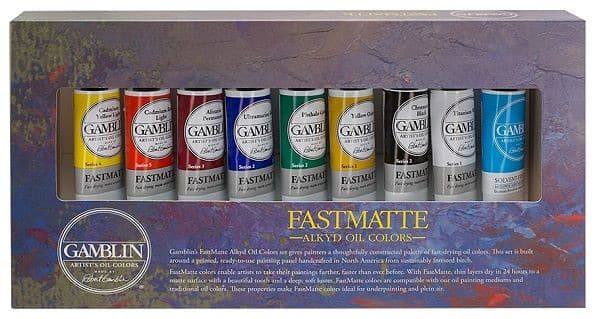
One of the drawbacks of oil paint is that it dries rather slowly. It can take days for a layer to dry sufficiently to add another layer. If this doesn’t suit your temperament, then you may want to consider buying Alkyd oils.
One reliable brand name is Griffin made by Winsor & Newton. Alkyd paints have a medium already mixed into the paint which greatly accelerates drying. It is possible to add your own quick- drying medium (more on this later), to regular oil paints, but it is not as convenient.
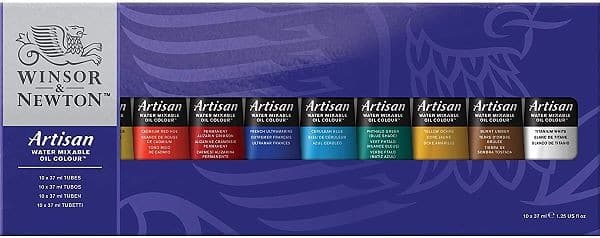
A new kid on the oil paint block is water soluble (also known as water mixable/miscible) oil paint. It is traditional oil paint which has been chemically modified to dissolve in water. This makes cleaning your brushes so much easier and cuts down on harmful fumes.
You can thin water mixable paint with water but it makes the paint slightly sticky. There are specially formulated mediums for painting with these paints, but more about that later. Good to know is that you can mix your water mixable oils with other “ordinary” oil paints you may own, but they then lose their water mixable properties. Water mixable oil doesn’t dry any faster than regular oil.
Warning: Some pigments in oil paints can be toxic so it’s best to avoid ingesting them or excessively getting them on your hands. The most common of these pigments is Cadmium which is a known carcinogen.
Many of these pigments are now being replaced by non toxic substitutes. When this is done they are indicated by the word “hue” in the label. The resultant colour is very similar, (unless you are a purist), but non – toxic; e.g. Cadmium Red contains the toxic cadmium pigment (PR 108) whereas Cadmium Red Hue does not.
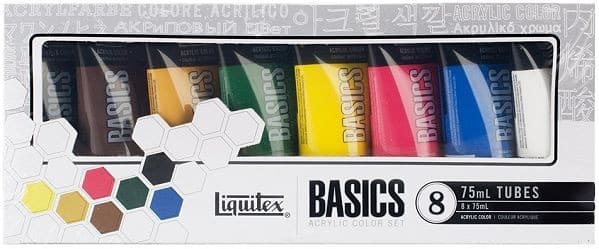
You may also want to buy at least one tube of acrylic paint which is useful for underpainting as acrylic dries very quickly. Underpainting is when you add a rough layer of paint to the canvas in order to cover the white of the canvas.
This means you have to apply fewer layers to achieve the look you want.
Note: You can paint over acrylic paint with oil paint but not the other way around.
Another technique artists use to speed up the painting process is to do the painting first in acrylics and then apply the final detail layers in oil paint. This gives you the best of both worlds – the “high tec” acrylic dries fast while oils are easy to blend, dry slower allowing you to take your time with the detail.
You can use a student grade acrylic paint for underpainting as long as you will be covering most to all of it up again with artist quality paint. If there will be significant areas of acrylic visible in the final artwork, then rather use artist quality paint to ensure it doesn’t fade.
Canvases / Painting Surfaces
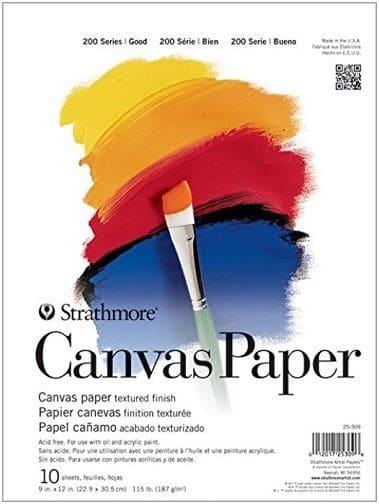
For a beginner the most convenient surface might well be a canvas paper pad. The paper is textured like canvas and ready-primed for painting with oil. It comes in a variety of sizes – just attach with masking tape to a board and you are ready to begin. An added advantage is that paintings on paper take up little storage space.
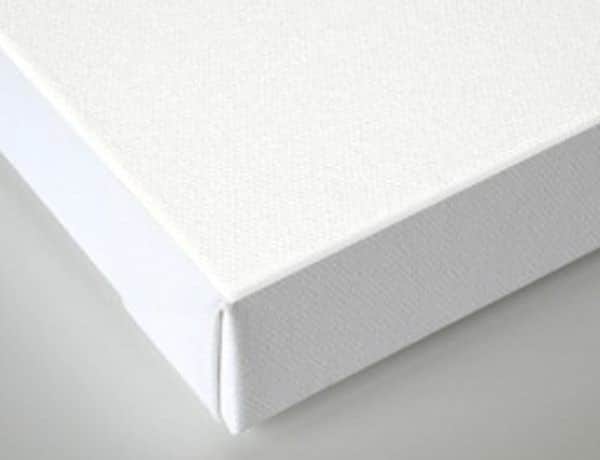
If you are more of a traditionalist you can buy a pre-stretched “box” type canvas in the size you require. These come in two different “depths”.
The narrow thickness canvas is meant to be framed. The deeper box canvas, also called a gallery canvas, does not get framed and is meant to be hung as is.
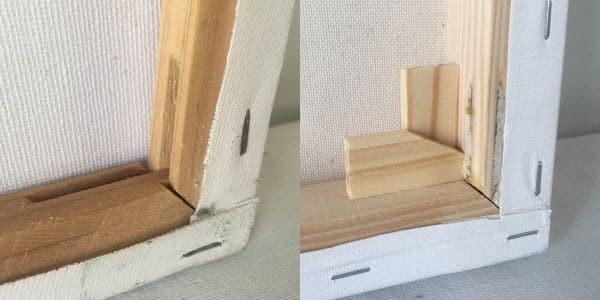
As a newbie to painting you may not know the purpose of the small wedge shaped pieces of wood are which are often included with your store-bought pre-stretched canvas. They are there to increase the tension on the canvas if it becomes necessary so as to make it tight as a drum and lovely to paint on. There are slots in the back of the canvas where they can be inserted as shown in the photo above
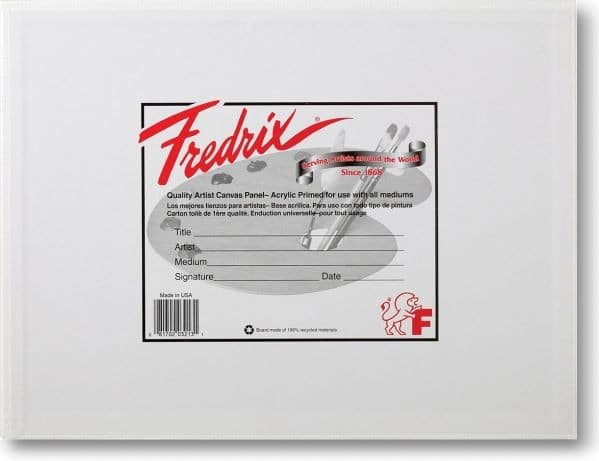
A cheaper alternative to stretched canvases are canvas panels, where the canvas is stuck to a backing board. Traditionally this backing board was a wooden panel, but nowadays a compressed cardboard is used to reduce costs.
Important: Either purchase your panels from a reputable manufacturer like Fredrix or give your canvas a coat of gesso before you start painting on it. Cheap canvasses are not primed enough to seal the canvas properly. As you paint the moisture then seeps into the cardboard panel causing it to warp.
Canvas panels need to be framed once complete in order to hang on the wall. Bear this in mind as the panel may be cheaper, but the frame adds considerably to the cost.
A do-it-yourself enthusiast may prefer to paint on a piece of hardboard / Masonite or plywood. Before painting however, seal the wood to prevent the chemicals in the oil paint from sinking in and damaging the wood fibres. You can make your own very effective sealer by mixing PVA / Elmer’s / carpenter’s glue with water and painting this on both sides of the wood (to prevent buckling). You could also use store bought gesso (more about gesso later).
Sealant/ gesso can be also used to protect watercolour paper before painting with oil if you have supplies of that you may want to use up or perhaps to turn a failed watercolour painting into an oil painting. Remember to tape the paper down well before applying the sealant or it may buckle.
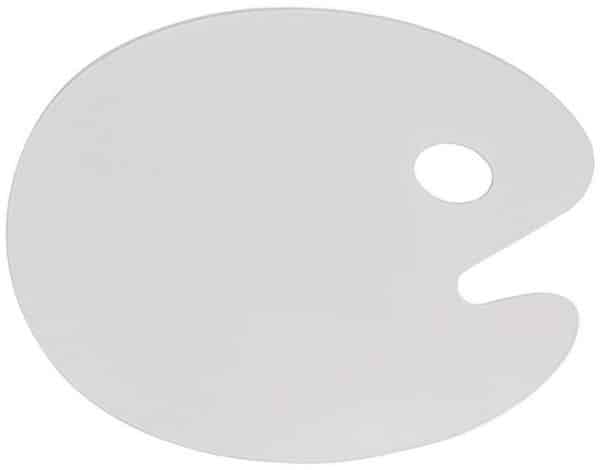
Palettes
You will need a surface on which to mix your paints.
Glass works well. You could use a store-bought, inexpensive, ready-made picture frame or have a piece of glass cut for you. If you do, have the edges smoothed to prevent cutting yourself.
If you go for the glass option, paint one side a mid grey which will make mixing colours more accurate.
You can scrape leftover paint off the glass with a palette knife. Any remaining paint can be cleaned off with turps.
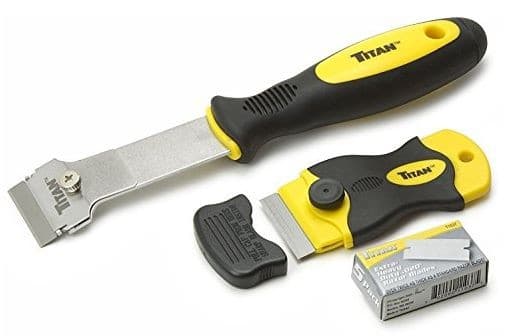
Paint that has dried on the palette is easily removed with an inexpensive paint scraper.
Another cheap palette alternative is to use a smooth tile. I personally use white tiles which I got as samples from the hardware store.
A sheet of clear cellophane cut to the size of your work surface, (the latter preferably painted mid-grey), is another disposable option which makes clean up so much easier. Attach with tape or bulldog clips to stop it from moving while mixing on it.
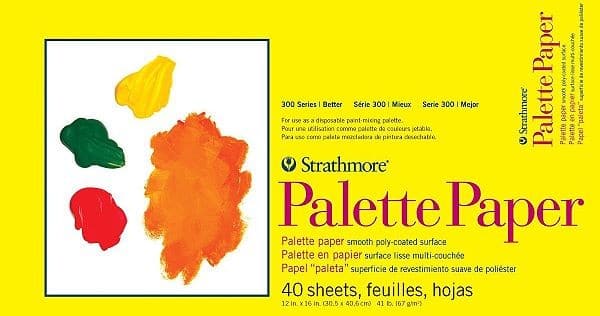
Commercially you can buy pads of tear-off palette paper which are coated in a waxy layer. When you are done, tear off the sheet and throw it away. Pads are available in mid grey and white.
Painting Medium
A solvent is used to dissolve the paint – it weakens the chemical bond which holds the paint together. A solvent is used to clean paint from your brushes and should not be used to thin down your paint. Often used solvents in oil painting include turpentine and mineral spirits. You can buy odourless versions (turpenoid and odourless mineral spirits) but they still produce fumes even though you can’t smell them.
A medium is an additive that alters the characteristic of the paint. How it alters it depends on the type of medium you use for the effect you want.
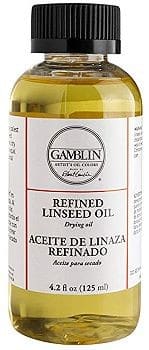
The most commonly used medium is linseed oil. When added to the paint it makes it easier to spread as it flows off the brush easier.
There is a rule in oil painting called “fat over lean” which experience has proven you need to follow. In essence this means that if you put layers of paint containing more oil over layers with less oil, they will stick. If on the other hand you put layers with less oil over layers containing more oil they probably won’t and will crack or flake off later. This is because the more oil the longer the layer takes to dry. If you put a less oily layer on top of an oily one it would dry quicker and could lose adhesion with the layer below.
So how do you stick to this rule?
When painting your first layer of an oil painting you can thin your paint slightly with little bit of medium.
In each subsequent layer you increase the amount of oil in the mix.
Other mediums are a mixture of oil and a drying agent. Yet others also include a varnish so can be used as a final varnish too.
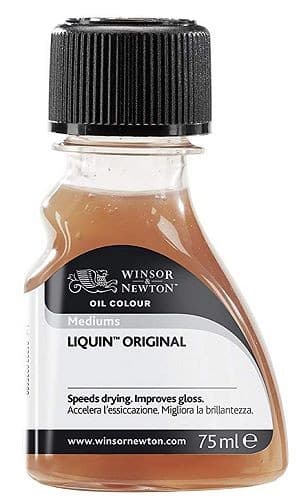
The most well known of the mediums is Liquin which comes in various consistencies from a gel to a liquid.
Note that if you are using water mixable oil paints, you need to use the corresponding medium which is specially formulated for the water mixable paints.
There are many other manufacturers making painting mediums. It is best to test the different ones before deciding which mediums suit you painting style.
If in doubt use Pure Linseed Oil or Liquin as your medium as they have withstood the test of time.
Gesso
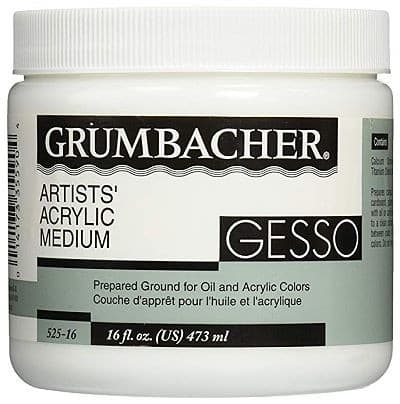
Gesso is neither a medium nor a paint but it is important in the preparation of your painting surface.
Painting will be easier over a surface that has been coated with a few layers of gesso, (be it paper, canvas or wood). How many layers you apply will depend on how smooth you like your surface to be. Two or three coats applied alternately in a horizontal and vertical direction and sanded with a medium grade sandpaper after each layer (once dry), should be sufficient to give you a smooth surface with enough “tooth” or grip to make painting a delight.
You can add acrylic paint to the gesso to colour it. It is often easier to paint over a coloured surface than a white one as judging colours becomes easier. Colours often used in this base layer (also called the imprimatur layer) are the earth colours (burnt sienna, burnt umber, ultramarine blue etc. etc. You can however decide what colour you prefer – (if you choose to underpaint at all).
Note that if you are purchasing ready made canvasses from a reputable manufacturer you do not have to gesso the canvas before painting. It has already been gessoed at least twice, so you can simply start painting.
If you have purchased a cheap canvas or prefer a smoother surface, then a coat or more of gesso can be applied.
Varnish
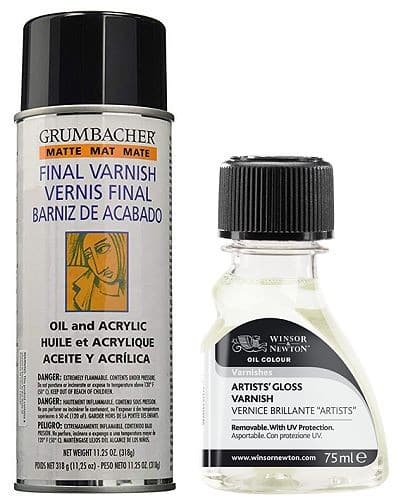
Once your oil painting is totally dry – this could take months especially if the paint has been applied in thick / impasto strokes – you can add a layer of varnish. Varnishing helps to protect the piece and also evens out any differences caused by some paints drying more matt than others. At the same time varnish makes the colours look richer. It comes in matt, gloss or satin finish. You can make your own satin varnish by mixing gloss and matt varnish. Varnish is available as a liquid or an aerosol.
Always buy the best possible varnish created especially for oil painting. Do not use varnish from the hardware store. These, and the cheap artist brands, yellow over time leaving the painting dull and lifeless.
Warning : One of the traditional varnishes, Damar Varnish, is one of the varnishes that darken over time – no matter which manufacturer you buy it from. Do not use this varnish! There are better, newer varnishes on the market formulated to not yellow, darken or dull over time.
Removing that dull layer of varnish can only be done by a professional restorer at great cost.
Brushes
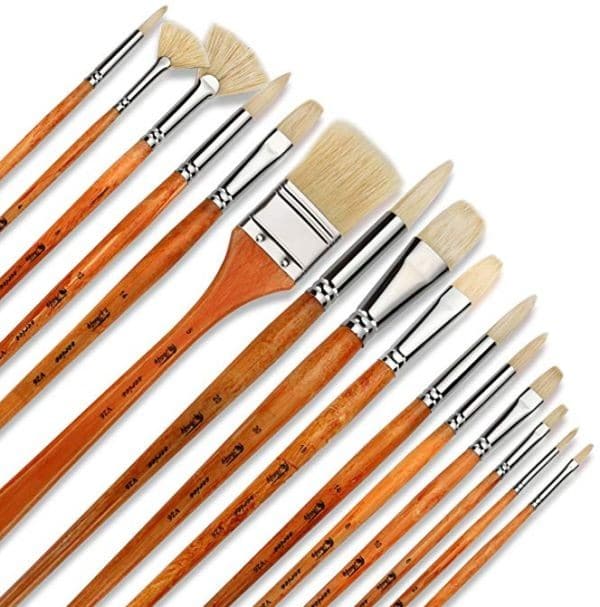
There are two basic kinds of brushes:
Bristle brushes which have harder / stiffer bristles. Traditionally made from hog hair, etc. These are now manufactured synthetically at very low cost. These brushes, as shown above, are perfect to use for most of your oil painting needs.
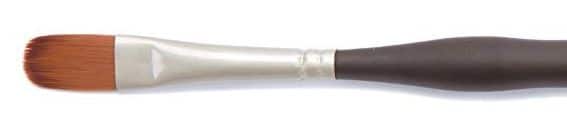
Hair brushes have soft hairs so cannot handle the scrubbing used in general painting work. They are however fabulous for more detailed work.
As a beginner it is not necessary to buy very expensive brushes. A set of synthetic bristle brushes and/or some hog hair brushes will suffice. Get a selection of sizes and shapes including rounds/flats/filberts which will cover most use cases. You can usually get this from your dollar store.
In addition a soft hair rigger brush for fine lines and a fine round brush is needed for fine detail work. These can be purchased at the stationery / art store. Here also a good set of detail paint brushes.
You can also purchase a set of bristle fan brushes if you wish as they have a multitude of uses.
Also, get a set of hardware or pastry brushes in pure bristle (not plastic bristle) for covering large parts of the canvas such as sky and background.
Knives

There are two types of knives to use for oil painting:
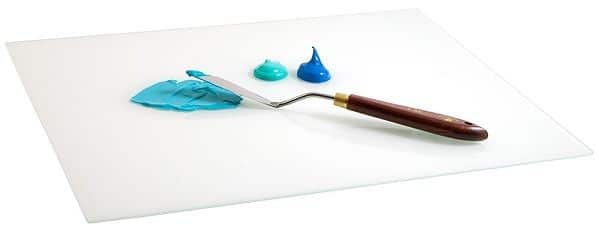
The palette knife has a straight handle and is used for mixing paint. You can see what it looks like above.
The painting knife has a bowed handle and is used to apply paint directly onto the canvas. You can see what this looks like below. A painting knife can also double as a palette knife.
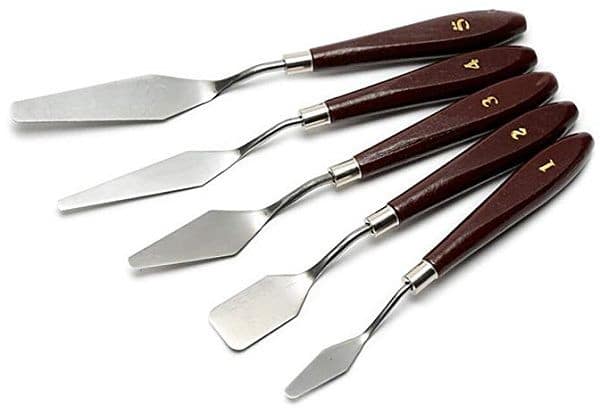
Mixing paint with a brush is a quick way to ruin your brush as the paint gets up into the ferrule of the brush where it eventually dries and forces the bristles to splay and the brush eventually loses it shape. Mixing is what palette knives are made for.
I have a variety of painting knives only (as shown above) which I use to mix my paint as well as to paint with.
They come in a variety of shapes, sizes and differing edges with which to manipulate paint. You can have more than one size to enable you to mix large and small amounts of paint as well as to paint larger or finer detail. They are easily cleaned by wiping on a paper towel.
When purchasing a painting knife always ensure the blade has a reasonable amount of give in it. If the blade is rigid it doesn’t paint well.
Plastic knives are also available but they are no good for painting, only mixing your paints as they are too rigid.
Warning : Always be careful when using a painting knife, although they are not sharpened like a regular knife. Their blades are thin so can still cut you.
Drawing Supplies
Sketching
You will need to directly draw the image you want to paint, or transfer an image onto the painting surface before you start painting.
Pencil: You can use pencil but be aware that graphite has a habit of bleeding into the paint and making an unwanted appearance in your final painting. Make sure to lighten your lines with a kneaded eraser to prevent this.
Charcoal: is excellent for drawing on your canvas as you can easily rub out any unwanted lines with your hand. If you don’t want to lose your charcoal lines, spray them with a fixative or hairspray which will prevent smearing when you paint.
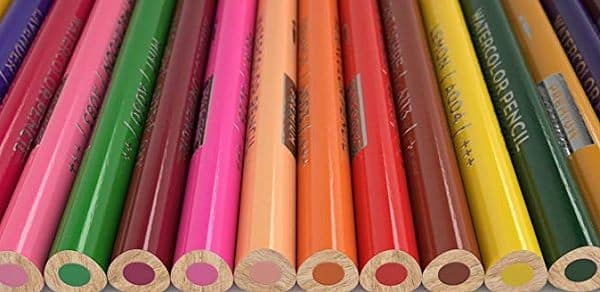
Watercolour Pencils: are ideal for drawing on canvas as you can use colours best suited to the subject and when painted over, they disappear into the paint without a trace. What is nice about drawing onto the canvas using watercolour pencils is that you can quickly and perfectly erase any mistakes or excess lines using a damp cloth. (Just ensure the canvas has dried again before you start painting).
Transferring
Transfer paper is yet another method to transfer drawing. Graphite transfer paper comes in white and graphite grey. The white is best used on darker painting surfaces. If you’re on a budget make your own graphite transfer paper by rubbing the back of a sheet of tracing paper with a soft graphite pencil. (2B or softer). Once well covered, dampen a cotton ball in rubbing alcohol and rub the graphite until you have achieved an even coating. Once dry you can use it to transfer your drawing. Just be sure to mark which side is the top to avoid the frustration of “transferring” a bunch of lines to the canvas to find out the transfer paper was upside down all along.
It is possible to use ordinary office carbon paper but the transferred lines tend to quite dark making it difficult to fully cover with layers of paint.
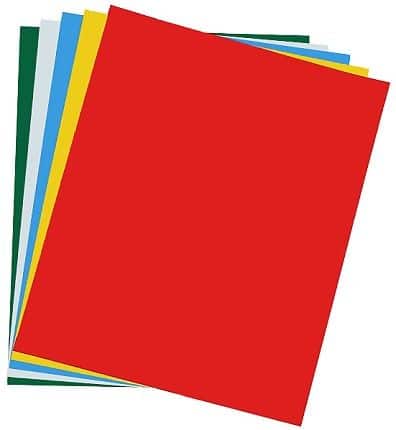
A better alternative is dress makers carbon paper. It sells in a pack which contains various colours, usually green, blue, white, pink and yellow. You can then choose a colour which will show up on the canvas, but disappear once the painting is complete. For example you could use the green transfer sheet to transfer the leaf outlines to your canvas, then use the pink paper to transfer the outlines of the red flower and so on.
Mahl Stick
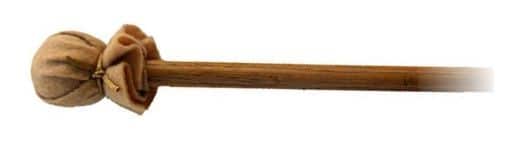
When you are painting a larger painting there will be times when you will want to paint fine detail. You then need to rest your hand on something to steady it. You can’t however rest it on the canvas as you will smear the wet paint below. This is where a mahl stick comes to the rescue.
Tip: You can often use a long brush as a mahl stick. Hold the brush at the end of the handle and rest the dry, clean bristles against a dry area of canvas. Alternately you can also hold the brush at the bristle end and then rest the handle on the wet canvas – this leaves a tiny mark which only takes a second or two to touch up afterwards.
You can purchase a variety of ready-made mahl sticks or you can make your own using a wooden dowel and a Styrofoam / squash ball. Gently rest the ball end on a dry area of your painting while holding the other end in your non painting hand. In this way you can support your painting hand on the stick while painting. You may prefer to tie some felt over the Styrofoam ball to stop it from slipping.
Cleaning Stuff
Lint Free Cloth
Any lint free material is essential for cleaning paint off brushes, lifting paint from your painting surface and other cleaning jobs. This is a good way of recycling old t-shirts. Many people also use tea towels as they are nice and absorbent.
Paper Towel
Paper kitchen towels are disposable and easy to use for a myriad of cleaning jobs like mopping up the turps after cleaning your palette. As you paint you will also sometimes want to wipe off excess paint off the brush without washing it. The roll of paper towel works perfectly for this too. More often than not I am painting with the brush in the one hand and the roll of paper towel in the other.
Turpentine
During a painting session you want a container which has turps in it handy in order to wash your brush before changing colours. I use a container as shown below as it has the spring above which holds my paint ladden brushes for my while painting. It also has an insert which helps to quickly clean the brush as you rub over it.
A useful do-it-yourself aid to brush cleaning is a tea strainer with the handle cut off and placed convex side up in a screw top glass jar of turps. Rubbing the paintbrush against the strainer will dislodge most of the oil paint. You can also use a smooth river stone at the bottom of the jar instead of a strainer for the same purpose.
Tip: While painting, after you have washed your brush, dry it thoroughly using your lint free cloth before continuing to paint.
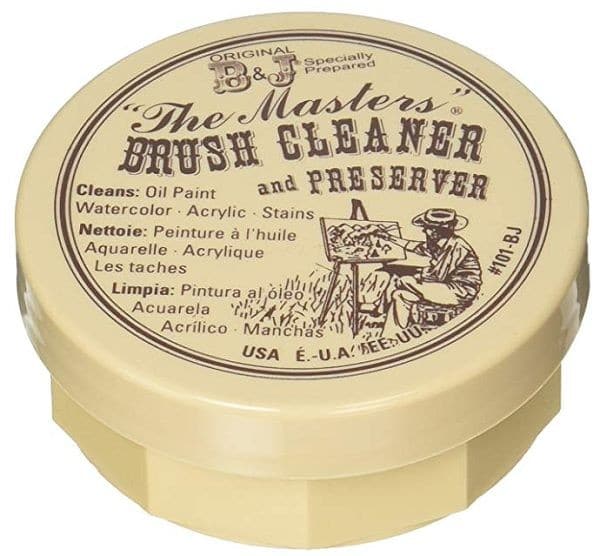
Brush Cleaner
Oil paint is very destructive of brushes. Always rinse your brush well in turpentine after painting, (water if you’re using water soluble oils), ensuring you get as much paint out of the bristles closest to the ferrule as possible. Gently dry using a lint free cloth.
Every now and again wash your brushes well using soap and preferably warm water. You get soap specially formulated for washing paint brushes, or you can use a bar of hand soap. Rinse well, dry on a lint free cloth then use a small amount of hair conditioner to shape the brush before putting into storage.
Let the brushes rest until you are ready to paint again – at least overnight. When you are ready to paint rinse then in warm running water. Dry thoroughly before starting the painting session. Your brushes will not only be beautifully clean but silky soft and fabulous to paint with.
Protective Clothing
Oil paint is very difficult, if not impossible, to get out of clothes once dry so always wear an apron and if you’re painting in winter, sleeve covers to protect long sleeves.
If you do get paint on your clothes it is important to dilute it as much as you can using clean turps (not recycled turps) to get rid of as much of the colour as possible. Then immediately wash the item of clothing as normal, before the turps dries. This will usually remove the last traces of the paint.
Tip: Keep or two pairs of clothes as your “painting clothes”. That way you won’t care if you accidentally get paint on them.
Hand Cleaning
You can use a solvent to clean paint off your hands but it is very harsh and will dry out your skin. Also the chemicals in the solvent will be absorbed through the skin which is probably not a good thing if you paint often.
A better plan is to protect your hands with a barrier cream before you start painting and then to remove any paint using baby or olive oil. Of course you could also opt to use gloves. The best ones to use are disposable surgical gloves which can be thrown away when you are done.
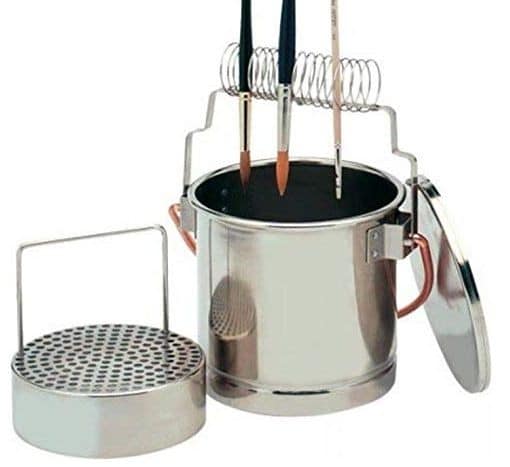
Wash Bucket
You will need a container to put your turps in. I have one of these which has a spring brush holder at the top which is great from when you are using several brushes at the same time. It also has a grill (shown left) which goes into the container. The brush then rubs on this to quickly clean itself. As it is raised the excess paint drops to the bottom of the container, extending the life of the turps.
You can of course use any small container such as an empty tuna fish tin to put your turpentine in to wash brushes. A useful do-it-yourself aid to brush cleaning is a tea strainer with the handle cut off and placed convex side up in a screw top glass jar of solvent. Rubbing the paintbrush against the strainer will dislodge most of the oil paint. You can also use a clean stone instead of a strainer for the same purpose.
Secret: You can recycle your turps by having two containers. One with clean turps in it and another which you throw your used turps into at the end of the painting session.
After leaving the turps to rest for a few days (preferably a week), the paint particles floating in the turps will settle at the bottom of the container. You can then gently pour the clean turps on top over to the clean container for re-use. When the dirty container becomes too full of sediment, you can cap it and take it to the paint disposal section of your recycling centre.
Note: the recycled turps will not be clear anymore as the oil in the paint will remain suspended. This is normal and perfectly okay to use.
Other odds and ends
Other essential items needed:
Rulers
You will want at least two different rulers one long one and one shorter one. I recommend the metal rulers purchased from the hardware store as they can handle the cleaning when you get a bit of paint on them.
They can then also be used to trim canvas panels and other items to size.
iPad or Android Tablet
It is not always possible to paint from life so you will often paint from photographs. Having a portable device like a tablet which has the photo on it in digital format is much better than a physical photo because it allows you to zoom in to see the detail better as well as zoom out to get an overall view of the scene.
You can also use the tablet to take a photo of your artwork. Looking at a photo of your artwork is like looking at it through someone else’s eyes. This often stops you from fiddling as you can now see the painting looks good. By the same token it also lets you quickly see glaring mistakes that you often miss when you have your nose to the canvas.
Another fantastic advantage of having a tablet handy is that you can instantly post your artwork updates to social media for added exposure.
It also goes without saying that you can watch our classes your on your tablet too ![]()
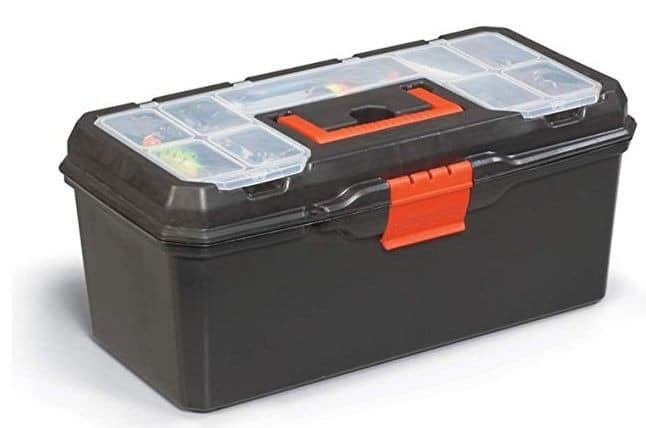
Toolbox
You will need a container to keep all your painting equipment in. I like to use a plastic toolbox as it has plenty of space and compartments to keep your equipment organised.
An added advantage of using a toolbox is that you are always ready to pick up your stuff to go en plein air painting.
Masking Tape
Masking tape is often used to mask off areas of the painting you need to protect.
It is also used to stick your reference material to the wall and various other creative uses that only an artist can think of like emergency brush repairs while out en plein air painting.
Clear Cellophane Tape
Cellophane tape (Scotch Tape) is less tacky than Sellotape so works well for sticking class templates and tiled reference material together.
Scrap Paper
Scrap paper, like photocopy paper is really handy to have around as you often want to sketch out a test composition of cut out a template or mask.
You can also stick them together to replicate the size of your canvas. You then do all your initial, rough sketch work on the tiled paper. This allows you to redraw and erase as many times as you want using a standard pencil while your canvas stays perfectly clean. Once you are happy with your composition, you use transfer paper to transfer the final sketch to your canvas.
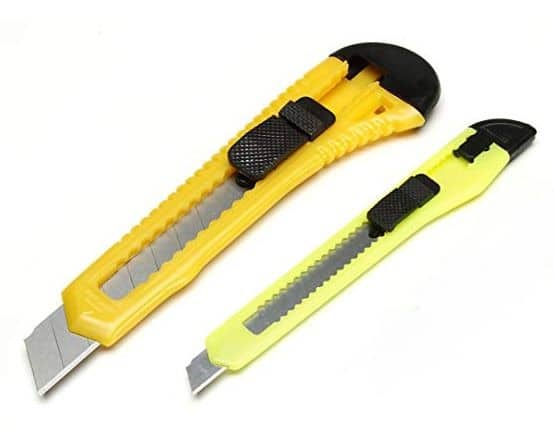
Craft Knife and Box Cutter
You will use these to remove the shrink wrapping from your canvasses, cut out templates, sharpen pencils, trim canvas panels to size and many other uses.
Clear Cover
This is a roll of thin clear vinyl sticker, traditionally used to cover books or line drawers. You can purchase it from your stationery store and often in the dollar store and general stores like Walmart (in the homewares department). It is also available on Amazon HERE.
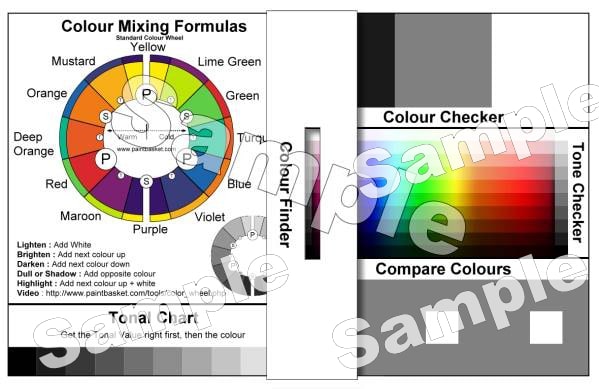
Color Buster
A Color Buster Color Mixing Tool is essential if you want to simplify the colour mixing process and remove the guess work usually required to match the colours in your scene.
The Color Buster has many other features which help the artist like a colour wheel and tonal chart to reference from while painting.
Reference Material
As an artist you can never have enough reference material as you are often combining various items into a single scene on the canvas.
For example if you are painting a beach scene and want to add a few figures onto the beach, having pictures of figures in various poses helps tremendously. You could also get an artist’s figurine which can be adjusted to exactly the correct position for your scene saving you the hassle of rummaging through hundreds of photos trying to find the correct pose.
You can of course use Google to search for images when you need them, but if you do that just know your responsibilities regarding copyright to ensure you don’t infringe and get yourself into trouble. When searching the Internet for reference photos it is always better to stick to the copyright free websites like Pixabay which allow you to use and manipulate any of their photos.
If you like to paint still lifes then all sorts of reference props will help you. Items like interesting bottles, candle sticks and vases can be used again and again in different compositions. As a result if you enjoy still life painting and plan to paint many of them then collecting some beautiful props can be worth their weight in gold. I often find some real jems by hanging out in antique and charity stores.
Wrapping Up
As you progress along your art journey you will no doubt find more and new items to add to your art supply collection. A simply wander into your local art store will quickly reveal many tempting treats to shrink your wallet. Just remember though that initially you don’t need all the fancy stuff.
You only need the basics until you have mastered the basics.
Pin Me