What is Instagram?
Instagram is an app which runs on your phone or computer. It allows you to share photos and videos.
Why Artists Need Instagram
Our art is visual and Instagram is a visual platform so marketing our art on Instagram is a perfect match.
Through Instagram we have the opportunity to potentially reach over 1 billion people. (Yes, that’s billion with a b!)
Obviously on a practical level, the chance of all 1 billion people seeing your artwork is zero. With so many people using Instagram, it is however very possible for you to reach thousands of potential buyers.
In order to sell an artwork you actually only really need to reach one person – the buyer.
What makes Instagram powerful for us as artists is the sharing nature of the platform.
If people like what they see they can like, save and share your post.
Likes, saves and shares all get you more exposure for your artworks from people outside of your circle of influence.
This in turn grows your circle of influence making it easier and easier to sell your artworks.
How to Set Up Your Instagram Account
Let’s take a look at how to set yourself up with an Instagram account.
1) Install the App
Depending on what device you have, you can follow one of these links to go and download the app:
2) Creating Your Account
You now need to create yourself an account.
Note: Instagram is constantly tweaking the look of the app, so the steps below may look slightly different on your device, but the process remains the same.
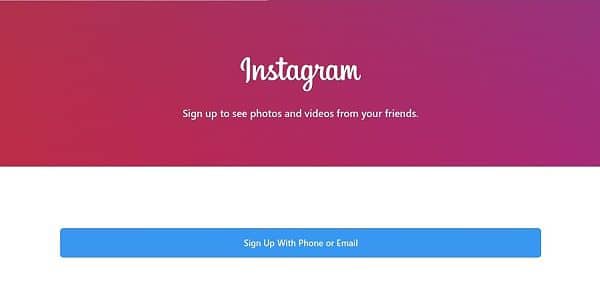
a) Click the Sign Up Button
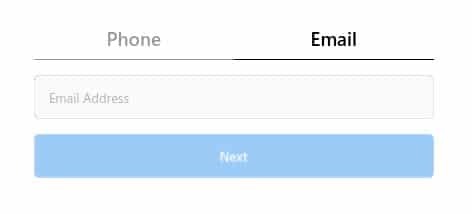
b) Choose Phone or Email
This links your Instagram account to your phone number or your email address. If you will access Instagram from different devices I recommend choosing the email option. If you will only be accessing Instagram on your phone then using your phone number option is better.
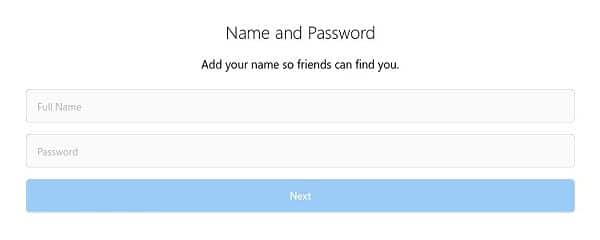
c) Add Your Name and Password
The name you add here will either be your own name, or that of your business.
Choose a long password. It doesn’t have to be hard to remember, just long as password length is what makes it difficult to hack.

Your Instagram account is then created using a computer generated username.
d) Choose a Better Username
Normally this username is terrible so click the Change Username option to choose your own username.
When choosing a username think carefully before you decide. It is possible to change your username later but that also changes the link to your profile page. You don’t want to spend time promoting your Instagram account only to change it later as this renders all your previous marketing efforts useless.
What Username to Choose?
When choosing your username you should consider these factors:
- Choose a username that is short and easy to remember.
- Choose a username that is first and foremost relevant to what you are selling. If you are selling custom hand made teddy bears, nobody is going to look for you under the username: thelemontree.In this example these usernames would however make sense: customteddies, cuddlyteddies, teddytime, teddybears. These are the kinds of names people will associate with your product, which makes it easier for them to remember the name.
- What if your business name is “The Lemon Tree”? In this case you can choose that as a username if you want as it would be easy for your existing customers to remember.I however see social media not just as a way of informing existing clients, but primarily as a way to find new customers. New customers will not be searching for your business name as they don’t know about you yet. Hence my previous advice to choose a keyword as a username as that is what a new customer would type into the search box on Instagram. I will leave you to decide if you agree or not
- A large part of ensuring your username is easy to remember is keeping your username as short as possible. It is easy to remember: customteddies. On the other hand remembering: handmadeteddybearsbymonique is not. A long username is also a pain to type. It takes ages to type and it is easy to make a mistake as you do. As a result many people simply won’t bother.
- Don’t use periods, dashes or underscores in your username if possible. People tend to forget to add them into your username when typing. They then don’t find you and simply assume you have stopped using Instagram. If you do have to use one of these, choose the period as it tends to be on the same screen as letters when typing on a mobile device. Getting to the dash is usually two keystrokes and underscores is usually three keystrokes. You have to make things as easy as possible for people to find you.
- Never use numbers in your username unless it is part of your brand name. People have difficulty remembering numbers so a username like teddy416 becomes difficult to remember. Even when using the number can dramatically shorten the username, like teddy4u, I would still not recommend doing so as you will find yourself having to keep clarifying that it is a number 4 and not the word four, etc.This then creates confusion making you difficult to find as people keep typing the username wrong.
- If possible keep your username consistent with your other brand identities. For example if your website address is customteddies.com, it makes sense to try and secure customteddies as your Instagram username as well. Keeping your branding consistent makes it easier for people to remember and find you. It also portrays a more professional image.
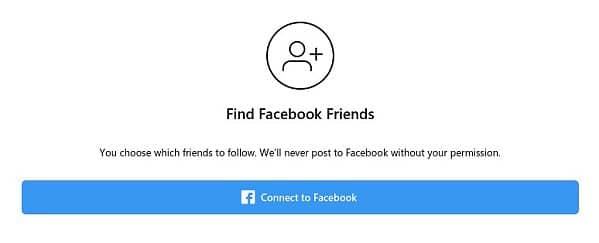
e) Linking Your Networks
Now that you have chosen yourself a fantastic username, it is time to connect to your existing networks.
You will be asked to link your Facebook account. By linking the two accounts, Instagram will check to see which of your Facebook friends are also on Instagram.
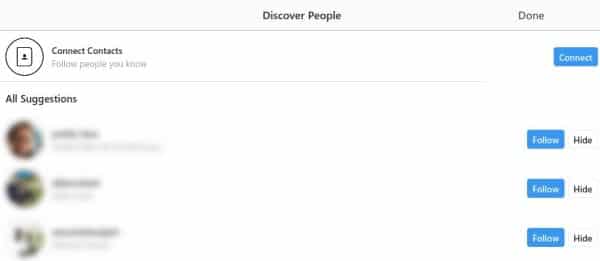
f) Follow Your Friends
You will then be able to follow your friends. Instagram will also recommend to your friends that they follow you. This will give your new Instagram account a quick boost in followers.
You are also able to connect other contacts like the ones programmed into your phone. If you let Instagram search your contacts, it will go through all the contacts you have saved on your phone and see which of them are also using Instagram.
You will then be able to follow them and they will be able to follow you back.
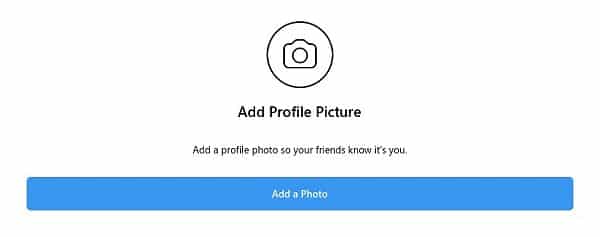
g) Add Your Profile Picture
You will add a profile picture to your account which becomes the avatar you see next to each of your posts.
Currently Instagram crops your profile picture so that it fits into a circle. Bear this in mind when selecting your profile picture.
Instagram will allow you to crop your photo into a square shape which does give you some control over what the final avatar will look like.
You can select any picture that is on your device as a profile picture. It does not have to be a photo of your face. You could use one of your artworks or even a copyright free image downloaded off the Internet.
You will need to decide what type of profile picture will work best for your branding efforts.
If your face is well known, then use a nice portrait photo.
Many artists use one of their artworks as their profile picture. If you do this ensure that the artwork you choose is representative of the majority of the artworks you create. For example, if you create mostly acrylic pour paintings and every now and again paint a landscape, it would make more sense to use one of your acrylic pour paintings as your profile picture.
If you have a logo that looks good in square format, then you could use that too.
Whatever you use, make sure that it instantly explains, or at least hints at, what your artworks are all about.
Also consider that your avatar can be shown quite small at times so try to choose one that looks good big or small.
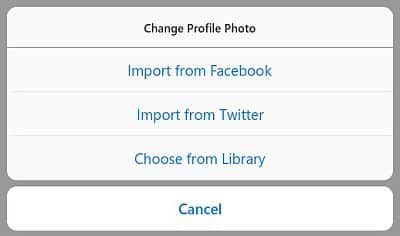
Tip: If you use Facebook or Twitter, you do have the option to import that profile photo. If you already have one you like on Facebook or Twitter, then it would make sense to use the same one on Instagram. (When it comes to branding, consistency is key.)
There are still two more things you need to set up to complete your profile but let’s have a look around the Instagram interface first before we complete these two items.
Exploring the Instagram Interface
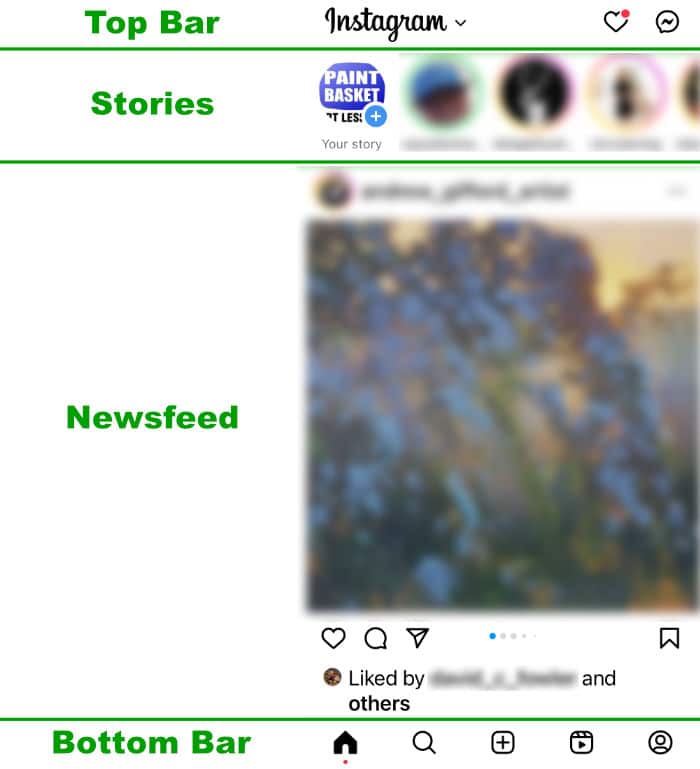
Note : Instagram is constantly changing and improving so the view above may differ by you. The view also changes depending on the device. The main icons and uses however remain similar.
The screen consists of four sections: Top bar, stories, newsfeed & bottom bar.
The top and bottom bar contain icons which you tap in order to do various things.
In the Stories area you will see icons that you can click to see that person’s latest story. I will explain what a Story is shortly.
If you are on a computer you may also see a recommendations area to the right of the screen like this:
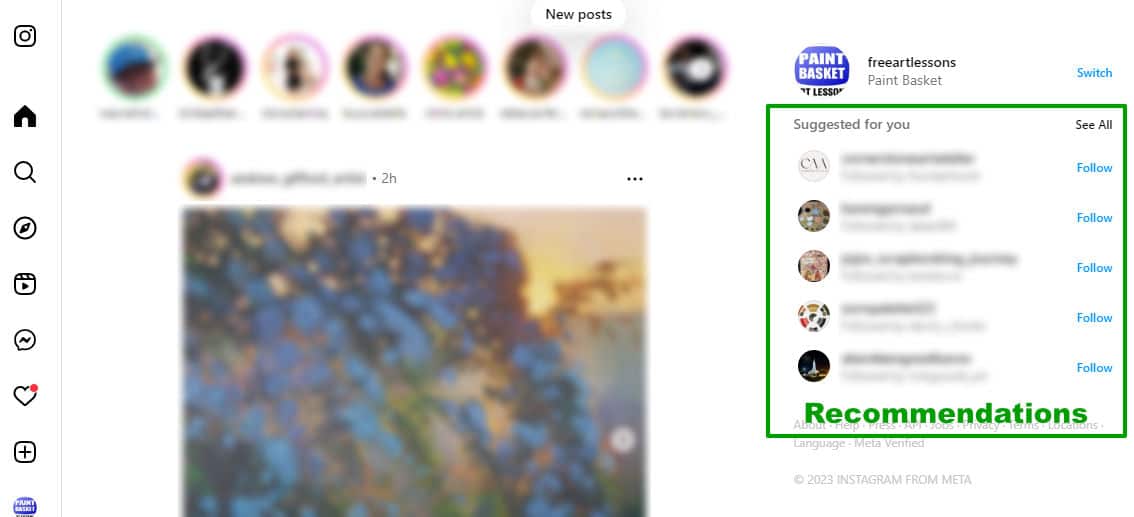
In the Recommendations area Instagram will show you other people it thinks you would be interested in following.
In the newsfeed area you will find the posts that your followers have posted.
Instagram Interface Icons
Instagram will show you various icons that you can tap to use the different features of the app.
Depending on what size screen you are on and what options are available at that time you will find these icons either in the top, side or bottom bars. Let’s drill down and look at what some of the main icons do.

Home icon : Use this to return to your main newsfeed.

Search icon: Takes you to the search screen. Here you can search for people and topics. You can type in keywords, hashtags and usernames in order to find what you are looking for.

Explore icon : On the explore page Instagram will show you a feed of posts it feels you will be interested in, including from people you do not follow.
Note that on a small screen this icon isn’t available. To get to this page tap the search icon. You will then find the explore feed below the search bar.

Create icon : Tap this icon to create new content for your Instagram account. We will discuss the different types of content you can create shortly.

Messages icon : In this area you can send and receive messages from your followers and those you follow. You can also view message requests from those you are not currently connected with.
Notifications icon : Shows you any latest activity that affects you. For example, you can see who followed you lately, suggestions of people to follow and recent activity by those you are following.
If you see a little red dot over the icon it means you have new notifications to view.
The red area to the right of the icon is a quick view of what types of notifications are waiting for you. This area will usually only display for a few seconds then disappear. Inside the red area, the heart icon shows how many new likes you have and the figure icon shows how many new followers you have since you last checked your notifications.

Profile icon : This will either be your logo or a figure in a circle depending on what device you are using. Use this icon to go to and edit your profile.

Reels icon : Use this icon to view the reels posted by your followers.
There are a few other icons which you will see when using the app but first let’s finish setting up your profile so that people can learn more about you.
Completing Your Instagram Profile

Go to your profile area by tapping the profile icon.
During the registration process you have already completed your name, profile photo as well as your username.
There are two more important bits of info you will want to add:
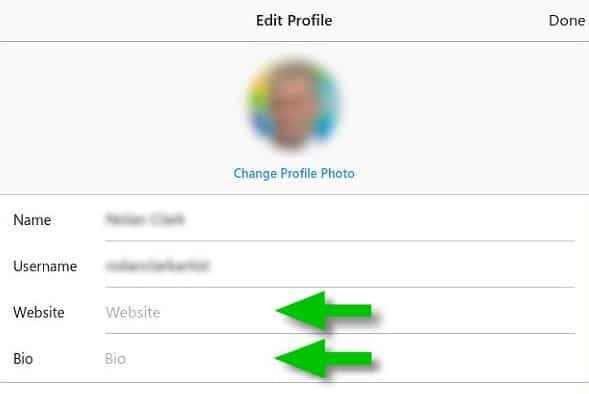
Website
Here you can add your website address. This will then show when people visit your profile for them to click on.
You are also able to link through to your Facebook page.
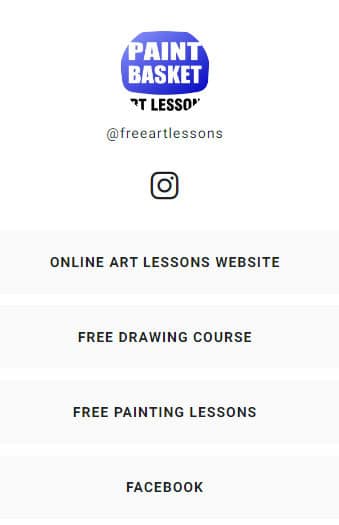
Tip : Often folks wish they could link to more than just one place. For example I want to link through to my website, two Youtube channels as well as my Facebook page. Another situation where you may want to do this is when you are running a competition and want to link to it while still linking to your other profiles.
Here is a trick I use to be able to do that: Go to Lnk.bio and create yourself an account (it’s free). There you can add as many links as you want which show neatly on one page. You then link to this page on your Instagram profile.
Here is what my Lnk.bio page looks like:
Bio
This is a short sentence telling your visitor what your Instagram is all about. Keep it short and to the point. This is what my bio says: “Learn to paint and draw. Lessons in pencil, oil and acrylic.” As you can see the person will instantly know what I do when reading it.
Fabulous, now that your account is set up, let’s take a look around the app.
Instagram Newsfeed
When you open the app you are automatically shown the newsfeed.
This is where you can see all the latest content added by those you follow.
To view more simply scroll down.
As you scroll you can interact with this content. Let’s take a look at how you would do that.
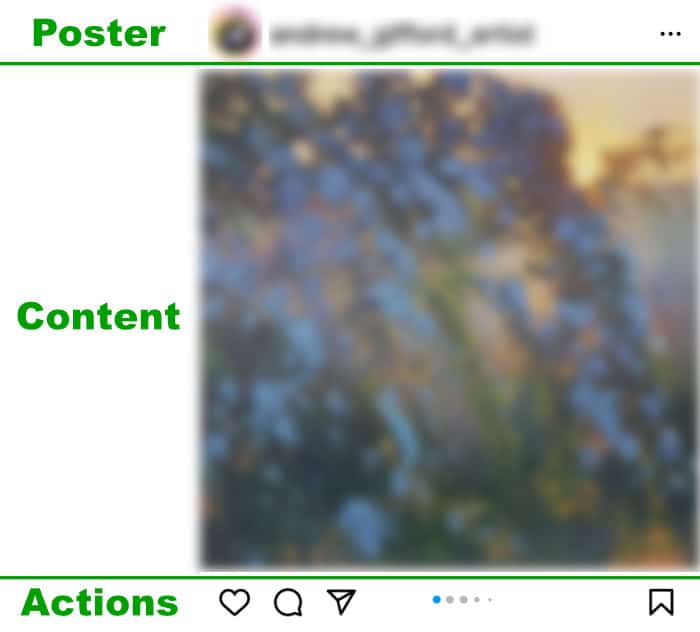
Poster Area
In the poster area you will see the profile picture and username of the person whose content you are viewing. You can tap this to go to their newsfeed which will show you only their content.
Next to that are three little dots which calls up a little popup box with options. The options available differ from one device to the other but include:
- being able to unfollow this person
- share their content
- add this post to your favourites
- hide this post so you don’t see it again as well as
- report the content if it is inappropriate.
Content Area
This is the actual content. It could be a photo, video, gallery of photos or even a gallery of photos and videos.
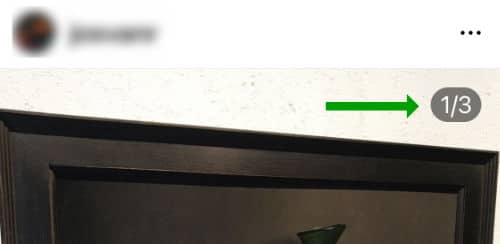
The way you tell if this post is made up of a gallery of items take a look to see if there is a number in the top right hand corner of the content like this:
Another way to see if this post has multiple items of content is to see if there are a series of dots below the content like this:
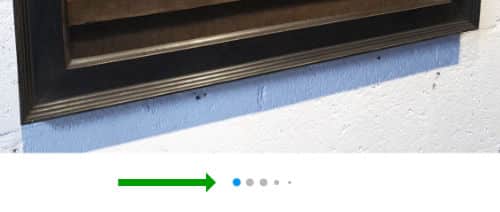
If you see either of these you can swipe left or right to scroll through the items.
Actions Area
The icons below the content allow you to quickly interact with the content. This is what each icon does:

Like icon : Tap this to like the post.
Tip : If you are on a touch screen device you can also double tap the screen to like the post.

Comment icon : When you tap this icon a popup opens which allows you to comment on the content as well as read previous comments.

Share icon : When you tap this icon a popup opens which allows you to share the content.

Save icon : If you want to be able to view a piece of content again you can save it by tapping the bookmark icon. (You can view your saved content under your profile area).
These are the basics you need to know about finding your way around the app. Now let’s take a look at the different types of content you will find on Instagram.
Instagram Content Types
There are four main content types that you can view and add to Instagram. These are post, story, reel and live.
This is what each one is:
Instagram Posts
An Instagram post is a photo or video that appears on your profile’s newsfeed. It can be a single image or multiple images in a gallery format, and can be accompanied by a caption and hashtags. Instagram posts can be edited and deleted, and can be shared with your followers, as well as with other users by tagging them in the post. Posts are a great way to showcase your creativity, share experiences, and engage with your audience. They become essentially a gallery of your artworks.
Instagram Stories
Instagram Stories are temporary photos or videos that appear in a slideshow format and disappear after 24 hours. They are usually taken and shared in real-time, and can include stickers, text, and filters. Stories can also be saved to your highlights, which are collections of Stories that stay on your profile permanently. Stories are a great way to give your audience a glimpse into your daily life, share behind-the-scenes moments, and post casual content. This is great for posting sneak peeks of the progress of your latest artwork; or giving short updates on day to day events in the lead up to your next exhibition.
Instagram Reels
Instagram Reels are short-form videos that are up to 60 seconds in length and appear in a separate Reels section on Instagram. They are similar to TikTok videos, and can include music, text, and special effects. Reels can also be shared on your profile’s newsfeed, as well as in your Instagram Stories. Reels are a great way to showcase your creativity, reach a wider audience, and get discovered by new followers. Reels are fabulous for showcasing your new artwork as you can zoom in to highlight details and then zoom out to show the whole canvas.
Instagram Live
Instagram Live is a feature that allows you to broadcast live videos to your followers in real-time. Your followers can watch and interact with you during the broadcast by commenting and sending virtual gifts. Once the broadcast is over, the video disappears from your profile. Instagram Live is a great way to connect with your audience, share your thoughts and experiences, and answer their questions in real-time. A good example of this would be to give your followers a sneak peek of an exhibition you are busy installing, or to do a live prize draw for a competition you are running.
In summary, Instagram offers a variety of content formats that allow you to share different types of content with your audience. Posts, Stories, Reels, and Live are all unique and serve different purposes, and can be used together to engage with your followers on multiple levels and stages of your artwork’s progress.
How to Add a Post to Instagram

Adding a photo or video is very easy, click the Create icon and ensure POST is selected.
The most recent photos and videos in your phone’s library will show up. If you want to take a new photo or video, then tap the photo icon at the bottom of the screen.
Once you have selected your photo or video, you can edit it by applying filters and cropping it.
Photos
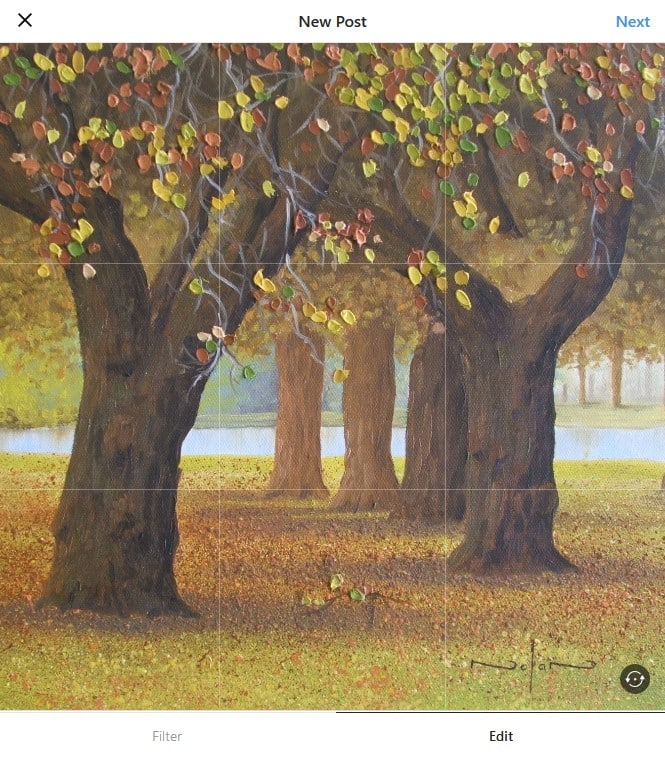
If you need to rotate the photo tap this icon:

Videos
Crop the length of the video you want to show. Instagram keeps adjusting the length of videos allowed. Currently your videos can be up to 60 minutes long for posts and 15 seconds long for stories.
Once you have cropped your video length, you can apply a filter effect to it.
You can also select a thumbnail image from the video. (this is the static image that shows when the viewer sees your video in their newsfeed. To watch the video they click on the thumbnail.)
Adding Filters
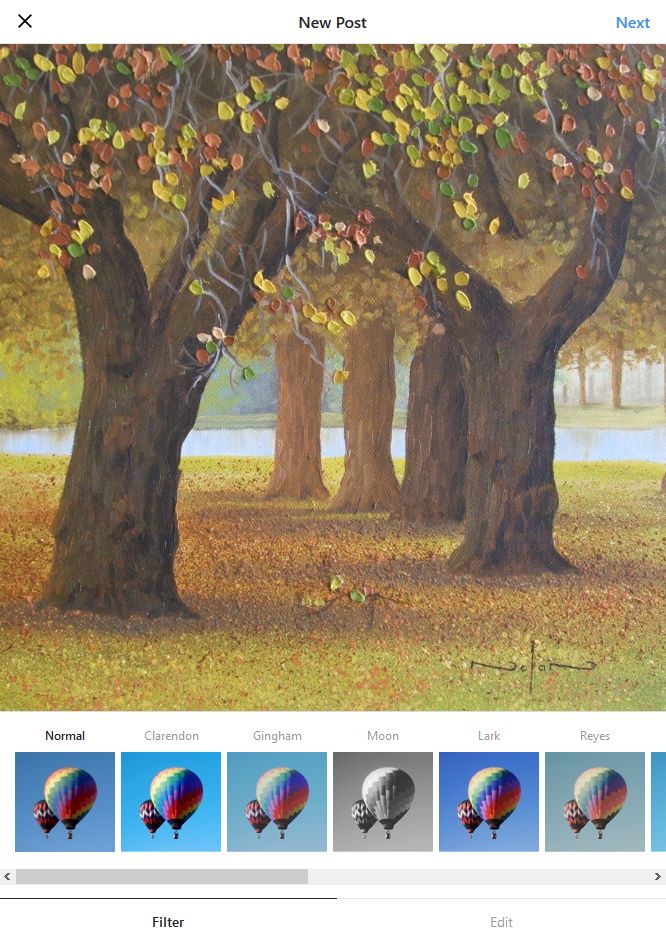
A filter effect is a way to change the image or video to make it look better, or different. For example, you could change the photo to black and white or Sepia.
When you are happy with your photo or video tap Next.
Adding a Caption
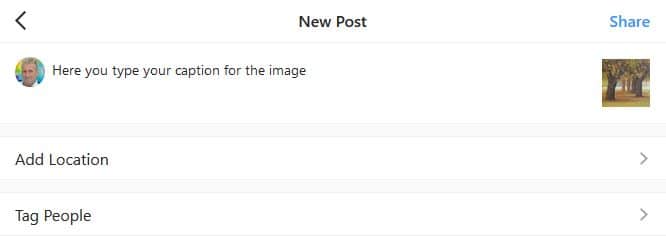
You can now add a short description to your post. You can use this area to say something about the image as well as add hashtags.
Hashtags
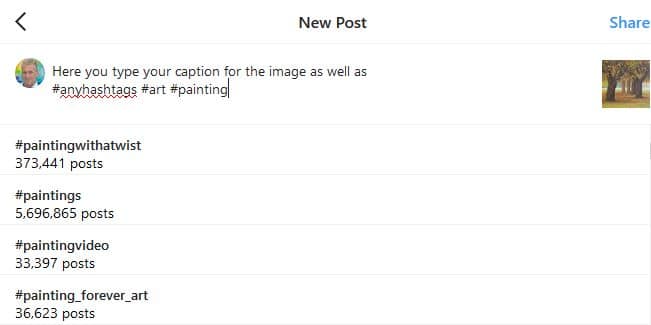
A hashtag is essentially a word or key phrase somebody might use to find your post. A hashtag can contain multiple words, but no spaces. It is always prefixed with the hash / pound (#) sign.
For example, if you are posting a photo of a painting containing strawberries painted in acrylic. You might add these hashtags into the description:
#painting #art #artist #strawberries #acrylic #acrylicpainting #yum
Tip : You will notice that after you type the # sign and start adding letters, Instagram will start to suggest popular hashtags for you to choose from. To select a suggested hashtag simply tap the suggestion. This is also a great way to find new hashtags to use.
What hashtags you use is up to you. You can add a maximum of 30 hashtags (which is way too many). 3 to 5 hashtags are normally enough.
Share Options
If you have connected your other social media accounts, like Facebook and Twitter, you can also select which of them to share this post to.
Tagging People
As with Facebook, you also have the option to tag people in your photos. The photo will then also show on their timeline.
Tip: Only tag people you have permission to tag, otherwise they may not appreciate you tagging them and get upset with you.
When you are happy with your post tap Done.
Your Instagram posts will now show on your profile’s newsfeed and in your followers newsfeed.
Your post may also show up in search results when people search for words used in your post description, or search for the hashtags used in the description.
Adding Stories to Instagram

Adding stories happens in pretty much the same way as a post, except after you tap the Create icon, you select the STORY option.
Your camera will activate for you to take a photo
When you add a photo to your story newsfeed, you also have the option to add text over the photo, as well as being able to draw onto the photo freehand before posting it.
Adding a Reel to Instagram

Tap the Create icon then select the REEL option.
Your camera will activate for you to record a video.
After you have recorded the video you can edit it, add music, overlays, titles and other effects to it before posting it to your Reels newsfeed.
Broadcasting Live on Instagram
Tap the Create icon then select the LIVE option.
Your camera will activate for you to start streaming live.
When you are ready to go live tap the stream button which looks like this:

Tip : Don’t just go live on a whim. Chances are only a few random people will see you. It is best to let your followers know a specific date and time when you are going to go live so they can prepare to be there.
Important : Going live can get you in front of many people, but it can also be very stressful. Always prepare before going live. You must have a very good idea of what you are going to say and how the live will proceed. Remember when live there are no edits or cuts, you are live, warts and all. The better prepared you are, the smoother your live broadcasts will be
What Next
With that you know the basics of using Instagram. There are lots of other little tips and tricks to using the Instagram app. A great way of learning them is to play around and use the app.
Always keep in mind that you can delete anything you have posted at any time so don’t be scared to make mistakes. That is how we learn. Besides, in the beginning your following will be small and it is better to learn and make mistakes while your audience is still small and growing with you. Those mistakes will show them that you too are a mere mortal and not just an Instagram wizard!
Next I suggest you read my article on the 11 Best Instagram Growth Tactics to get your following off to a blazing start. (Coming soon, join the newsletter below so I can notify you when the article is published)
Pin Me
