Class Tutorial
Transferring the outlines onto the canvas
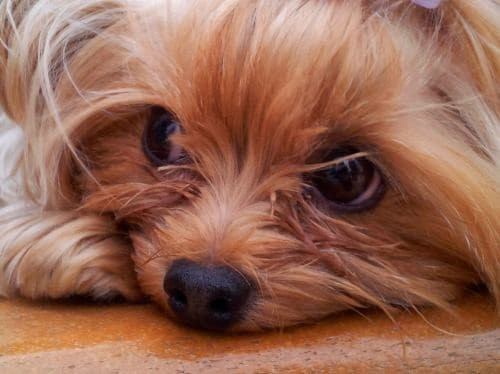
Using your preferred method, transfer the basic outlines of the dog onto your canvas. Be sure to include as many direction lines as needed so that you will remember which directions the various hairs are going in.
Colour Mixing
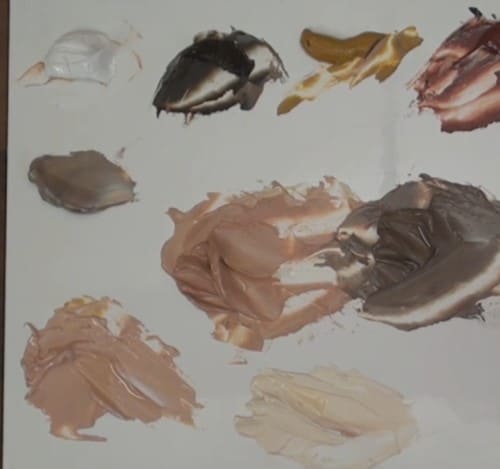
Mix the colours that you will need for the dog’s hair. Your palette should include various tonal values from almost white to several dark tones. Be prepared to make some impromptu mixes also as the needs arise.
Painting the sides of the head
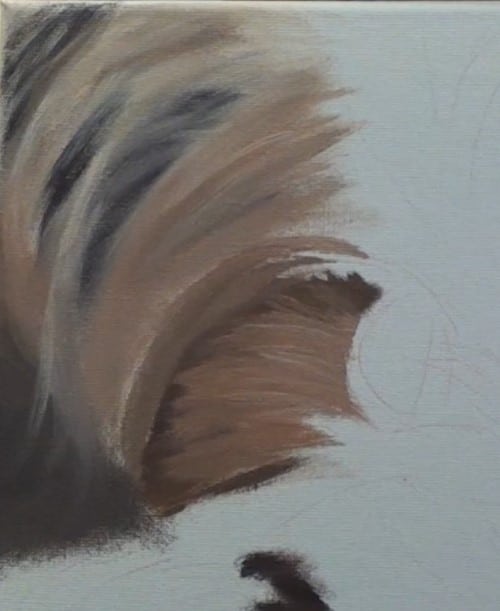
Begin by applying paint in areas where there is the deepest layering of hair – the far left and right sides of the head. Using a bristle brush and light strokes, lay on the darkest tones in the proper places. Then follow with the lighter tones. Constantly check your reference photo for proper placement of tones. Don’t be skimpy on the area of each application as the success of this technique is the overlapping layer-on-layer effect. Be sure to follow your direction lines.
Use the same procedure on the other side of the painting. To create contrast, darken the area to the side of the eye on the left, then flick the hair over it.
Painting the area beside the eyes
Move to the dark shadowy area next to the eye. Scrub in the dark tones, and then begin flicking in the lighter tones. Do not overwork it and be sure to clean your brush often so as not to muddy your colours. Stand back often and check your work. Remember you are not flicking in every hair, but just giving the impression of them.
Painting between the eyes
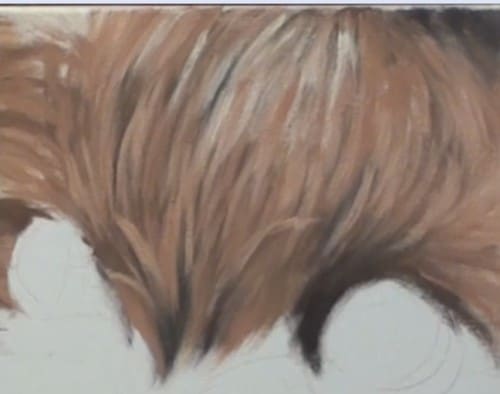
Hair is very thick here and there will be many layers. Again, lay down the darkest tones first. Follow the same procedures as you used above. Strategically placing the tones in the right places and flicking in the right directions will create the rounding effect in this area. Notice how Nolan ties in the hairs in this section to those previously done before he lays down the final lightest layers.
Continue between the eyes, layer after layer. When you think it’s done, stand back and check to be sure all tones are correct and all hairs are going in the correct directions.
Painting the eyes
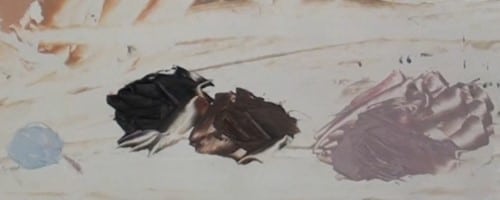
Prepare the colours for the eyes. Study the contour lines of the eye before applying the paint. Thin the paint to get it to flow better.
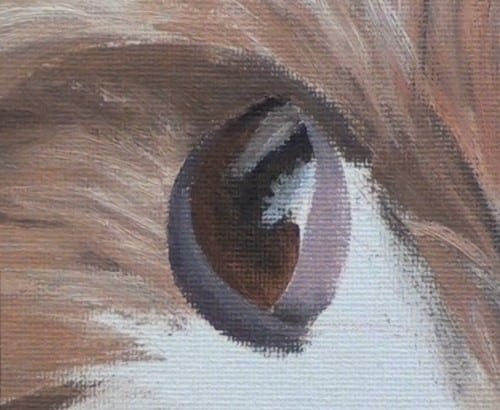
Begin applying the dark brownish tone around the iris. Then add the blackish tone for the pupil. Blend them where they meet. Add a black shadow at the top of the iris.
Mix the colour needed to paint the roll of skin around the iris. Use Nolan’s technique for applying this piece.
Lay down the whitish line though the iris, blending it into the black at the bottom of the eye. Add the dark tone in the deep recess at the top of the eye. Add the sky colour reflections across the iris and any other dabs of colour that add depth to the eye. Soften any hard edges on the iris. Fill in the remaining dark side of the eyeball, continuing well below it.
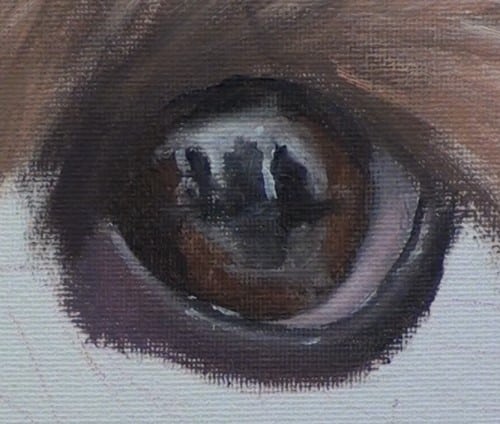
Now move to the other eye. Block on the blackish-brown eye colour on the iris, then paint in the black pupil. Leave the area of reflected light white for the moment. Place the black shadowed area at the top of the eyeball. Now add the reflected sky colour. Check your reference photo and make any necessary adjustments.
Add the whitish tone around the iris, then paint the eyelid. Adjust any other shadowy areas around the eyeball and soften any hard edges. Add highlights and reflections.
Painting the wood effect

Prepare at least three tonal values that you will need to paint the wooden base that the dog is lying on.

Using a bristle brush, block in the darkest tones first, both wood grains and shadows. Continue with the lighter tones in an effort to create a wood grain effect. Add in the highlights and adjust the shadows. Sharpen the edges of the wood. Be sure to extend the wood under the dog’s shadow.
Painting the paw
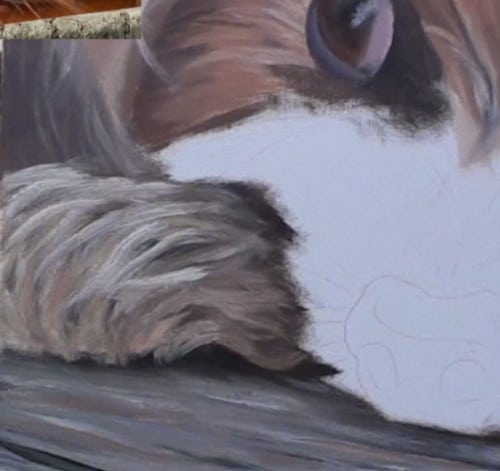
Start by blocking in the dark patches; then flick in a lighter shade. Keep checking your direction lines as you paint. Continue with adding more lighter shades.
Painting the middle of the face and the bridge of the nose
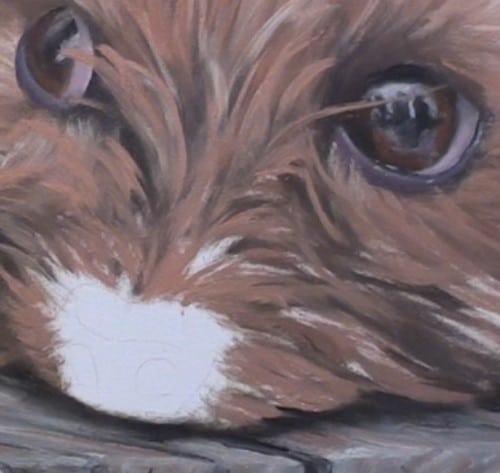
Use the same technique as you did above for the paw. Use a dark tone to create depth between the paw and the face.
Block in the darks along the sides of the bridge of the nose. Layer in the other tones in the proper directions. Adjust the tones around the eyes if need be and end up by adjusting again the shadows under the dog. Continue layering the lights all the way down the face.
Painting the nose
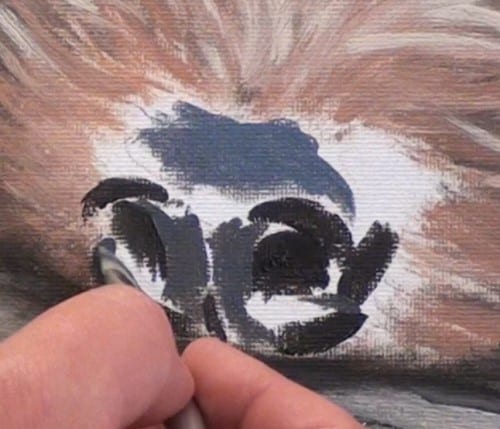
Mix the paint needed for the nose. Include some sky colour for highlights. Paint the nostrils first – the darkest dark.
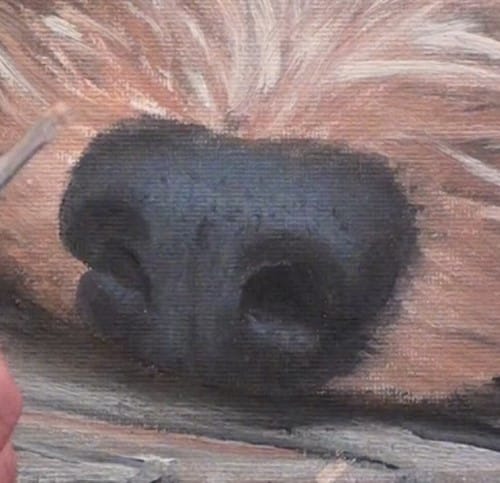
Refer closely to the reference photo to see where to apply the other nose tones. Block them all in lightly, then blend them. Next, refine the shape of the nose and add some dark to the surrounding exposed skin. Brush on the sky-coloured highlights to give definition to the shape of the nostrils.
End by randomly dabbing on small bits of paint to suggest the wrinkly texture of the nose and adding in all the wispy hairs that tie it all together.
Finishing
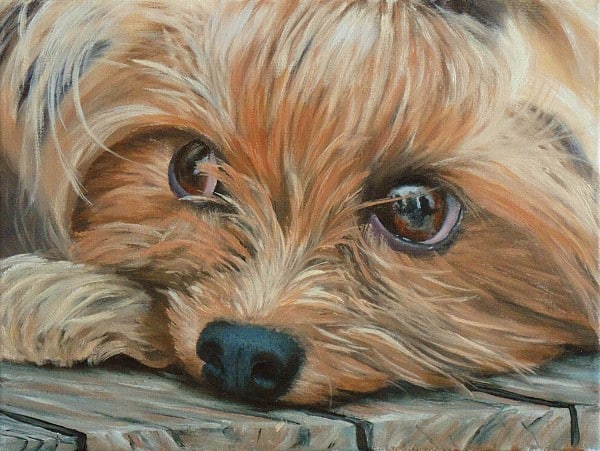
Let the painting dry overnight. Then scan it closely to refine all the highlights and shadows and define all the little details.
Click the button below to view the real time follow along version of this class:
Pin Me
