Short Class Video
Class Tutorial
Masking and painting the background
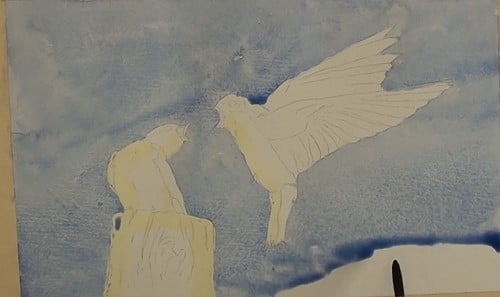
We need to protect all the light colored areas in the painting. Sometimes it is easier to pour out some masking fluid into a small open container rather than using it direct from the bottle. Don’t forget to clean the brush in water often to avoid the fluid hardening on the hairs.
For the background – use a Purple Blue mix of Ultramarine Blue and Alizarin Crimson for the background. Lift the back of the board up slightly so that there is some gravity flow towards the bottom of the painting. Use enough paint on the brush to keep a bead of paint. Ultramarine Blue is a granulated color and you can see this in the wash. Don’t let the bead dry out. Work your way right to the bottom of the painting.
The sky area – crumple up a tissue and lightly lift out some of the wet color for out-of-focus clouds to make the sky more interesting.
Painting the swallow on the left-hand side
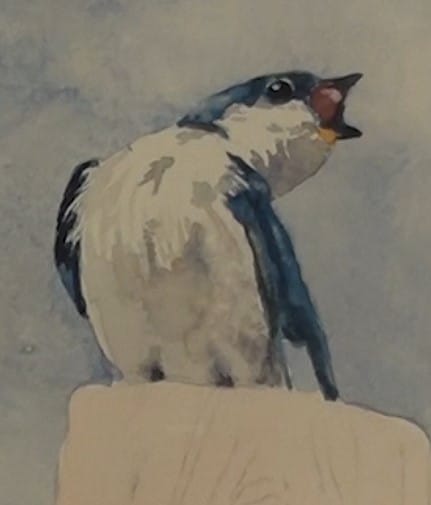
Paint in the dark colours with some strong Ultramarine Blue, and paint carefully around the eye area. Paint the wings, and also notice how I feather out the left side wing to show the loose chest feathers. Paint the eye, and the very dark areas, with Blue into which a touch of Burnt Siena has been added.
Use a damp brush and a tissue to carefully lift out the areas reflecting the main light.
1:08 Lift out the highlight in the eye and then add some paint around it until the highlight is of the correct size. Add the beak and throat colors.
The shadow for the underside of the body is from a very diluted wing color. Work up all the various tonal ranges and small darker shadow patches. Darken up and lighten some areas as you go along.
Painting the wooden post
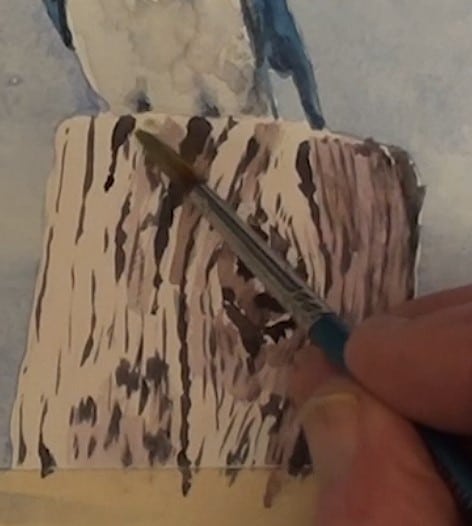
Lay an undercoat of light Alizarin Crimson and let it dry. Paint in all the cracks with the very dark mix we used for the bird. This is a very old and weathered post so it has many marks and cracks in it.
Paint all the shadow side with a warm purple-blue mix. Leave some of the highlights at the edges of some of the cracks. There is also a light touch of Green on the post.
Painting the swallow on the right-hand side
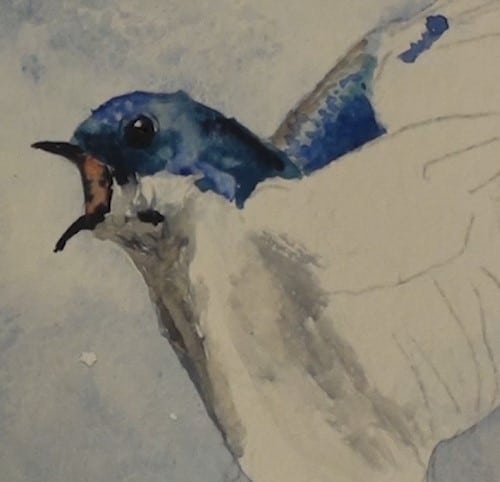
Use the same colour as the first swallow to paint in the dark Blue areas. Burnt Siena is used for the open beak. Continue working on the head and the eye. This bird is the focus point of our painting. The drama in this painting is that he is challenging the other swallow’s rights to sitting on the pole.
Add the light Blue to the head and begin to lift out the highlights.
Commence the shading of the body. I’ve suddenly decided to go back and do some more work on the head and the eye. A touch of Red needs to be added inside of each beak.
Painting the tail and feet
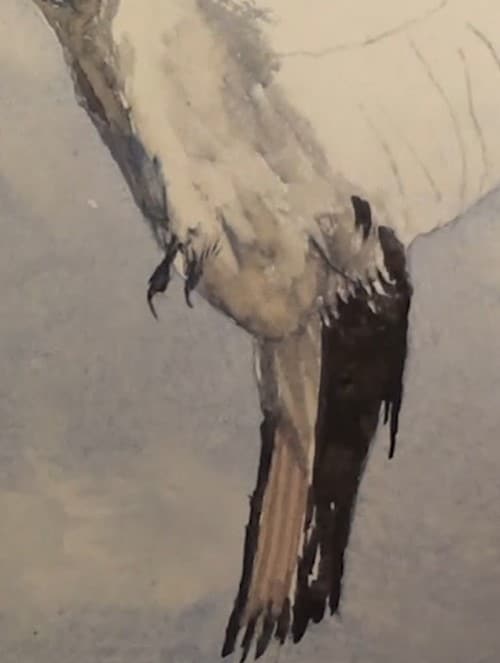
The top of the tail is very dark. Notice again the feathering on the tail, as well as the few areas left unpainted. The underside of the tail is reflecting the same colour as the shadow of the pole. Continue shading in the underside of the body, being a little bit darker lower down.
The feet are well tucked in so there is very little detailing to do here.
All the darks for the top wing are now painted. While the paint is still moist add the lighter coloring to merge in with the top ridge of each individual feather and finish off where the thumb would normally be.
Painting the wings
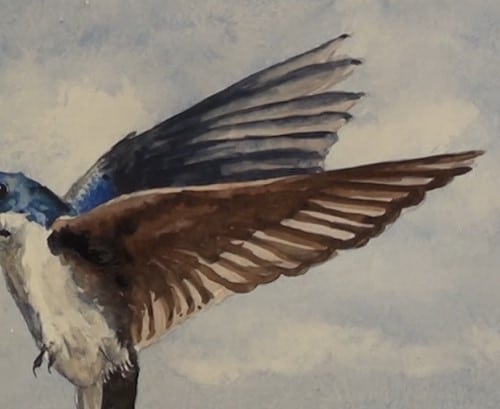
While we are painting the lower wing. The dark brown is painted in rather moist but not too wet, and tap in more darker paint to merge a bit streaky, as shown. When that has been done, we can now start painting all the dark portions of the wing feathers.
Add the dark shadow at the leading edge of the wing and some more on the feathers. There is not much detailing to be seen here, so show more of the tonal areas instead. Only the faces of the birds should be in full focus. Blend in more dark paint at the base of the wing.
Final painting

Click the button below to view the real time follow along version of this class:
Pin Me

