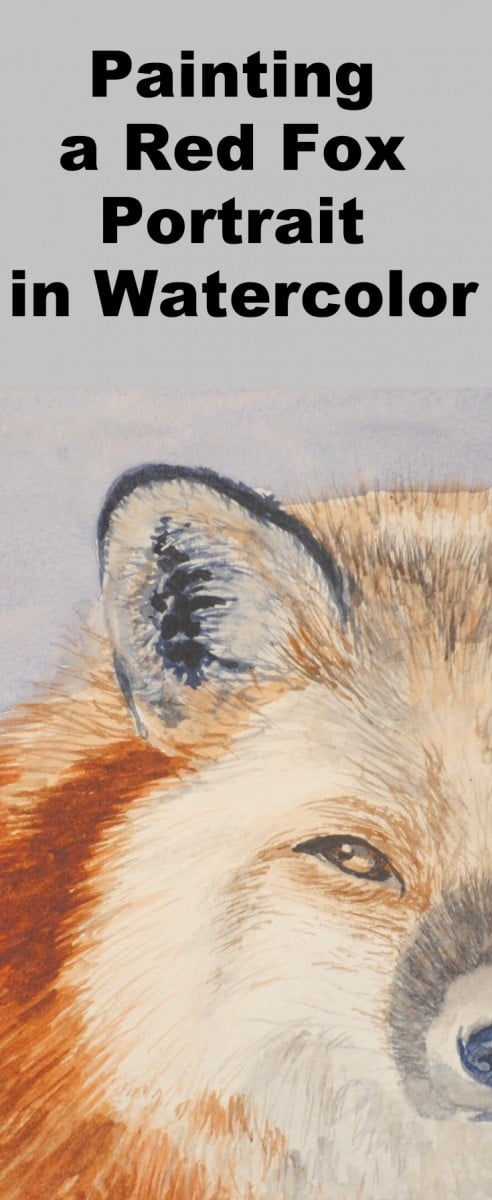
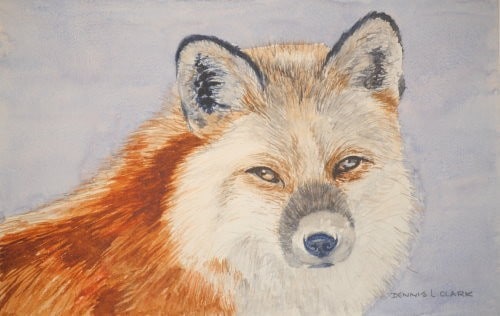
Class Tutorial
Fox underpainting
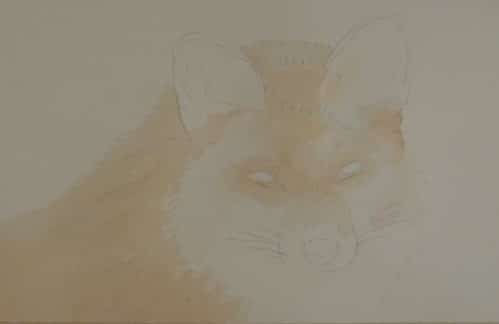
Start the underpainting by adding a very light application of red/brown to the face area. This will be the highlight colour.
Mix up a slightly darker value of the previous colour mix, and start adding it to the body and the darker fur colour in the face. While still damp, drop in some very light blue/gray into the shadows areas. Don’t make it too dark at this stage as these are the initial sketching in of the shadows. It is easier to rectify mistake in a light colour as opposed to a much darker value.
Lightly outline the eye socket with a light blue/grey mix paint it in as shown. Add the small area of yellow to the left hand eye.
Painting the eyes
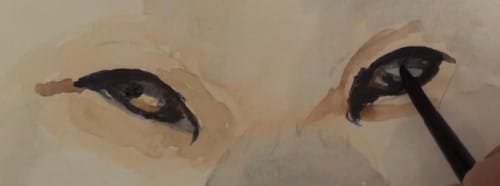
The eyes are very narrow and small, with the result there will be not too much detail to paint. The eyes have a bit of a squint. Do not lose the light yellow sunlit area in the left eye. Also, carefully add in the shadows on the top section of the eyes. This is the shadow caused by the eyebrows.
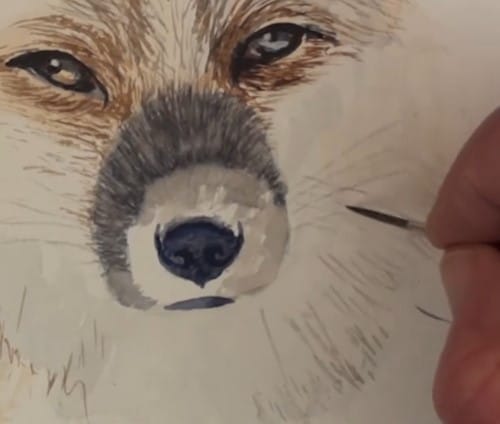
Painting the nose
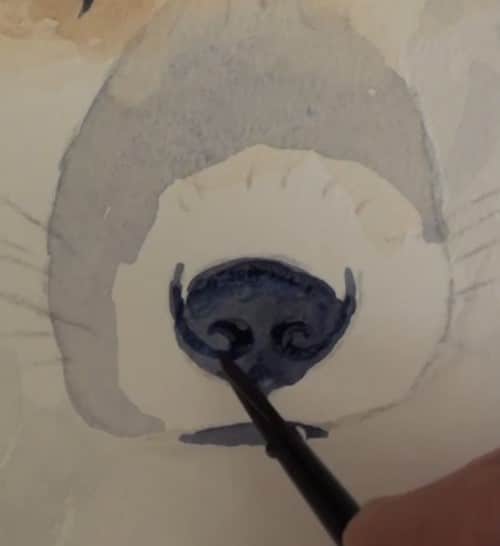
With a dark mix of Ultramarine and Burnt Sienna paint the nose. Lift out the lighter sections. Just block in the basics shapes at this stage.
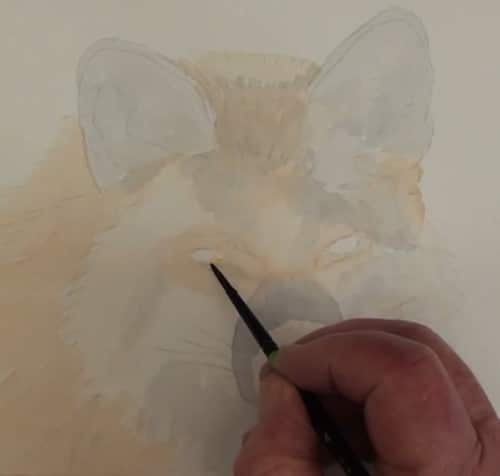
Painting the ears
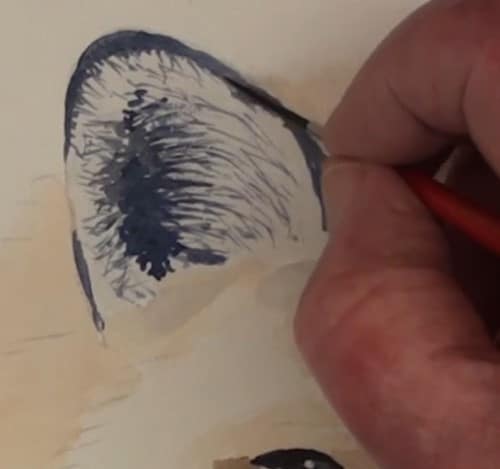
Begin the ears with the dark outline. Then add the dark section, and from this area, while it is still wet, negative paint the long hair by pulling the paint from here outwards. Use a thin #2 rigger brush to do this.
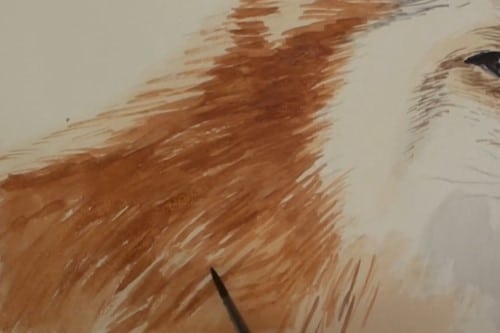
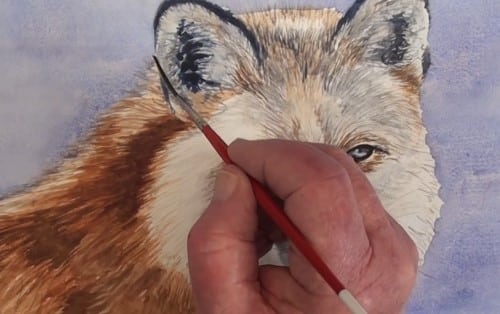
Painting the fur on the face
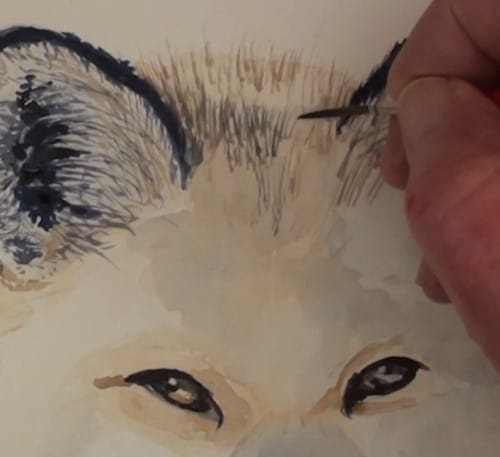
Paint the hair on the head with the #2 rigger brush. Pull towards the tips of the hairs in order to get them thin and pointed.
It is of vital importance that you paint the fur in the direction that the hairs fall or lie. This is one of the most important ways of showing the moulding of the body.
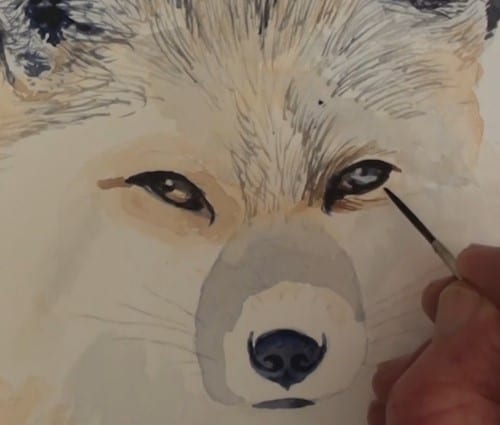
After completing the painting I suddenly realized that this dark band over the nose was actually a shadow falling over it. You can either leave it out or leave it as a very light band. Don't paint it as dark as in this painting. If you have already done so then lift out as much as possible with a damp brush and dabbing with a tissue. It’s not serious if not all can be lifted out.
Start the body
Here stronger lines can be painted in to imply course hair. Always pull the brush in the direction of the hairs.
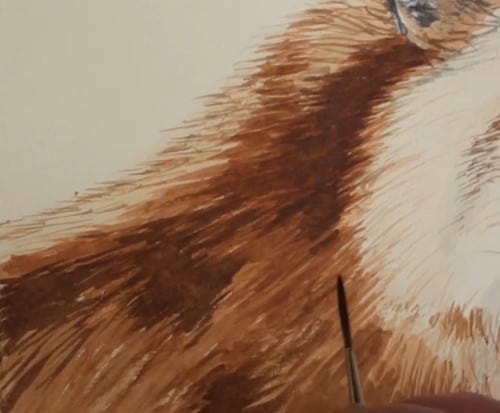
Add the dark patches. These are actually cast shadows and add to the interest of the body. With the rigger brush, add the lighter hairs in the lighter area. Don't fill this light area up too much.
Edge the neck hairs with a light grey mix.
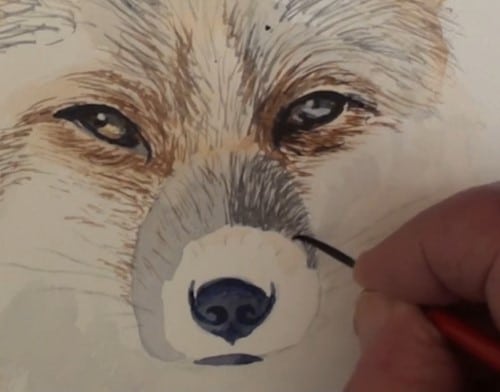
Complete the nose
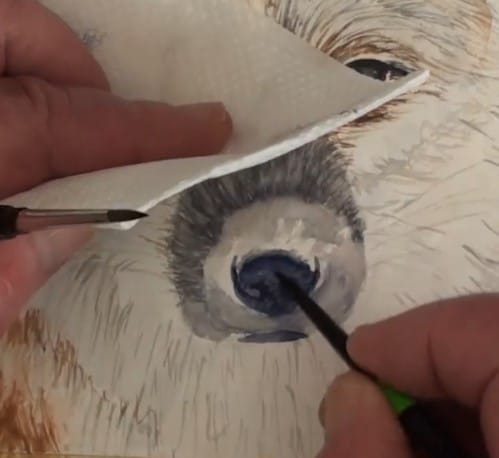
With a damp brush blend and lift out the light reflections. Don't leave out the reflection on the tip of the nose.
Paint the background
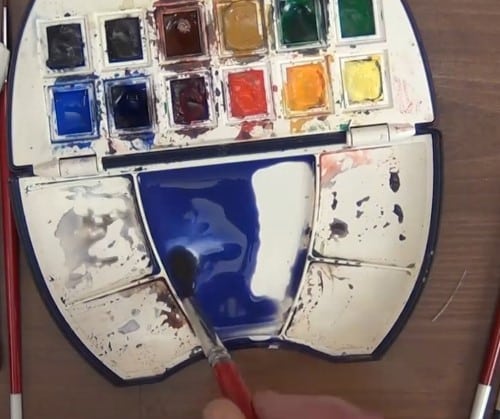
Mix a warm blue/purple as shown in the palette and wash in the sky around the figure.
Keep the wash nice and loose. In other words, don't paint too dry. Keep the board at a slight angle so that a water bead forms. This helps to paint as even a surface as possible.
Final brush work
With the rigger brush go back and edge off the hairs against the sky. We need to soften and get rid of the hard edge that has formed between the body and the sky.
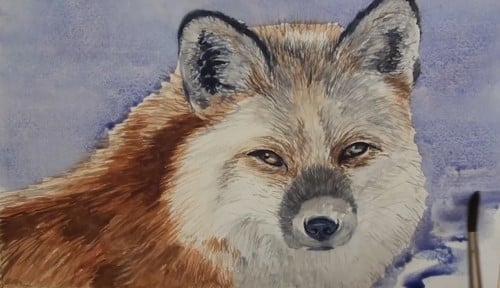
Final painting
Click the button below to view the real time follow along version of this class:
Pin Me