Short Class Video
Class Tutorial
Drawing the sky and clouds

Sky - Lay some White and then some light Blue over the toned paper and blend. If the paper is a dark color, do this as many times as necessary to get to the sky color you need. End with a last covering of Blue.
Clouds - These soft clouds are added only to have something in the sky area. Gently blend up to the mountain outline.
Drawing the mountain
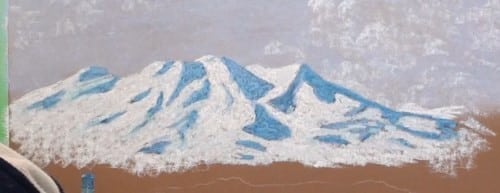
I normally block in the darks first for snow-capped mountains and then, when I add the snow colour, I go over the dark colour and tone it down to the required value. There will be a lot of different shadow values over the mountain.
It is much easier to paint this large mountain, which is actually a volcano, in sections using the principle of darks first then the lighter areas.
Don't try and do too much detailing at this stage – just a few indications here and there to help us later in the painting. A few soft blendings also help to bring out the lighter shadow values.
Shadow Details - Use the dark blue stick to very gently work in all the various shadow values, all the while comparing what you are doing against the Reference Photograph. Concentrate on all the major features, because we are not going to add in all the very smaller shadow areas. If you had taken this Reference Photograph 2 minutes later, or 2 minutes earlier, all the shadows will have looked much different. We are not chasing the shadows here! Back to the painting: Alternatively use the Blue and the White to build up all the major features. Softly blend where needed.
Deep Shadow - The setting sun is already low in the sky, so we have a deep shadow at the base of the mountain. This helps to show up the snow area. There is no definite line separating them, so blend them evenly together.
To indicate an even darker shadow, I’m using a dark brown under-painting, over which I will lay a coat of the dark blue. There is absolutely no detail to be seen here at all.
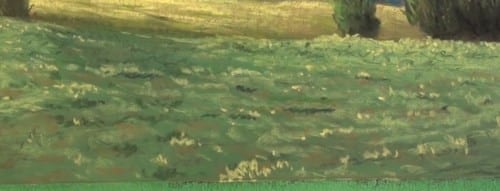
Drawing the grassy field
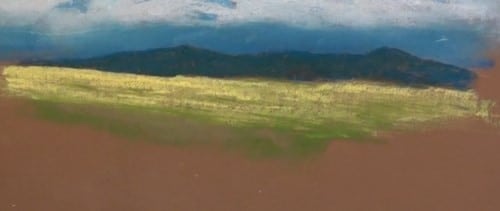
Start stroking some medium Yellow for this sunlit field. Blend to darken it up a bit and then paint the bright areas, leaving it a bit patchy for a natural look. Bring in some bright Green lower down. This is the field in shadow.
Drawing the trees
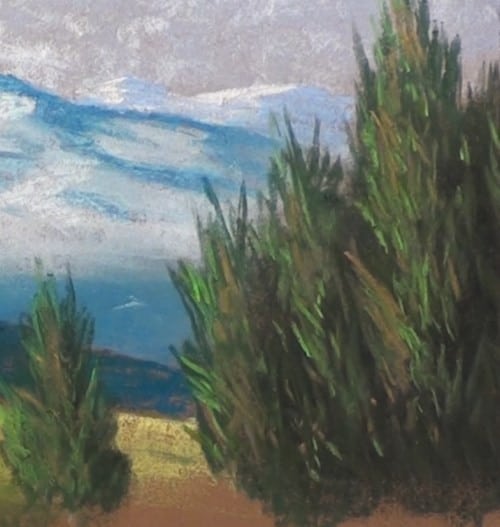
Using vertical strokes, paint the left-hand trees and then add some Brown for the deep shadows and to warm it up a bit, use a light Green for the highlights.
The trees on the right-hand side are not as dark as those on the left, because they are catching more sunlight. A touch of Black will darken up the shadow area. A smaller tree is added for optical balance. With lighter colors, build up the branches. The sun is allowing us more detail here.
Drawing the foreground
I'm not following the Reference Photograph for the foreground, as it lacks interest and the fencing cuts the picture into two areas. Imagination comes into play here. Don't be afraid to experiment as you go along. Play around until you get to something you feel is right for the scene.
There is more sunlight on the right to balance out the dark trees at the left. Now we can begin to show some detailing in the foreground. There are a lot of small shrubs and hollows in shadow. I've added a hump in this field for interest as well as to provide three tonal areas instead of one only.
Continue to work on the foreground. Bring in some warmer colors here and there to counteract the general coolness of the scene. The sunlit grass tops scattered across the field heightens the effect of the setting sun. Work in some darker areas and to warm it up even further, tap in some darker Yellow such as Cadmium Yellow and Yellow Ochre. Finally, touch up the sunlit area on the right with more detail.
Drawing the sheep
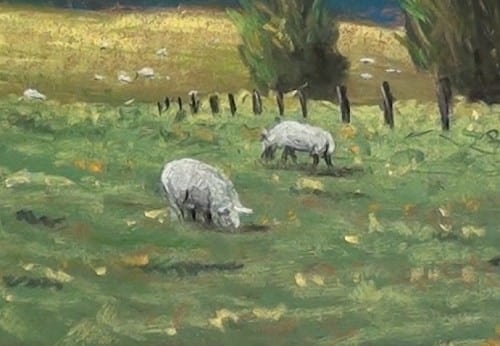
We need some life in the painting so I have decided to add some sheep grazing in the fields. I'm using a White and a Black pastel pencil to do paint them. The distant sheep are just “blobs” of White with a shadow underneath: Block in these sheep first before any detailing is attempted. Even then, this is kept to the absolute minimum.
Add the fencing and you are done!
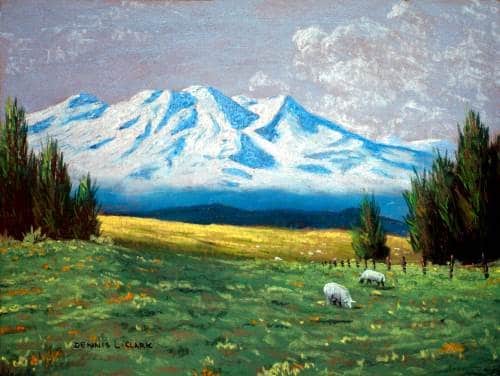
Final drawing
Click the button below to view the real time follow along version of this class:
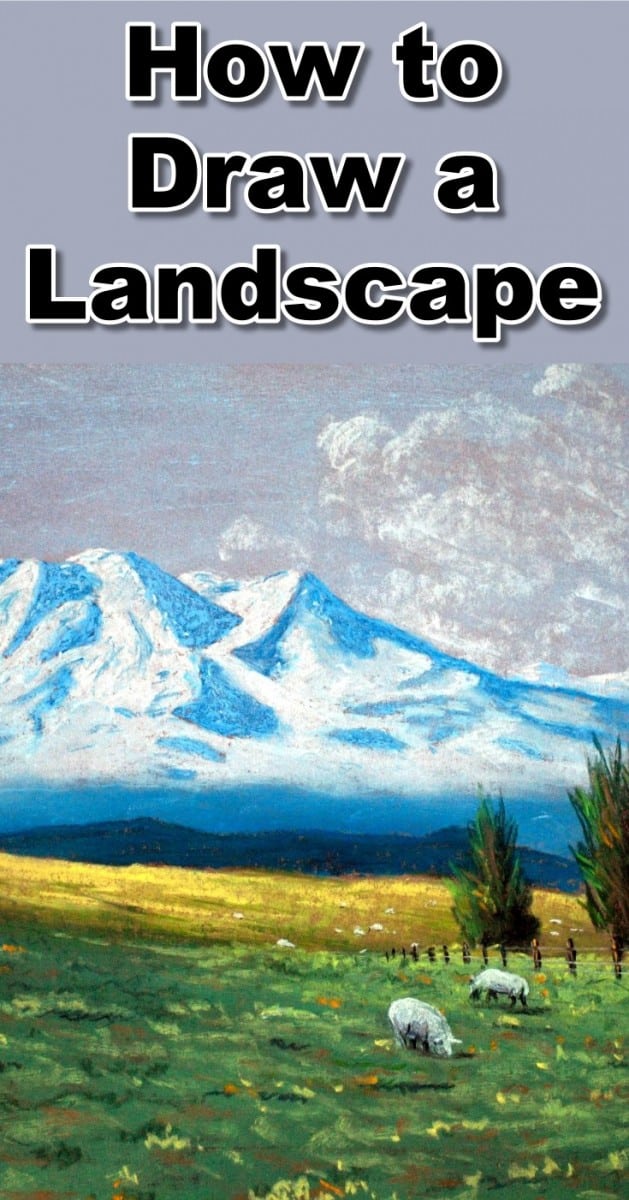
Pin Me