How to Paint a Swan in Oil
Skill Level : 3 Advanced
Medium : Oil Painting
Subject : Animals
Tutor : Nolan Clark
Class Length : 2 hours 23 minutes
Avg Rating : No Ratings Yet
Silver Level or Higher Class
Class Description
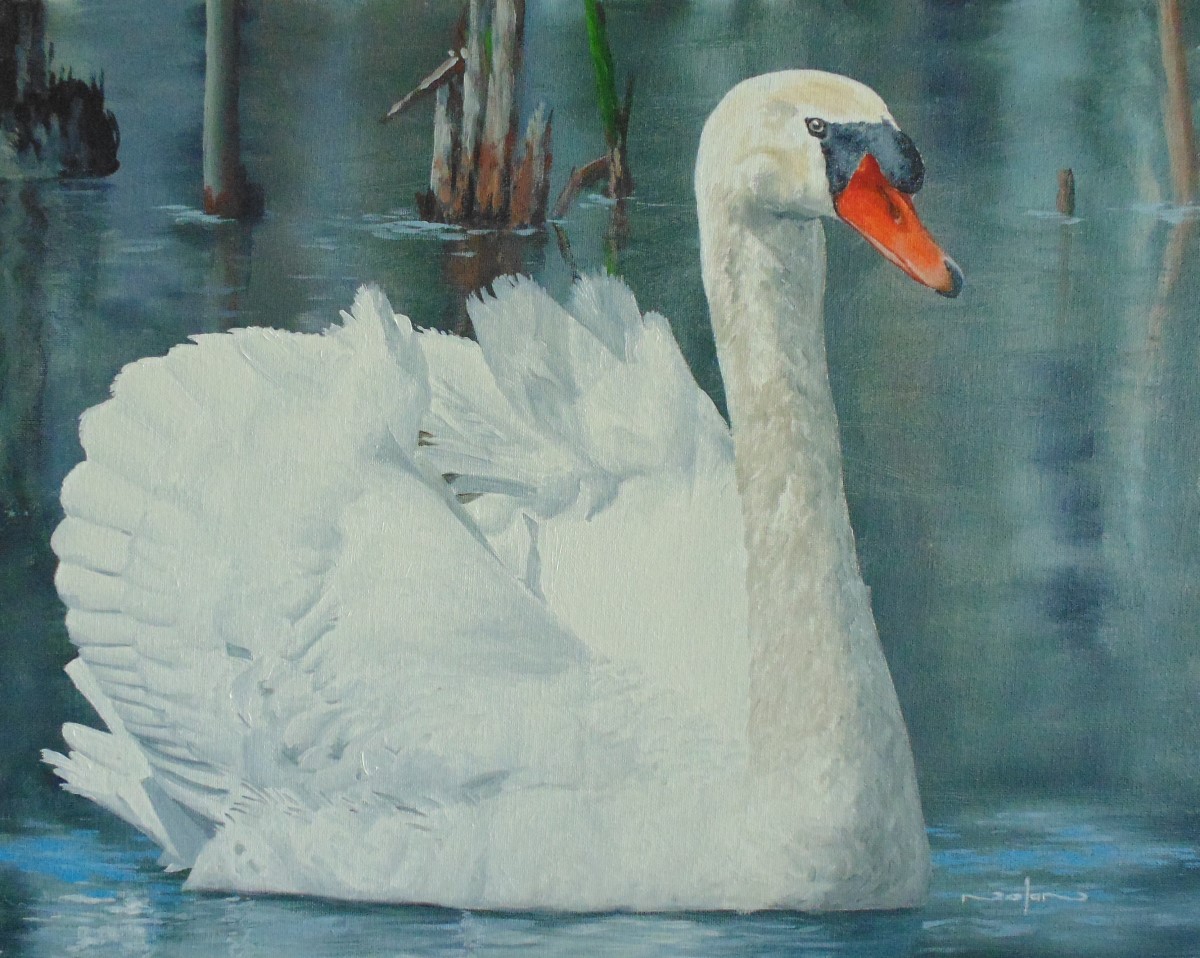
Swans are always such peaceful birds. Painting them can be a very rewarding process. In this class we will learn how to:
1) Paint the background in such a way that it doesn't distract from the main subject
2) paint the swan itself
3) show the reflections of the swan in the water
4) show that the swan is moving in the water
Latest Reviews
No Reviews Yet

Class Tutorial
Planning

Transfer the template to the canvas, including all the lines that Nolan uses to help you get the angles and tonal values correct. In this mini-tutorial, we will assume that you have decided to paint the swan as the paint-along, so mask it off with a type of clear cover so that you can paint the water in advance.
Water Planning
Take note of the features of the background: reeds and ripples on the water. At this point, you may choose to use acrylics for the background as Nolan does or use oils which will take much longer to dry.
Water - Colour Mixing

Mix the colours that you will need for the water, the reeds, and the sky reflections.
Reflecting Water

Begin by squiggling on the reflections, lighter ones first, then the darker ones (blues, grays, and greens). Paint right over the mask so that the reflection will appear to go behind the swan. Add the dark shadows at the bottom under the swan and the whitish reflections from the swan on the water.

Using a wide brush, begin blending the reflections out of focus. Check your reference photo and make adjustments to your colours if needed. This is a good stopping point if you need to let the painting dry before moving on to the reeds.
Reeds - Colour Mixing

Mix the colours you will need for the reeds, including highlights and shadows.
Reeds - Painting

Begin by painting in the darkest tones of the reeds, moving to the lightest. Blend the colors on the reeds, then add some dark texture to them. Repeat the same process with the other reeds. Add shadow tones where needed.
Ripples

Note the smudging technique that Nolan uses to pull the reed paint into the water as a reflection and then his use of a ripple effect to separate the reed from its reflection. Also add ripples behind, under, and ahead of the swan. Add highlights and shadows, also.
Swan - Colour Mixing

Mix the tones you will need for the swan. A careful examination of the swan will reveal that his feather colour has a bluish tinge on the top, reflecting the sky color, and more of a brownish tinge toward the bottom.
Wings

Remove the mask before you begin to paint the swan. Start in the wing area and drop in the dark tones first, then move to the lighter tones. Next you will add the darker tones that show the shadows cast by the other feathers.
Enjoying This Tutorial?
Head
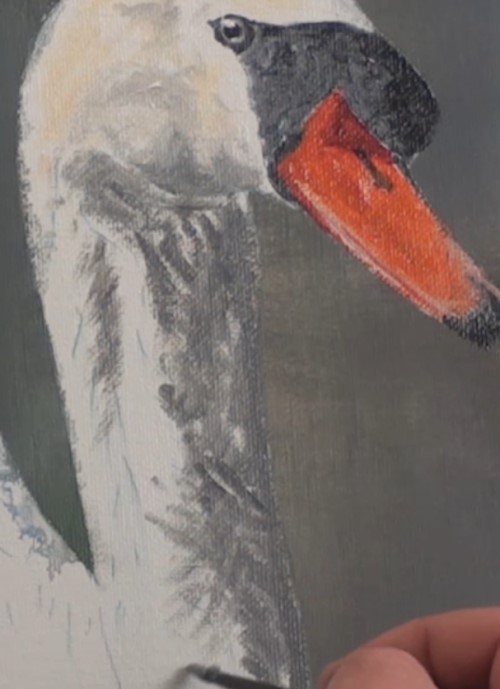
Mix the colours you will need for his head. Prepare highlight and shadow tones, also. The colours for the beak can be mixed right on the canvas.

Begin by blocking in all the white. Stay clear of the black areas.

Now paint in the various shades of black around the beak. Add the colours to the eye, then the highlights.

Block in the orange on the beak, then add a bit darker shade where appropriate. Use a lighter color at the sides of the beak, then paint a fine line for the mouth. Blend/adjust the orange beak colours. Paint the beak tip black. Add the dark spot for the nostril.

Adjust the off-white colours for the top of the head. Start with the darkest tones first. Paint on the shadow colours.
Neck
Modify your paint colours to reflect the colours in your reference photo and begin applying them in appropriate places as you go down the neck. Try to imitate Nolan's brush stroke to effect a feathery look.
Also, follow the angles/directions in the shadowy areas. Continue using these techniques to finish the neck. This is what the neck looks like when complete:

Body

Use the technique you used to paint the wings to fill in the body. Check your reference photo often.
Revisit the Background
Look back over the background and feel free to add additional reeds.
Final Overview

Go back over the painting as Nolan does to be sure you have all the details correct.

You May Also Like |